#header-inner {background-position: center !important; width: 100% !important;}
Showing posts with label cheesecake. Show all posts

Friday, September 12, 2014

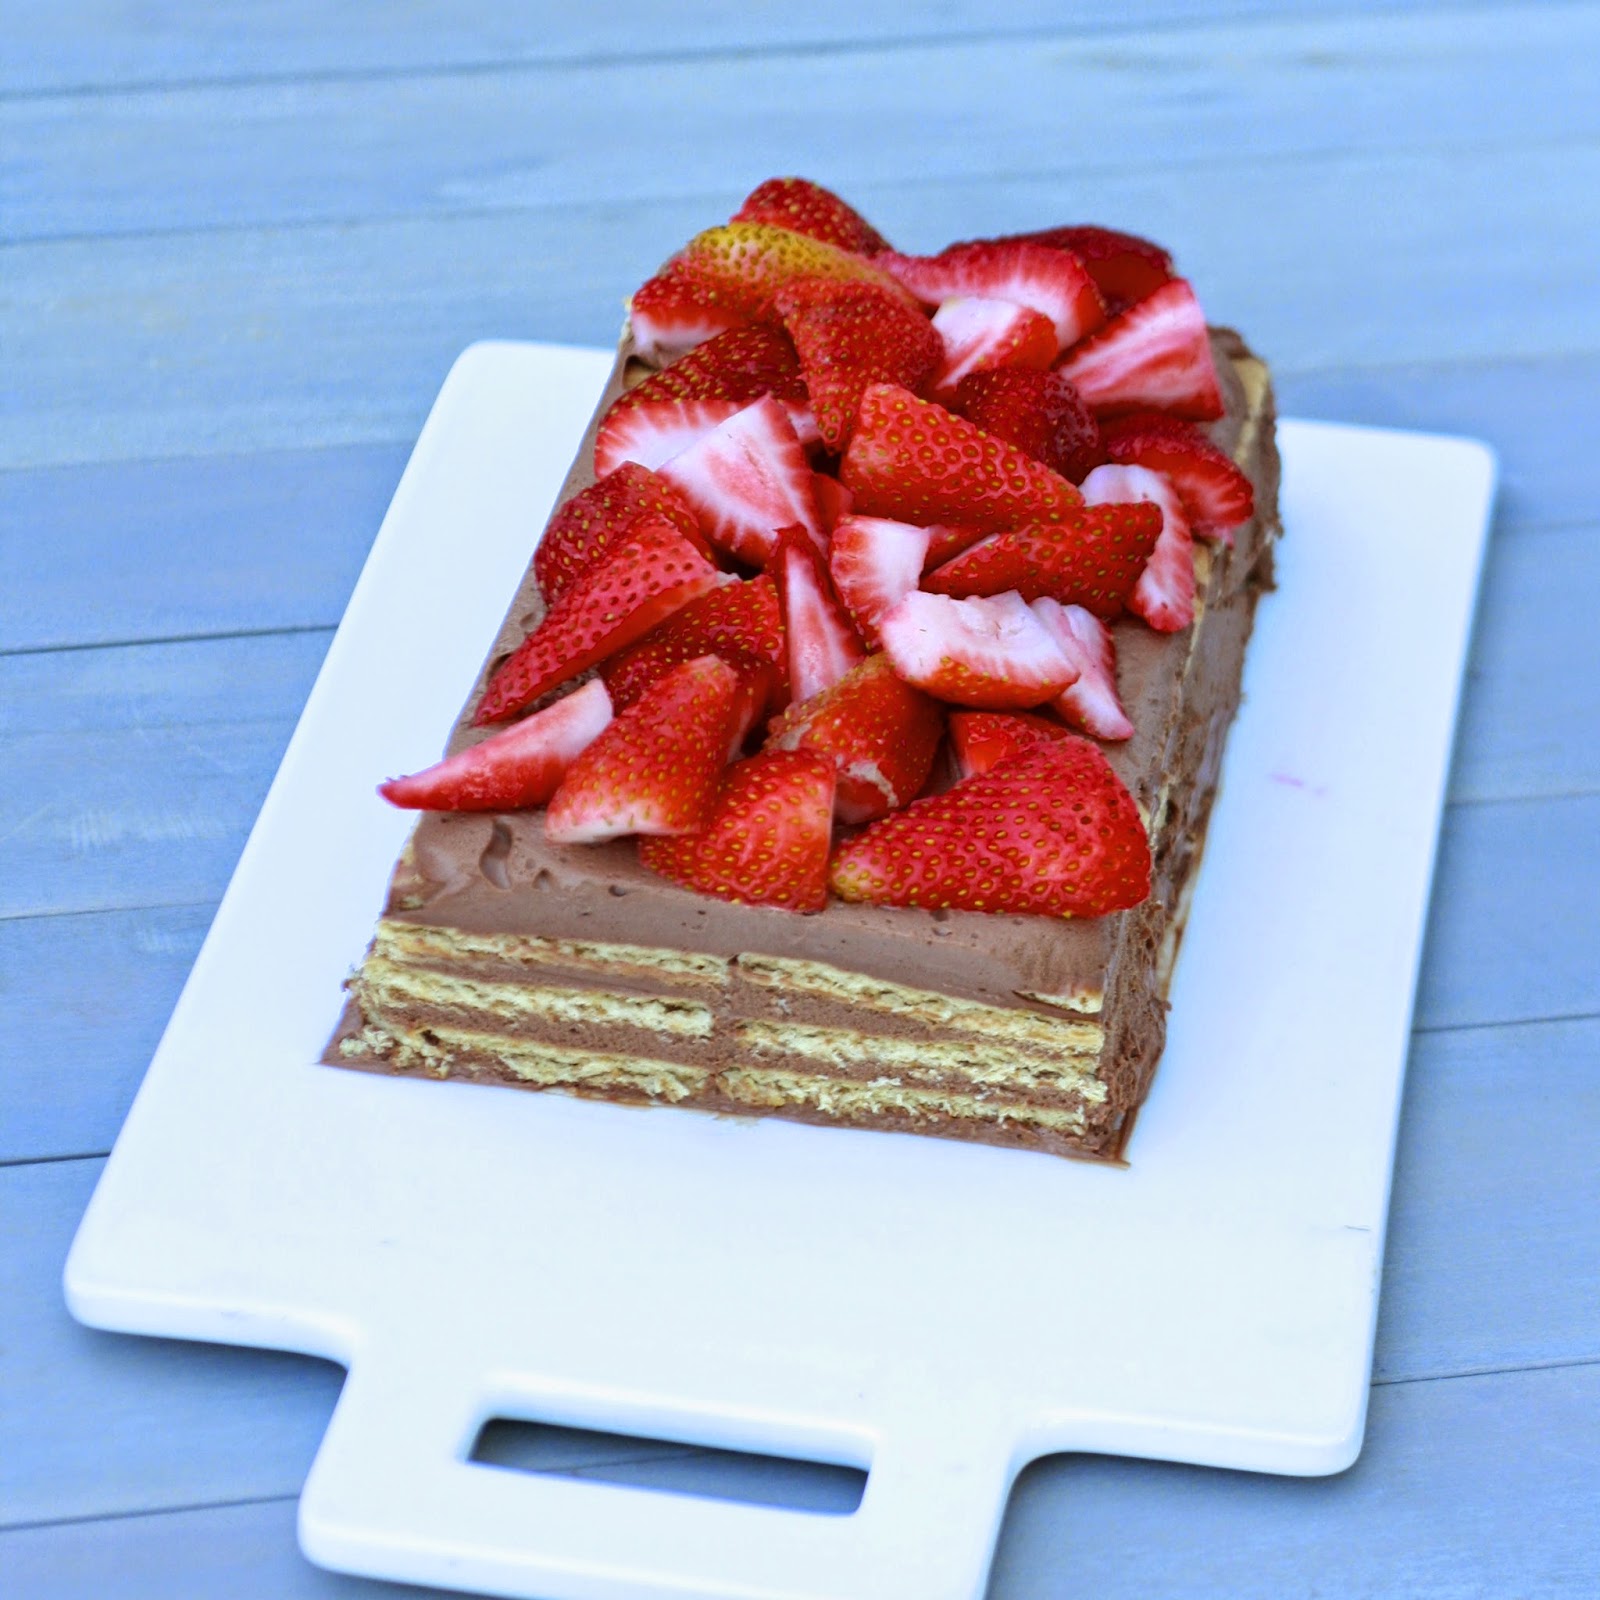
No Bake Chocolate Layered Cheesecake with Strawberries


No Bake Chocolate Layered Cheesecake with Strawberries | The Sweets Life
No Bake Chocolate Layered Cheesecake with Strawberries 
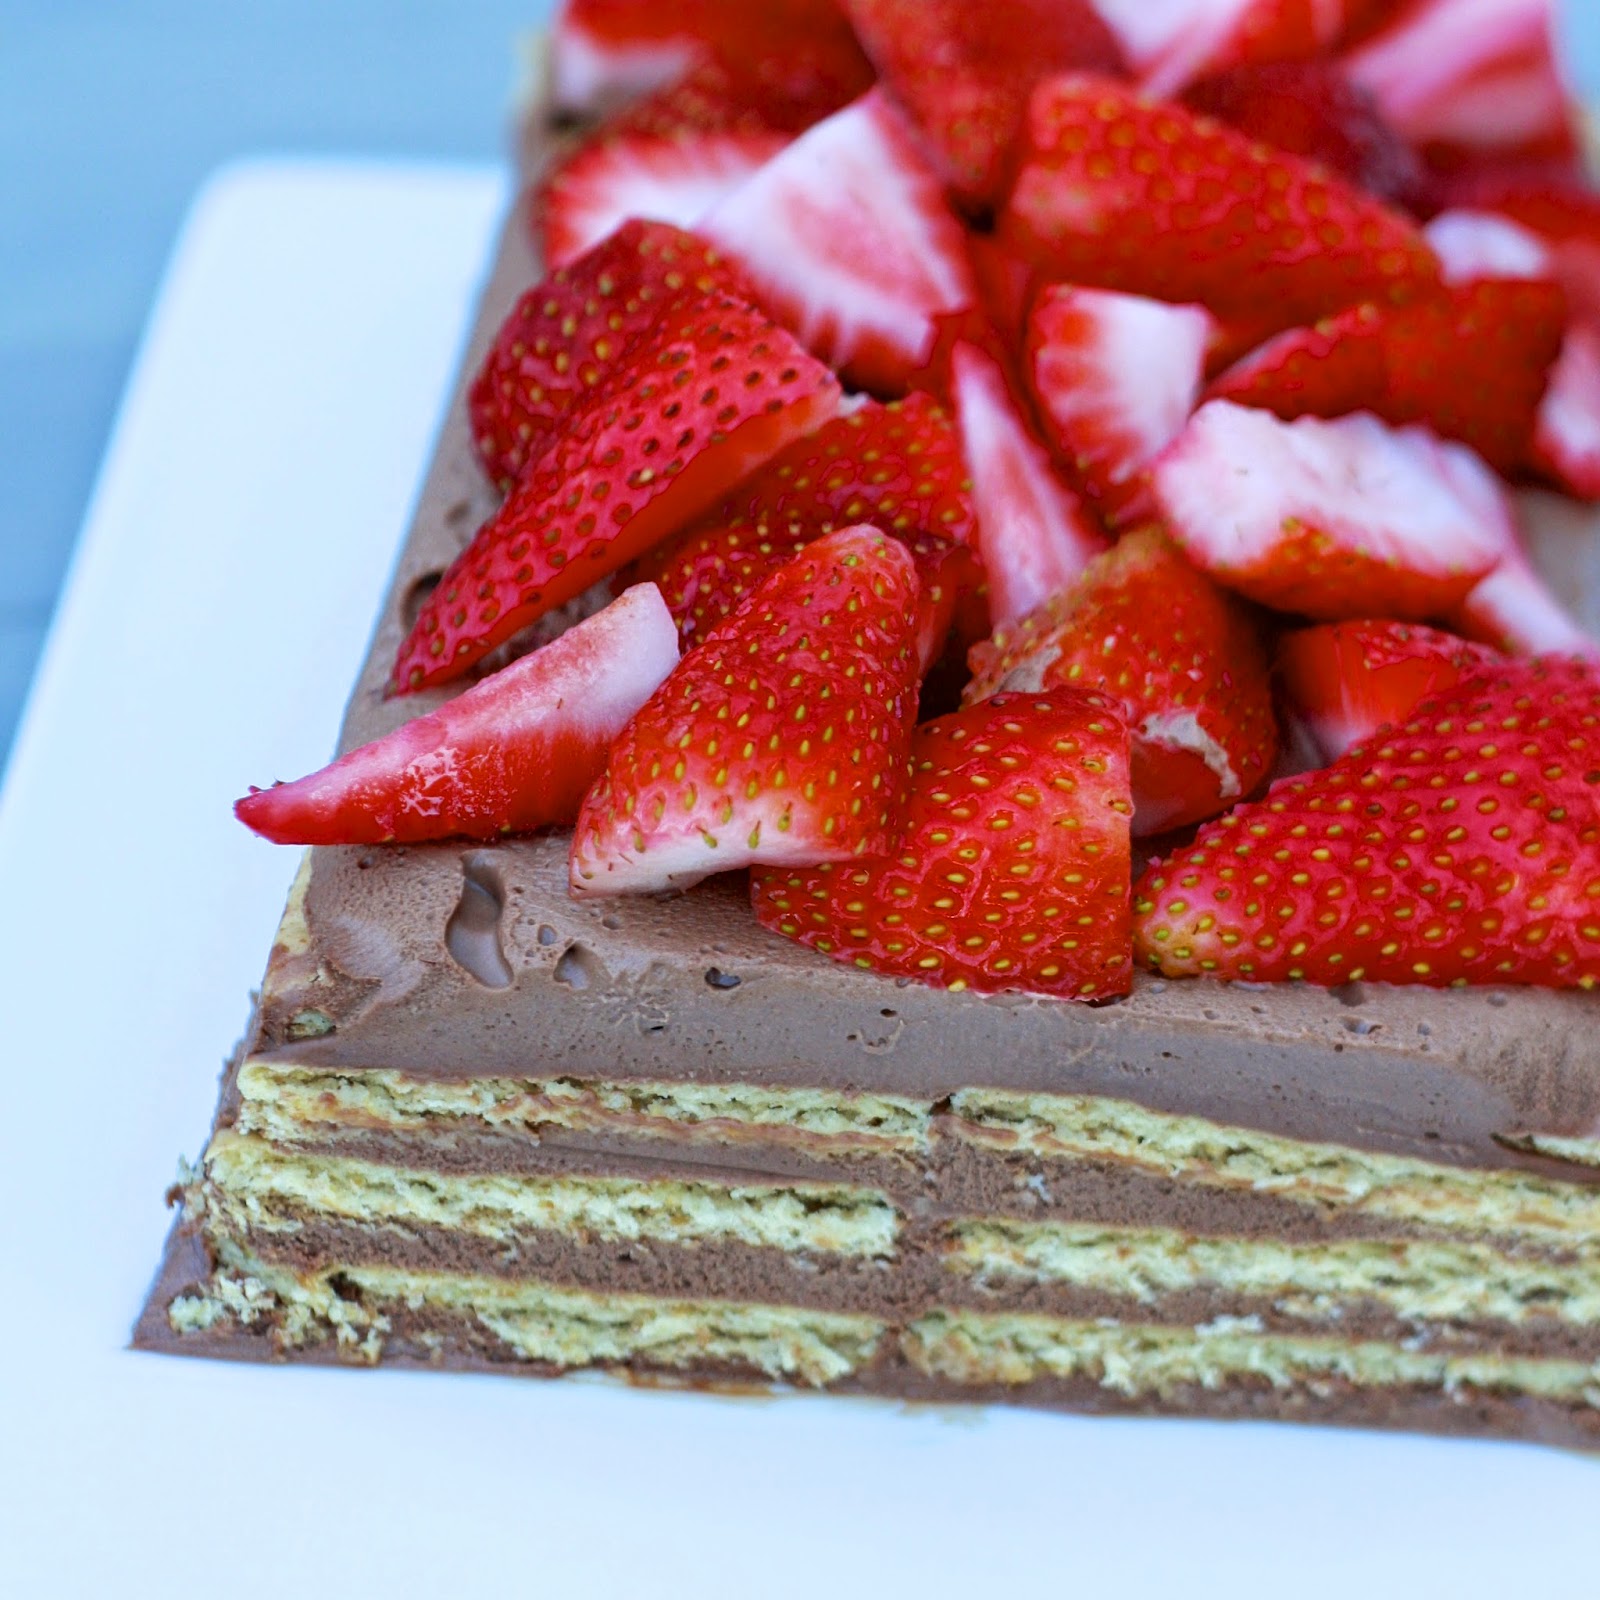
I wasn’t kidding when I told you I had other versions of the lemon layered cheesecake up my sleeve! My mind immediately went to the chocolate strawberry combination…it’s essentially a perfect combination of the cheesecake-stuffed strawberries and the ever-famous chocolate-covered strawberries.
Pin ItNo Bake Chocolate Layered Cheesecake with Strawberries | The Sweets Life

Just like I said with the other version, this dessert is about as easy as it gets. I will admit that spreading the cheesecake mixture can be a little difficult, but once you get the first layer down, it’s smooth sailing!  I love how pretty this looks on a platter and I would argue that it’s much easier to slice than a traditional cheesecake (plus you get 3x the ‘crust’!!!). Next I’m dreaming up some sort of peanut butter version! You can expect that sometime in the future...
No Bake Chocolate Layered Cheesecake with Strawberries | The Sweets Life

One Year Ago: Marinated Summer Vegetables
Two Years Ago: Tomato Cucumber Feta Salad and Green Bean, Grape, and Bacon Pasta Salad
Three Years Ago: Pappardelle with Vegetables, Basil, and Asiago and Chocolate Liqueur Brownies
Four Years Ago: Banana Oatmeal Date Cookies and Blushing POM Holiday Cheesecake
Five Years Ago: Homemade Whole Wheat Bagels and Chocolate Chip Oreo Cookies

Friday, August 22, 2014

Lemon Layered Cheesecake


Lemon Layered Cheesecake | The Sweets Life
Lemon Layered Cheesecake 
This here is the easiest (and potentially most gorgeous) cheesecake you'll ever make! You aren't baking it, so you don't have to worry about over or under baking it, OR dealing with a giant crack through it. You use a loaf pan to shape it, so uniformity is a given. You throw a ton of blueberries on top, so even if it isn't picture perfect when you peel off the plastic wrap, it will be post-blueberry assembly. 
Pin ItLemon Layered Cheesecake | The Sweets Life
Even if it was hard to pull off, I'd still be encouraging you to make it because it is so dang good! Good enough to tempt our friends to cheat on their 30-day paleo diet (names omitted to protect the innocent). Good enough to eat two slices in one evening (again, names omitted to protect the innocent). Good enough that I've already created a second version of this that I'll be sharing with you in a few weeks (get excited, very excited!).
Lemon Layered Cheesecake | The Sweets Life
It can be made in less than 15 minutes, then requires an 8-hour rest in the fridge. I found it best within that 8-24 hour mark, but it will still keep in the fridge for a few more days. I love everything about this and I'm willing to bet you will too!

One Year Ago: Chocolate Pudding Ice Cream with Peanut Butter Swirl and Black Bean and Greens Tacos with Mushrooms and Caramelized Onions
Two Years Ago: Greek Tomato Tart and Peanut Butter Cup Cheesecake Chocolate Layer Cake
Three Years Ago: S'Mores Cheesecake Bars and Lemon Basil Hummus
Four Years Ago: Peanut Butter Ice Cream

Wednesday, March 5, 2014

Peanut Butter Cheesecake Brownie Bars


peanut butter brownies
Can we talk about baby girl clothes? Ugh, such a guilty pleasure. For so long I was completely convinced that I was having a boy and I was excited at the prospect for a lot of reasons, but a small part of me mourned the fact that I wouldn't be shopping for pink clothing and bows and butt ruffles. Color me surprised, of course, when February 2nd came along and our baby GIRL arrived. Visions of little dresses immediately danced in my head! Needless to say, I've had a lot of fun shopping for Brecken over the last few weeks and my mother-in-law commented that it's like I'm dressing a Barbie every day ;) Come to think of it, when my sister and I played Barbies, all we really ever did was change their clothes a million times!
cheesecake browniesPin It
Baby girl clothes really have nothing to do with brownies, except I'd say they're another guilty pleasure...especially when they contain a peanut butter cheesecake layer! As soon as I saw these brownies on Joanne's blog, I knew I needed to make them asap. Cut 'em small and serve them cold. If you're the type who loves a glass of milk with your chocolate dessert, these are the perfect accompaniment!
cheesecake brownies
As little Miss Brecken outgrows some of my favorite newborn outfits, you can probably find me crying in a corner stuffing my face with these brownies! Slow down baby girl!
One Year Ago: Chickpea Curry and Egg & Hash Brown Casserole with Spinach and Mushrooms
Two Years Ago: Braided Garlic Herb Bread and Peanut Butter and Chocolate Dipped Pretzels  
Three Years Ago: Apple Cranberry Baked French Toast and Chocolate Peanut Butter Chip Cookies 
Four Years Ago: Golden Grahams S'mores Bars and Baby Blue Party Punch

Friday, May 24, 2013

Citrus Cheesecake Bars

Pin It
 You’d think after my cheesecake extravaganza, I’d be over making cream cheese laden desserts! Not the case, however, not at all! It turns out there are so many things you can do with cheesecake (turn it into cake pops, mix it with M&Ms, makeparfaits, stuff strawberries…don’t even get me started…!) that I likely won’t ever quit making new cheesecake desserts.
These citrus cheesecake bars reminded me a little bit of the lemonblueberry ones I made a few years ago, but feature oranges and limes in addition to lemon. The finished result is a cheesecake bar that is both sweet and tangy. I made mine in a 9-inch pan, but you can certainly use an 8-inch pan if you want the crust and cheesecake filling to be a little thicker.
Long live cream cheese desserts!

One Year Ago: Memorial Day Remembrance 
Two Years Ago: BLT Bread Salad
Three Years Ago: Caramel Brownies

Wednesday, December 19, 2012

M&M Cheesecake Bars

Pin It
Unfortunately daylight is hard to come by these days. Of the (long) list of things I love about summer, the sun setting late in the evening is near the top! It's rare that I get home these days before dark which is why the lighting in these pictures is a little weird. Don't let the artificial lighting confuse you--these bite-sized M&M cheesecake bars are a tasty little treat!

I will always love bar cookies for their overall convenience. You mix, dump, and bake. These are a little more complicated in that you first bake the crust before adding the cheesecake layer, but even so you can whip them up in less than an hour. The nuts in the crust add a heartiness and cut some of the sweetness. The cheesecake looks like it melts between the crust and topping, but one bite and you can't miss its unmistakable richness! These were a huge hit with our community group and definitely belong in the 'make again' category of this blog!

One Year Ago: The Best Burger of My Life
Two Years Ago: Green Tea Sugar Cookies
Three Years Ago: Strip Steak with Rosemary Wine Sauce

Tuesday, November 27, 2012

Carrot Cake Cheesecake Bars

Pin It
Carrot cake cheesecake bars are the cousins of carrot cake. They have all the same elements of carrot cake but require significantly less time and energy to make. No multiple pans or uneven cake layers! The ratio is about 1:1 when it comes to the carrot cake and cheesecake portions. I included raisins, nuts, and coconut in the cake layer, but purists could just as easily eliminate them.
I made these for my brother-in-law Nate’s birthday last month, knowing that carrot cake is on his supposedly short list of approved desserts (becoming part of our family has seemed to expand his sweet tooth! Mission accomplished!). He gave them two thumbs up (literally--it's the boy's trademark) and I now have a solution next time we're craving carrot cake but not the time involved!

One Year Ago: A Very MARRY Pizza Party (the celebration of Nate & Julia's engagement!)
Two Years Ago: Loaded Turkey, Vegetable, and Wild Rice Soup


Friday, July 13, 2012

Blueberry Jamboree

Pin It
My brother Quinn has made it very clear that he is not a fan of fruity desserts, with the exception of my Grandma's apple pie. Quite the opposite of my husband Ryan, who can't get enough of fruit-filled sweets. As a result, there haven't been a lot of fruit tarts or strawberry cream puff tarts around our house this summer. Instead, there has been lots (and lots!) of ice cream, root beer floats, and cookies--preferably with some sort of chocolate and peanut butter!

Tuesday, April 3, 2012

Mini Cheesecakes

Pin It

You know how sometimes your memories don’t exactly align with reality? The best example I have of this is when my “boyfriend” in the 8th grade found out my family was headed to Michigan on a family vacation. He raved and raved about this playground there, Imagination Station; for days leading up to the trip I heard all about the giant playground and how fun it was. Of course, I defended his case, convincing my family we absolutely needed to stop there one way to check it out for ourselves. 

Imagine my disappointment when we arrived, only to find ourselves at a regular old playground, not unlike anything we had at home, and a place far too young for a thirteen year old to be climbing around on!
I kind of worried these cheesecakes would be like that. Of all the desserts my mom made during my childhood, a few stand out in my mind. Her sugar cookies, of course. Butterhorns. And these mini cheesecakes. I have vivid memories of absolutely loving these…but I couldn’t help but worry they’d turn out to be another Imagination Station. Thankfully, they were anything but a disappointing memory pulled from the past. Instead, one bite brought me right back to my childhood! They’re a great food for parties because they can be made ahead of time and no fork is required, just peel the wrapper off and dig in! I’m partial to the canned cherry filling, which looks pretty on top and nicely complements the creamy cheesecake, but you could easily top these with whatever you like!

Any memories turned disappointing realities for you? Or resounding successes? 

One Year Ago: Homemade Dog Treats
Two Years Ago: Almond M&M Easter Nests

Friday, February 10, 2012

Creme Brulee Cheesecake

Pin It
Back in December sometime, one of Ryan's coworkers sent me an email, thanking me for whatever treat I'd pawned off on them that week. After her thanks, she asked if I had ever made creme brulee cheesecake before, slipping in an offer to be a taste-tester if I wanted to give that recipe a try! ;)
Creme Brulee cheesecake was not one of the dozen varieties I'd made for the Cheesecake Extravaganza and when I went in search of a well-tested recipe to try, I came up short. Instead, I decided to create my own version of creme brulee cheesecake...an interesting task considering I've yet to make creme brulee!
Ultimately, I made a standard New York Cheesecake recipe (recipe from my Better Homes and Gardens cookbook), added my own crust (vanilla wafer) and then topped it with a layer of sugar, which I torched/broiled to give it that "creme brulee" effect. The end result turned up better than I ever could have imagined. The cheesecake itself was perfectly creamy and I was amazed to find it did not crack one bit while baking. This will be my go-to "plain" or base cheesecake flavor. I loved the flavor of the vanilla wafer crust and the burnt sugar topping was perfectly reminiscent of the creme brulee's I've sampled in the past.
The cheesecake didn't just meet my standards--it was also well received by Ryan's co-workers. One went so far as to say it was the best thing I've made for them--a bold statement considering the number of treats I've baked them over the past two years or so. I hope you give this a try--I'd love to hear what others think of this creation!


Two Years Ago: Spaghetti Pie


Creme Brulee Cheesecake


Ingredients:
-1 1/2 cups vanilla wafer crumbs
-1/4 cup butter, melted
-3 (8 oz) packages cream cheese, softened
-1 cup sugar
-2 tbsp all-purpose flour
-1 tsp vanilla extract
-2 eggs
-1 egg yolk
-1/4 cup milk
-3 tbsp sugar, for topping

Directions:
1. Combine melted butter with vanilla wafer crumbs and press into a the bottom of a springform pan (9-inch). Place in refrigerator to firm up.
2. Beat cream cheese with sugar, flour, and vanilla until creamy, using a spatula to scrape down the sides of the bowl. Add eggs and egg yolk all at once, beating on low just until combined. Stir in milk.
3. Pour filling into crust and place springform pan on a shallow baking pan. Bake in a 375F oven for 35-40 minutes, until center appears nearly set when shaken.
4. Cool in the pan on a wire rack for 45 minutes. Cover and refrigerate for at least 4 hours, or overnight. Just before serving, sprinkle granulated sugar over the top of the cheesecake and use a kitchen torch (or place in the oven and broil, but watch carefully so that it doesn't burn and turn it if need be to heat evenly [note my burnt spot above!]) to torch cheesecake until crisp and lightly browned.

Tuesday, December 20, 2011

Oatmeal Cheesecake Cranberry Bars

Pin It
Thank goodness canned goods have a long shelf life. You don’t want to know how old my can of cranberry sauce was! (Don’t freak out, I think I bought it last November or December…definitely not years old or anything) If you don’t have a bad habit of picking up canned goods and then storing them in your pantry forever, fear not…just head to the store and pick up a can of the whole berry sauce. I’m pretty sure you could also use fresh cranberry sauce, if you happen to have any frozen from Thanksgiving.

You know a dessert is a hit when someone admits to eating five of them in one sitting. Don’t worry Brian, I definitely had more than my fair share too ;)

The cheesecake layer in these is thin, but it’s just enough to complement the cranberry sauce. The crust is the star here—thick and full of oats and butter. Cut these small, and then eat five! Yum!

Looking for another holiday cheesecake bar that’s more about the cheesecake? Try these Blushing POM Holiday Cheesecake bars, featuring a pomegranate juice glaze!


Oatmeal Cranberry Cheesecake Bars
from Taste and Tell

Ingredients:
-2 cups all-purpose flour
-1 1/4 cups old-fashioned oats
-3/4 cup brown sugar
-1 cup butter (2 sticks)
-12 oz. cream cheese, softened (I used 1/3 less fat)
-1/2 cup sugar
-2 eggs
-2 tsp orange juice (original recipe called for lemon juice)
-1 tsp orange extract (can sub vanilla extract)
-1 can whole cranberry sauce (mine was 14 oz)
-2 tsp cornstarch

Directions:
1. Preheat oven to 350F. Grease a 9 x 13 inch dish and set aside.
2. Combine flour, oats, and brown sugar in a large bowl. Cut in the butter with a pastry cutter until the mixture resembles coarse crumbs (I did this in my food processor but didn't add the oats until after). Set aside 1 1/2 cups of the mixture. Press the remaining mixture into the prepared pan. Bake for 15 minutes.
3. While crust is baking, beat cream cheese and sugar until light and fluffy. Add eggs, orange juice, and extract and beat until smooth. Spread the cheesecake mixture over the baked crust.
4. Combine cranberry sauce and cornstarch in a small bowl. Carefully spoon cranberry sauce over the cheesecake mixture (it will not cover completely, just drop spoonfuls all over). Sprinkle the remaining crumb mixture over the top.
5. Bake for 40 minutes, until set. Refrigerate for 3 hours or until completely cooled and firm. Cut into bars and serve chilled.

Saturday, September 3, 2011

Mexican Brownie Bottom Cheesecake

Pin It
Of all the cheesecakes I made for the Cheesecake Extravaganza, I was most skeptical about this one. I wanted to make one with a brownie bottom, but I wasn’t convinced that the cinnamon/cayenne combination would be a crowd-pleaser.

I couldn’t have been more wrong. People, myself included, really loved this unique cheesecake. Upon first bite, your mouth is filled with cinnamon creamy goodness and a bit of rich brownie. It isn’t until a few chews in that you’re suddenly met with just the slightest punch of cayenne. The contrast is surprising, but something about it just works.

I made 1/3 of the recipe to yield two 4 ½-inch cheesecakes, but I’m quite certain there would have been no complaints if I’d made a full-sized cake! Now that I’ve put cayenne in my dessert, I suppose it’s time to put chocolate in something savory, huh?

...and with that I think I'm FINALLY done with cheesecake posts! I did my best to spread them out to not burn you out...but I'll be honest...I'm tempted to make another cheesecake sometime soon. Consider yourself warned ;)


One Year Ago: Chilled Mango and Cucumber Soup


Mexican Brownie Bottom Cheesecake
as seen on Buns in my Oven, originally from Perry's Plate

Ingredients:
for the crust-
-1/2 cup butter, cut into pieces
-4 oz unsweetened chocolate, cut into pieces
-1 cup sugar
-2 eggs
-1 tsp vanilla extract
-1/2 cup flour
-2 tsp cinnamon
-1/2 tsp cayenne pepper
-pinch of salt

for the filling-
-3 (8 oz) packages cream cheese, softened (can use 1/3 less fat)
-3/4 cup sugar
-1 tsp vanilla extract
-1 tbsp cinnamon
-1/2 cup sour cream (can use light)
-3 eggs

Directions:
1. Preheat oven to 350F. Spray an 8 or 9-inch springform pan with cooking spray.
2. Melt the butter over medium-low heat. Once butter is melted, reduce heat to low and stir in chocolate until melted. Remove from heat and stir in sugar. Add eggs, one at a time, beating after each addition. Add vanilla. Stir in flour, cinnamon, cayenne, and salt, stirring vigorously until batter is smooth.
3. Pour batter into prepared pan and bake for 30 minutes, until the center is barely set. Remove from oven and allow to cool.
4. Reduce oven temperature to 325F.
5. While brownie bottom is cooling, prepare filling. Mix cream cheese, sugar, cinnamon, and vanilla in a mixing bowl until well blended. Stir in sour cream. Add eggs, mixing on low speed, just until blended. Pour batter over cheesecake crust.
6. Place springform pan on a rimmed cookie sheet. Add 3/4-inch of water into the baking sheet. Bake at 325F for 1 hour and 5 minutes, or until center is just set (middle will jiggle slightly). Turn off the oven and crack the oven door. Allow to cool until it can be touched without hot pads. Remove from oven and cool on counter to room temperature.
7. Cover and refrigerate at least 4 hours, or overnight. To serve, run a knife around the rim of the pan to loosen cake before removing outer sides of pan. Slice into pieces and serve.

Friday, August 26, 2011

Chocolate Chip Cookie Dough Cheesecake Bars

Pin It
These rank right up there with the Reese's Peanut Butter Cup Cheesecake Bars in terms of popularity from the masses. Rather than make those again for the Cheesecake Extravaganza, I went with something I was equally confident people would love. These went over just as well as anticipated. In fact, I think I refilled the tray of these more than anything else in the first hour or so of the party. Are you surprised though? 

As you can see from the picture, the little bars are packed with cookie dough. I opted to cut them into pretty small squares and serve them in cupcake liners, but you may find yourself just digging into the baking dish with a fork ;) As I sliced these babies, I made sure to cut perfect edges, ensuring that there was plenty of discarded pieces to shovel in my mouth!


One Year Ago: Salsa Verde Bake (LOVE this meal!)


Chocolate Chip Cookie Dough Cheesecake Bars
as seen on Brown-Eyed Baker, adapted from Bake at 350

Ingredients:
for the crust-
-1 1/2 cups graham cracker crumbs (about 8 whole graham crackers)
-5 tbsp unsalted butter, melted

for the cookie dough-
-5 tbsp butter, melted and cooled
-1/3 cup light brown sugar
-1/4 cup all-purpose flour
-1/2 tsp vanilla extract
-3/4 cup semisweet chocolate chips

for the cheesecake filling-
-10 oz. cream cheese (can use 1/3 less fat), at room temperature
-1/4 cup granulated sugar
-1 egg
-1 tsp vanilla extract

for the chocolate drizzle-
-1/3 cup semisweet chocolate chips
-1 tsp vegetable shortening

Directions:
1. Preheat oven to 325F. Lightly grease an 8 x 8 inch baking pan, line with parchment paper, and butter the parchment paper. Set aside.
2. Stir together the graham cracker crumbs with melted butter until crumbs are evenly moistened. Press the mixture into the bottom of the prepared pan. Bake for 6 minutes or until lightly browned. Cool on a wire rack.
3. To make the cookie dough, stir together the butter and sugar until smooth. Stir in flour, then the vanilla and chocolate chips. Refrigerate until firm (30 minutes), before rolling dough into teaspoon-sized balls. Place balls on a plate and refrigerate while preparing cheesecake filling.
4. In a mixing bowl, beat the cream cheese and sugar until smooth, scraping the bowl if needed. Add the egg and vanilla extract, beating until combined.
5. Remove the cookie dough balls from the fridge and toss with 1 tsp of flour. Drop into the cheesecake filling and mix together carefully. Pour the filling into the cooled crust, spreading evenly over the top. Bake for 30 minutes, until cheesecake filling is set and no longer jiggly. Transfer to a wire rack to cool completely. Chill in the fridge for at least 2 hours.
6. Remove the bars from the pan and place on a cutting board. Cut into squares. Melt chocolate chips with shortening in the microwave, stirring until smooth. Drizzle chocolate over the bars and allow to set for about 20 minutes. Store leftover cheesecake bars in the frige.

Tuesday, August 23, 2011

Cheesecake Stuffed Strawberries

Pin It
These aren't anything complicated. With five ingredients, they take only a few minutes to put together. In fact, these were probably the least time-intensive food at my Cheesecake Extravaganza. Yet, I had more than a few people come up and proclaim their love for the finger food.

You don't have to throw a cheesecake party to serve these....I imagine they'd be welcomed just about anytime! Another great party food, these can be made ahead of time. I did all the steps, even the sprinkling of graham cracker crumbs, twenty-four hours ahead of time and they suffered no ill consequences. Just be sure to wrap them well (I covered my plate with plastic wrap).

Next time, I'll make more... this was the first food to go at the Cheesecake Extravaganza, and with good reason!


One Year Ago: Brownie Roll Out Cookies

Cheesecake Stuffed Strawberries
from Nutmeg Nanny
Print this post
Ingredients:
-1 lb large strawberries
-8 oz. cream cheese, softened (can use 1/3 less fat)
-3-4 tbsp powdered sugar (4 tbsp for a sweeter filling)
-1 tsp vanilla extract
-graham cracker crumbs

Directions:
1. Rinse strawberries and cut around the top of the strawberry. Remove the top and clean out with a paring knife, if necessary (some may already be hollow inside). Prep all strawberries and set aside.
2. In a mixing bowl, beat cream cheese, powdered sugar, and vanilla until creamy. Add cream cheese mix to a piping bag or ziploc with the corner snipped off. Fill strawberries with cheesecake mixture. Once strawberries are filled, dip the top in graham cracker crumbs. If not serving immediately, refrigerate until serving.

Sunday, August 21, 2011

S'mores Cheesecake Bars

Pin It
Today, I turn 25. Weird. Weird because in my head, I still think I’m 21. In fact I sometimes catch myself answering the question “how old are you?” incorrectly. It’s not because I’m worried about growing older (that’s not to say I don’t feel old seeing kids I used to babysit for graduate from HIGH SCHOOL)…I know I have a lot to look forward to in the future, I just seem stuck in this youthful mindset. The years between turning 21 and turning 25 have been fast and furious, but also really fun. I graduated college. I started my first “real” job. I got married. I traveled to 4 countries and at least twice as many states. I watched my husband go through a career change. I transitioned into a job and a career path that I love. I endured several running injuries and many, many tears.  I started this blog. I discovered a passion for cooking. I ran a marathon. I joined a church that became my second family. I started school, again. I made and ate a lot of ice cream.
(me on my actual 21st birthday!)

Whew. I get tired just typing that out, and that isn’t the half of what my last four years have all entailed.
Interestingly enough, I’m not the same person I was at 21. At twenty-five, I’m more sure of myself and what I stand for. I care less about what people think about me, my choices, and my interests. I’m more balanced and more laid back than I was four years ago (I know those of you that know me well are laughing at this, but I promise I am!). I’m more confident in my faith. I’m more careful with my friendships and the people I share my innermost self with.

And yet, in so many other ways, I’m still exactly the same. I am still fiercely loyal to my family and long to be in their company more than anyone else’s (besides Ryan’s of course!). I can still laugh at myself, especially when I find myself in embarrassing situations. I still get choked up during sappy TV or movie moments way more than the average person. And I still love anything s’mores flavored!

These cheesecake bars, another gem from the Cheesecake Extravaganza, are just one more thing to add to my list of s’mores delights (which now includes brownies, cake, bars, ice cream pie, ice cream, and granola bars!)…only time will tell what other s’mores treats I’ll spend enjoying for the next twenty-five years!

S'mores Cheesecake Bars
As seen on Annie's Eats

Ingredients:
for the crust-
-1 cup graham cracker crumbs
-1 tbsp sugar
-4 tbsp unsalted butter, melted

for the cheesecake-
-4 oz. bittersweet or semisweet chocolate, finely chopped
-8 oz. cream cheese, at room temperature (I used 1/3 less fat)
-1/4 cup sour cream
-1/2 cup marshmallow cream
-2 tsp cocoa powder
-3/4 tsp vanilla extract
-2 large eggs

for the topping-
-1 1/2 cups mini marshmallows
-chocolate chips or candy melts (optional)

Directions:
1. Preheat oven to 350F. Line an 8x8 inch pan with foil and spray with cooking spray. In a small bowl, combine graham cracker crumbs, sugar, and melted butter. Stir until wet and press in an even layer into the bottom of the prepared pan. Bake for 10 minutes before transferring to a wire rack to cool slightly. Reduce oven temperature to 325F.
2. To make the filling, melt the 4 oz. of chocolate in either the microwave or using a double boiler. Once melted, stir until smooth and set aside to cool slightly. In the bowl of a stand mixer, beat cream cheese, sour cream, and marshmallow cream on medium-high until well combined (1-2 minutes).
3. Add cocoa powder, vanilla extract, and eggs, beating to incorporate. Stir in melted chocolate until well blended. Pour the filling over the crust and use a spatula to spread evenly. Bake for 30 minutes, until teh center is just set (does not jiggle when gently shaken).
4. Remove from oven and top with the marshmallows. Return to the oven for 2-3 minutes, until marshmallows begin to puff and melt. Turn oven to broil and watch carefully, removing when marshmallows are just browned (could also remove and use a kitchen torch). Once bars have cooled to room temperature, drizzle with melted chocolate or candy melts. Transfer to the fridge and chill for at least 3 hours before slicing and serving.

Friday, August 19, 2011

No Bake Orange Creamsicle Cheesecake

Pin It
Creamsicles were one of the staples my mom kept in our freezer growing up. I've mentioned several times that we're an ice cream loving family, but in addition to half gallons of cookie-dough or moose tracks, we usually could expect an array of frozen treats on hand at all times.

I don't think I've had a creamsicle in probably ten years, but one bite of this no-bake cheesecake and I was instantly taken back to my childhood. While mixing the cheesecake filling, I didn't think the orange flavor was very strong and I was a little apprehensive about the finished product. After a rest in the freezer, however, the creamy orange flavor concentrated and it tasted no different than the orange treat on a stick.

The original recipe calls for you to make this in 9 mini tart pans. Instead, I used my large (9-inch) tart pan. If you go this route, you'll have a little bit of extra filling leftover. I have mini tart pans, so I made three personal-sized tarts with the extra. You could easily pour your extra filling into muffin tins or another small pan. This is one filling you won't want to go to waste!

Cut into small slices, this was a definite throwback food for all of the guests at the Cheesecake Extravaganza!


One Year Ago: Crockpot Eggplant Curry

No Bake Orange Creamsicle Cheesecake 
from Foodie with Family

Ingredients:
-20 cream filled vanilla wafer cookies (like Golden Oreos)
-1 stick butter, melted
-2 (8 oz.) packages 1/3 less fat cream cheese, softened to room temperature
-zest & juice from 1 orange
-1 cup heavy whipping cream
-1 1/2 tbsp real vanilla extract
-1/2 tsp orange extract
-3/4 cup granulated sugar

Directions:
1. In a food processor, pulse cookies until they are crumbs. Add butter and pulse until combined. (Can also do all of this by hand). Spray 9 mini tart pans or 1 9-inch tart pan with non-stick cooking spray. Press crumb mixture into tart pan(s), pressing down firmly to pack down. Refrigerate until ready to fill.
2. In a mixing bowl, beat cream cheese on high until smooth and creamy. Scrape down the sides with a spatula. Add orange juice and zest and continue to mix until evenly blended. Add heavy cream and mix until slightly thickened. Scrape down the sides, add sugar, vanilla, and orange extract and mix on high until thick.
3. Divide mixture evenly among pans (if using multiple). Cover with plastic wrap or foil and freeze for at least 2 hours prior to serving.
*Can be served frozen or thawed for 20-30 minutes before served.

This post is linked to Eat at Home.

Tuesday, August 16, 2011

Blue Cheese Cheesecake with Pear Onion Jam

Pin It
Much like the Greek Cheesecake that I made for our Cheesecake Extravaganza, this one was also extremely popular. Something about blue cheese, pears, and caramelized onions is a magical combination. Who am I kidding, anything with caramelized onions is magical in my book! Still, it was the jam that put this recipe over the top!

This is one of those repeat recipes that I can see myself making for many different parties...I can already anticipate that people will be requesting it again and again! It's the perfect accompaniment to green apples, pears, and crackers. Again, I made 1/3 of this recipe which yielded two 4-inch springforms. If you choose to make the big (9-inch) one, make sure you have some friends to share it with, although I don't think you'll be sorry if you end up eating leftovers for a few days!


One Year Ago: Blueberry Lime Scones

Blue Cheese Cheesecake with Pear Onion Jam
from Pink Parsley

Ingredients:
-3 (8 oz.) packages cream cheese (can use 1/3 less fat), softened to room temperature
-8 oz. blue cheese, crumbles
-6 oz. Asiago cheese, shredded
-4 large eggs
-1/4 cup heavy cream
-1/4 tsp freshly ground black pepper

for the jam-
-4 cups onions, diced
-2 tsp olive oil
-2 cups peeled and chopped pears
-2 tbsp raspberry or pear vinegar
-1 cup brown sugar, lightly packed
-1/4 tsp kosher salt
-pinch cayenne pepper

Directions:
1. To make the cheesecake, preheat oven to 350F and grease a 9-inch springform pan.
2. In the bowl of a stand mixer, blend the cream cheese, asiago cheese, and blue cheese until smooth and creamy. Add the eggs, one at a time, beating after each addition. Add the cream and pepper and mix to combine.
3. Pour the mixture into a springform pan and bake uncovered, in a water bath, until browned on top and barely set in the center (45-50 minutes). Cool completely and refrigerate several hours or overnight.
4. To make the jam, saute onions in the oil over medium heat until softened and browned. Reduce heat and cook an additional 10-15 minutes, until they begin to caramelized. Add the pears, vinegar, brown sugar, salt, and cayenne. Cook until pears are slightly softened but still crisp.
5. With a slotted spoon, remove the pears and onions from the skillet and place in a medium bowl, leaving behind as much of the liquid as possible. Increase heat to medium and cook until the mixture has thickened to a glaze. Mix into the pears and onions, cover, and refrigerate until ready to serve.
6. To serve, pour the jam over the cheesecake, then remove the sides of the springform pan. Serve with crackers, bread, or apple slices.