#header-inner {background-position: center !important; width: 100% !important;}
Showing posts with label pumpkin. Show all posts

Monday, November 10, 2014

Pumpkin Layer Cake with Cream Cheese Frosting


Pumpkin Layer Cake with Cream Cheese Frosting | The Sweets Life
Pumpkin Layer Cake with Cream Cheese Frosting 
Working in an office environment, you can guarantee that at least a few times a month you'll walk into the galley and find an array of "treats" before you. More often than not, I dismiss them without a second thought. At the risk of sounding like a food snob, store-bought treats aren't all that enticing to me and I usually pass them up (aside from the occasional Panera bagel, which has the magical ability to turn a bad day right around!). Homemade treats, on the other hand, are a totally different story. These are fewer and farther between and when one appears, I am definitely partaking...one coworker's wife makes the best chocolate chip blondies and another coworker's wife makes these gluten free chocolate walnut cookies that I have the recipe for but am resisting making because I know I'll eat the whole batch! This pumpkin cake was brought in for Boss's Day back in October. After devouring a slice, I literally had to sit on my hands to keep myself from going back for more, releasing them only to email the baker and beg for the recipe.
Pin ItPumpkin Layer Cake with Cream Cheese Frosting | The Sweets Life
Three days later, I had an entire pumpkin cake at my disposal. If you saw my post on Instagram, you know I was tempted to keep the entire cake for myself. Gluttonous? YES, but if ever there was a cake worthy of a little glutton, this is the one! I thought I already had my favorite pumpkin cake and I'm not going to declare a winner until I taste them side by side, but today's is a bit simpler in that you don't have to worry about browning butter AND you're not trying to perfect your frosting skills--mounding it on top and sprinkling with nuts makes for a gorgeous (but easy!) presentation. Bottom line--this cake is a must make. I received texts from both my sister AND my sister-in-law praising it after leaving them with pieces. My friends from community group cleaned their plates. (Yes, I decided to share!) Pie is the traditional Thanksgiving dessert, but it would be a mistake not to offer a cake option as well...this cake!
Pumpkin Layer Cake with Cream Cheese Frosting | The Sweets Life

One Year Ago: Odds & Ends
Three Years Ago: Waldorf Tuna Salad and Salted Caramel Pie

Monday, March 31, 2014

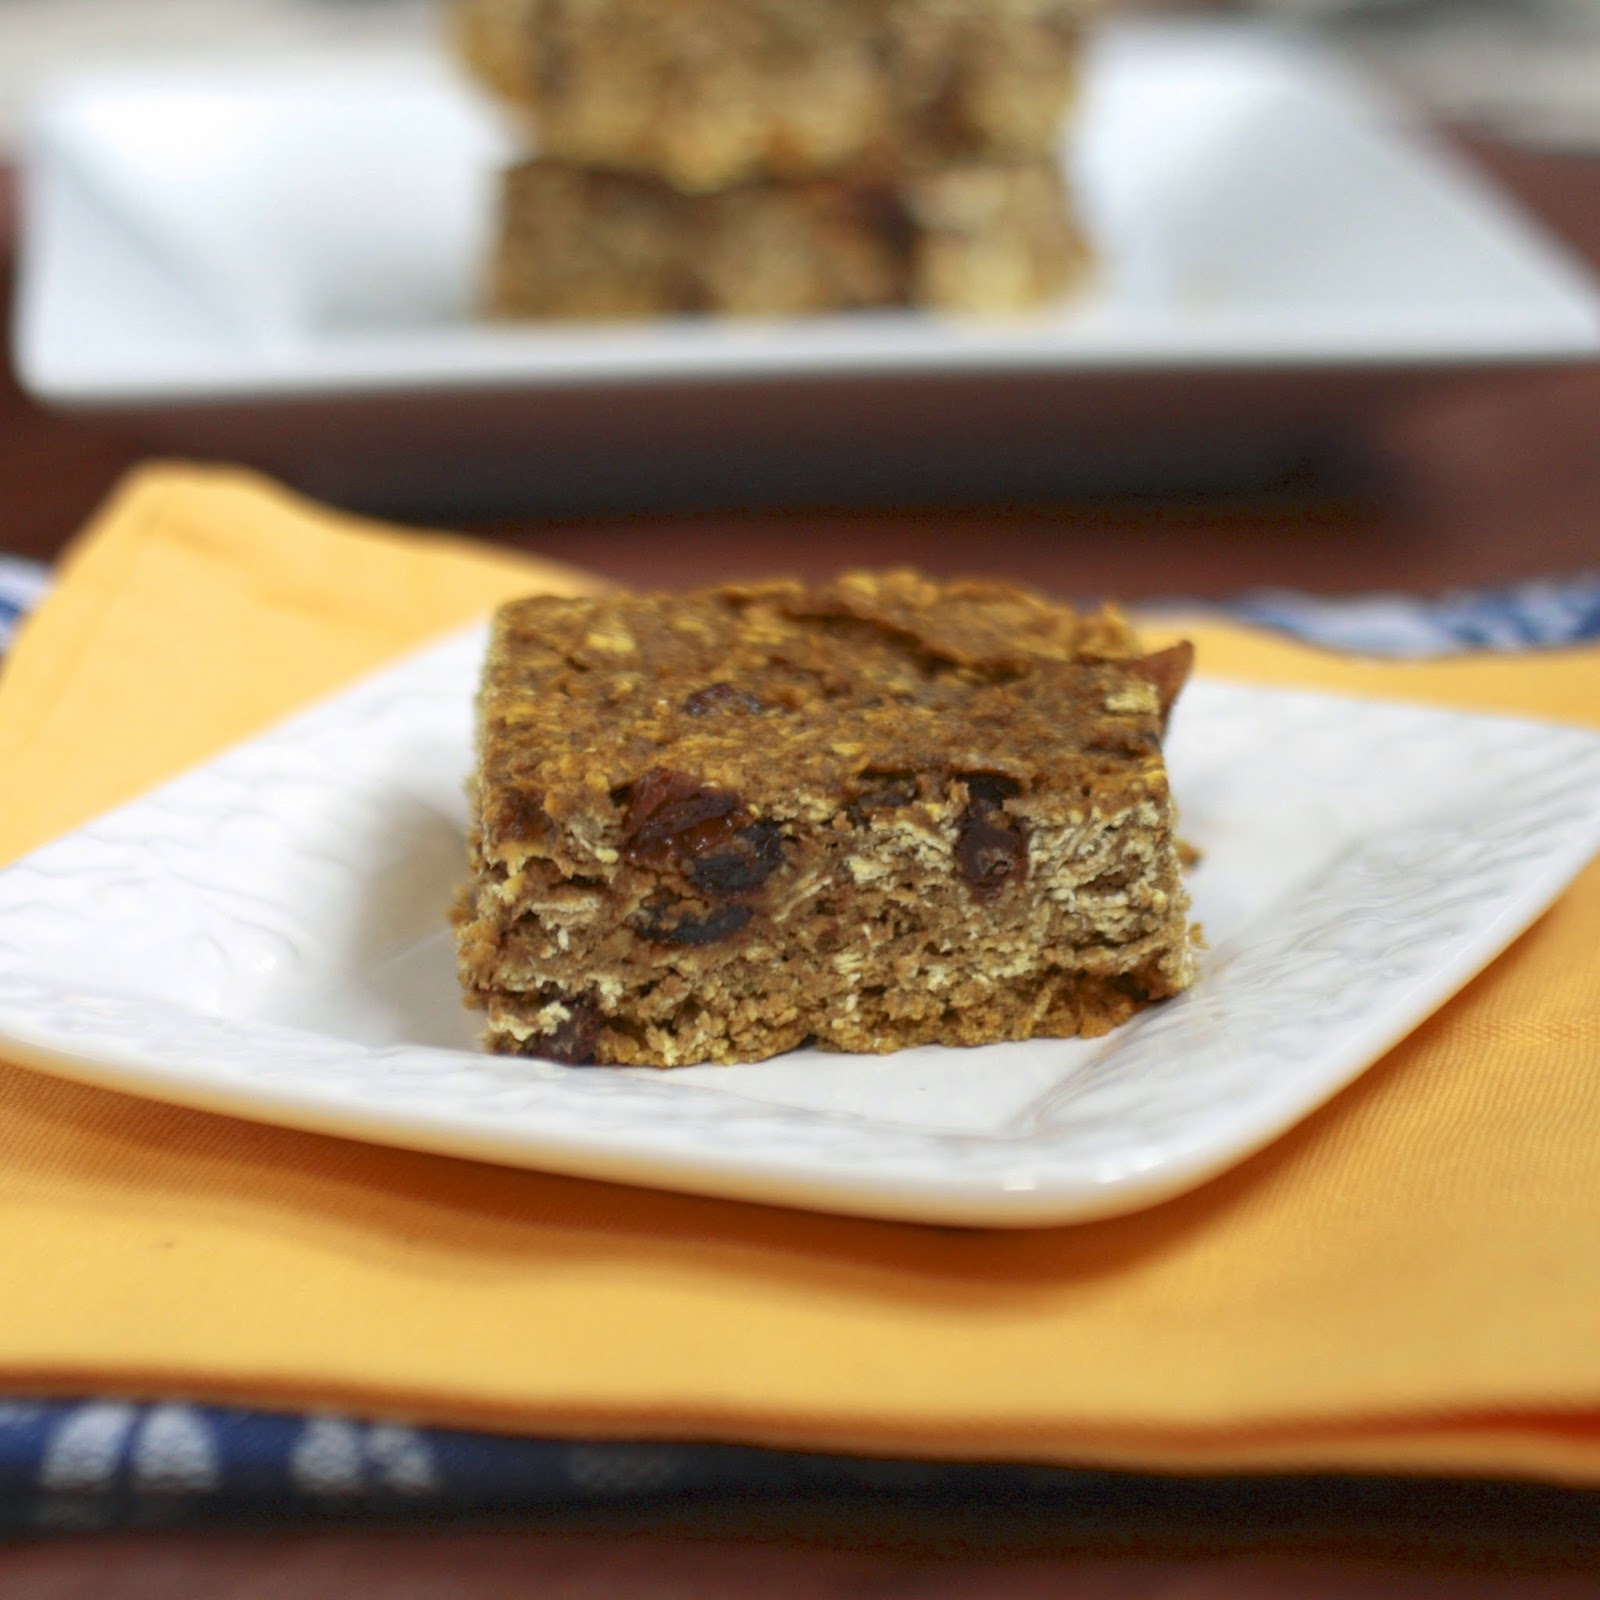
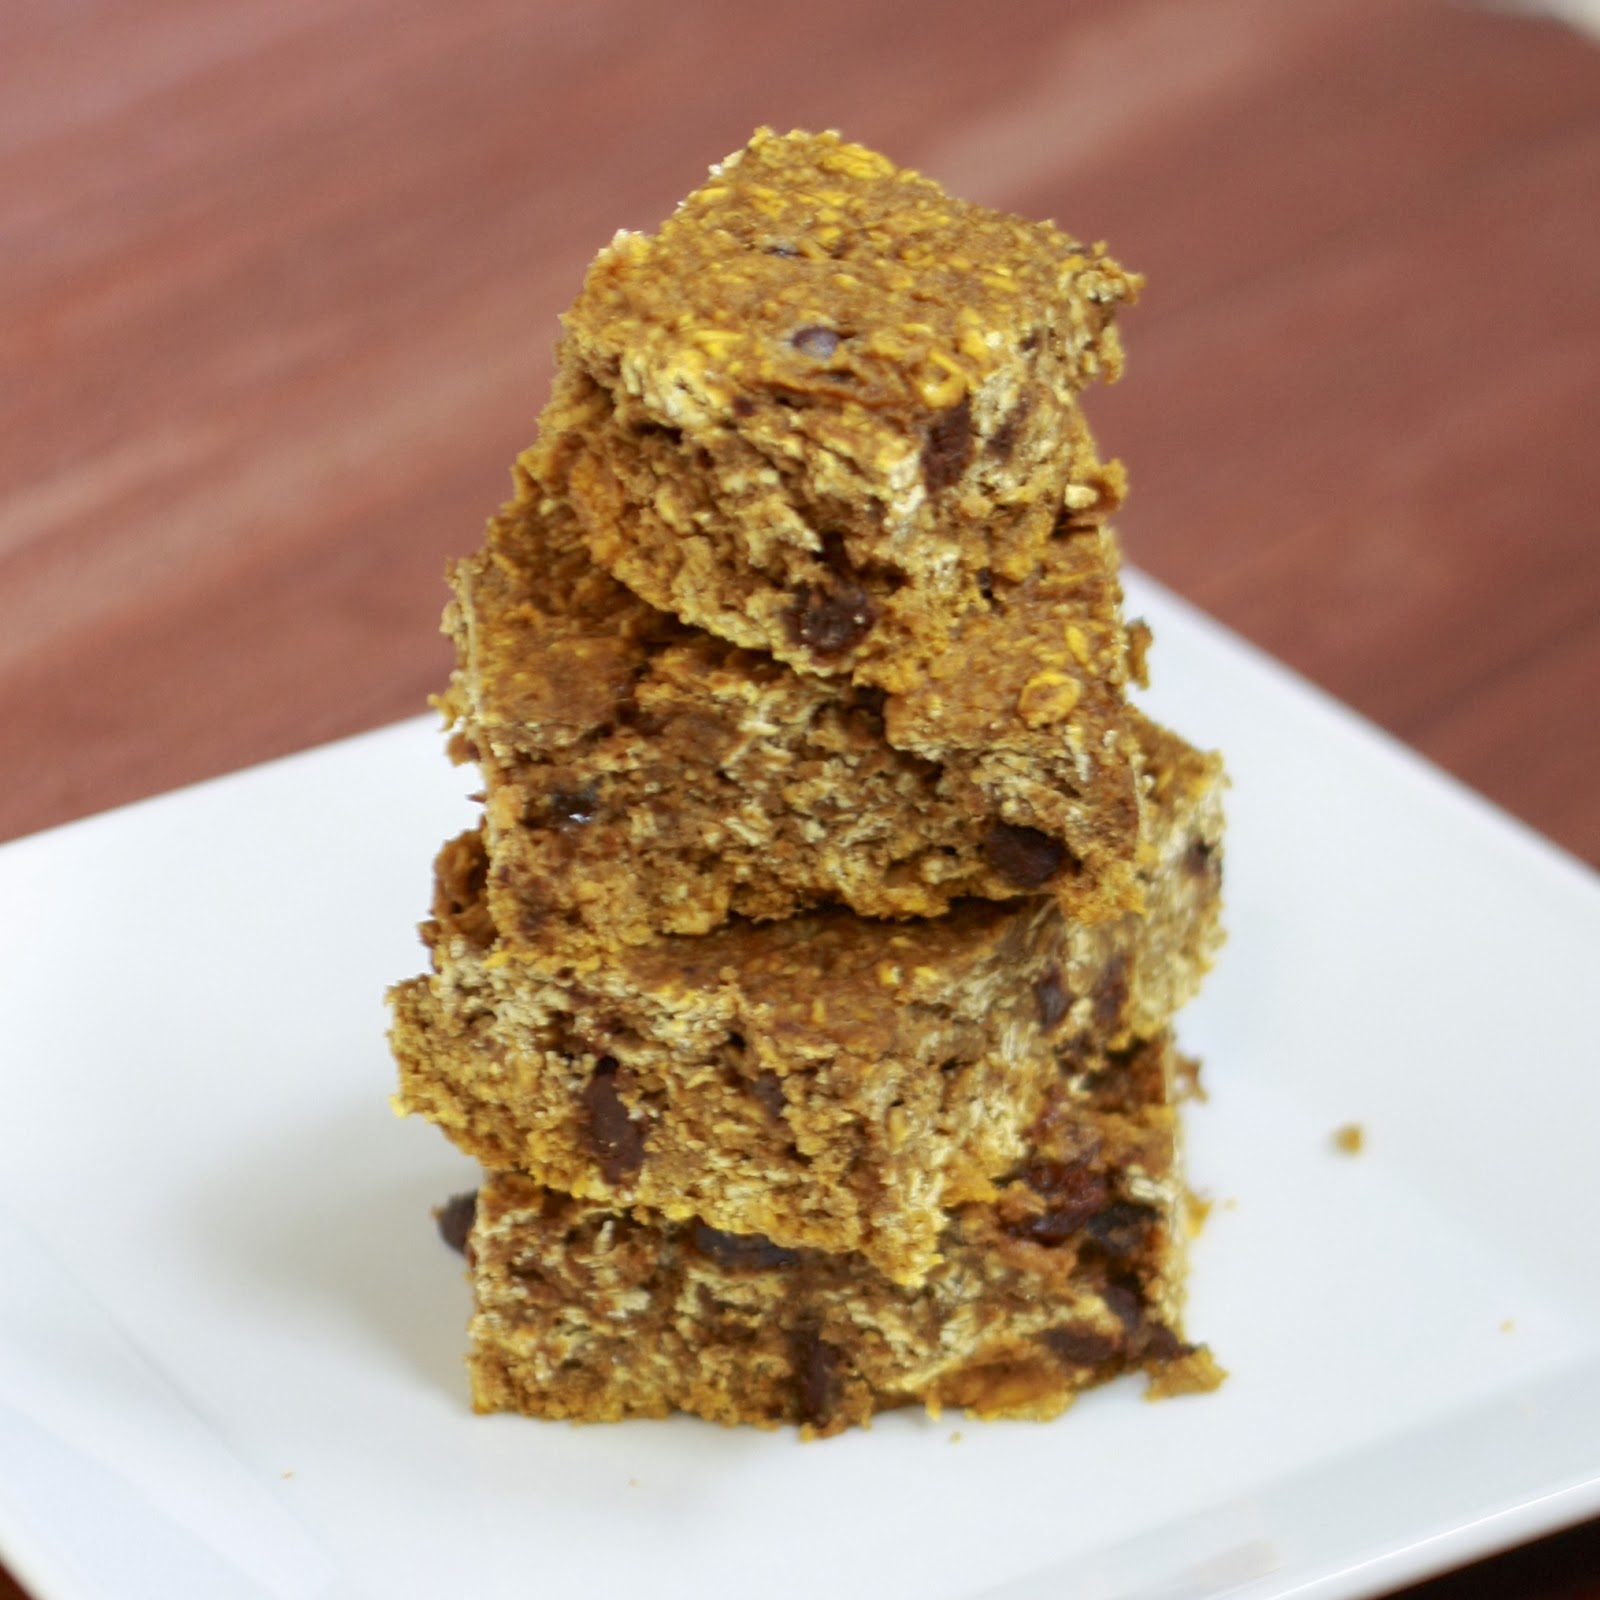
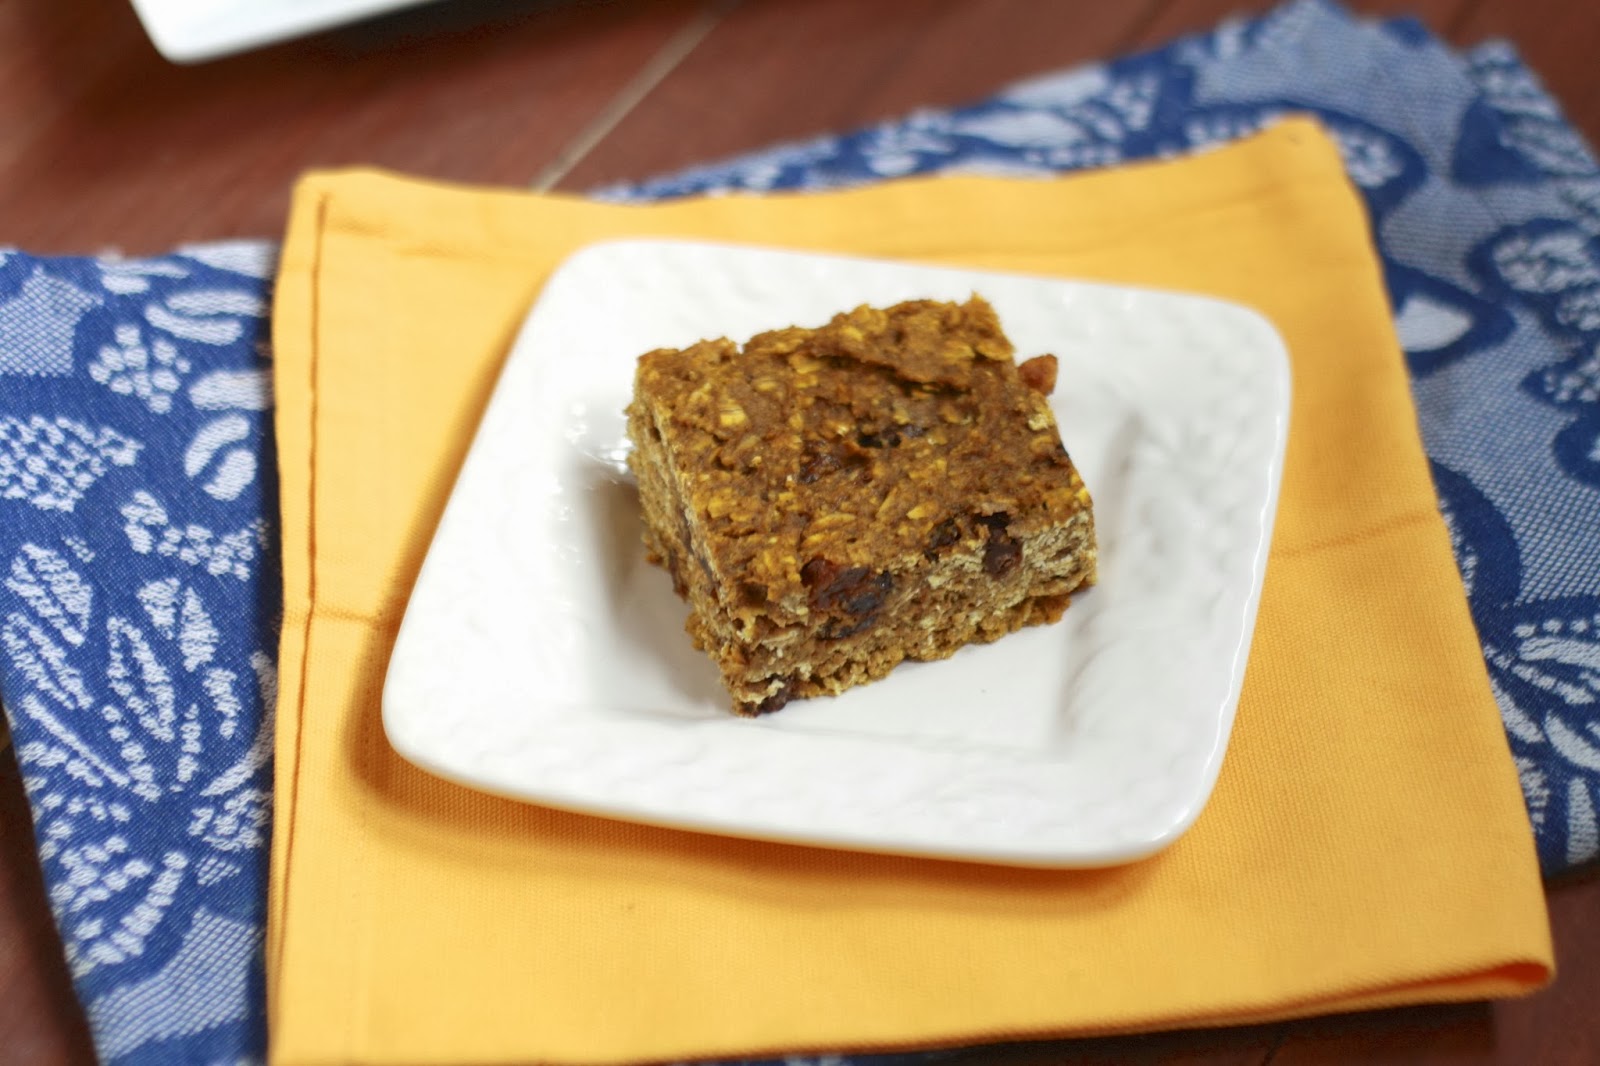
Pumpkin Oatmeal Breakfast Bars


pumpkin bars
Pumpkin Oatmeal Breakfast Bars
So my Whole Wheat Cinnamon Swirl Bread was the January obsession and this is what then replaced it. I know, I know, it's not pumpkin season. It's not anywhere near pumpkin season. And yet, I'm buying cans of pumpkin at the grocery store each week because I cannot get enough of these! Truth be told, they don't have a particularly strong pumpkin flavor to them, although it does add a bit of a moistness and a tint of orange! 
Pin Itpumpkin bars
I actually made a batch of these the day before I headed to the hospital, and it was a godsend to come home to a few days later! One of these bars, plus a smoothie, plus coffee has become my go to breakfast ever since Brecken was born and I spend a quick fifteen minutes once every ten days or so putting a pan of these together.
pumpkin bars
They're hearty, healthy, and far better than anything you can buy in a plastic wrapper, I promise! The sugar content is low, but the raisins and chocolate chips add just enough sweetness to fool you into thinking you're eating something indulgent for breakfast. Yes--I have no shame in incorporating chocolate into my breakfast!

Don't wait until pumpkin season to make these breakfast bars!

One Year Ago: In Christ Alone
Two Years Ago: Cornmeal Cranberry Muffins and Black and White Cookies
Three Years Ago: Mocha Chocolate Chip Cookies and Sweet Onion Salad with Orange Vinaigrette 
Four Years Ago: Mixed Citrus Greens Salad and Black Bean Burgers with Mango Salsa

Tuesday, October 23, 2012

Pumpkin Spice Granola

Pin It
I've made pumpkin granola once before, but when my grandma mailed me some newspaper clippings from the Milwaukee Journal Sentinel, I was reminded how much I loved the stuff and decided to try a new version. As luck would have it, the recipe called for mixing in dried dates, which I had recently picked up from the grocery store with no plan in mind for them.

The good luck ended there. The evening I made this granola can only be described as disastrous! First I spilled coconut oil all down the front of my dress and all over the kitchen floor. Have you ever tried to clean oil up off the floor? Not fun! Disaster #1. I was simultaneously cooking dinner while prepping this granola and then spilled cayenne pepper all over my stovetop. Sigh. Disaster #2. And because disasters apparently come in threes, I had the brilliant idea to transfer my newly purchased bag of popcorn kernels into a Ziploc bag...except I somehow missed the bag and they ended up all over the floor. Disaster #3.
Yes, that would be popcorn kernels all over my floor ALREADY slicked with oil. Thank God for my husband, who silently shook his head and went to get the broom. At the end of the day, a disastrous hour in the kitchen was well worth it. I think I liked this granola better than the last pumpkin granola. It was a little chewier than I would have preferred, but that could be prevented by baking the granola on two cookie sheets instead of one, which I've reflected in the instructions below.
Make your breakfast a little more fall-like with some of this! I enjoyed it with milk, yogurt, and just by the handful! If you don't like dates, add raisins or dried cranberries instead!

Tuesday, October 16, 2012

Pumpkin Apple Streusel Cake

Pin It
 This pumpkin apple streusel cake was how I chose to break my pumpkin fast. It wasn't a true or intentional fast, I just stopped making pumpkin goodies when the season changed last year. Much as I love pumpkin, I'm not one to crave it in the middle of July. The can of pumpkin has been patiently waiting in my cabinet, but I didn't even feel a strong inclination to use it until October arrived. Part of this was probably the gorgeous weather St. Louis enjoyed throughout September and part of it was my not-so-secret denial that summer was on its way out. Sigh.
 I might be sad about the shift in seasons and weather (I know I'm in the minority here!), but I can't deny how much I love pumpkin anything and everything. I'm ready to enjoy some of my favorites again: the ever impressive pumpkin roll, enchiladas with pumpkin sauce, and of course pumpkin ice cream. This cake is quickly moving to the top of my list of pumpkin favorites. It's basically a pumpkin brownie topped with apple pie! When I say pumpkin brownie, I'm talking about the texture not the flavor. It's dense and when my friend said it reminded her of a brownie, I immediately knew what she meant! The sautéed apples sitting atop the cake are reminiscent of the classic pie filling--soft but still holding their shape and bursting with cinnamon. Whether you eat this straight from the oven with a scoop of vanilla ice cream or chilled after a rest in the fridge, you'll be singing fall's praises and (nearly) forgetting those hot days of summer!
One Year Ago: Tiramisu
Two Years Ago: A Chocolate Review
Three Years Ago: Mini Oreo Cheesecakes

Wednesday, December 7, 2011

Pumpkin Cream Cheese Muffins

Pin It
On Thanksgiving Day, Nate (my sister's new FIANCE :)), Ryan, and I were en route to Children's Hospital to pick Julia up from her overnight shift. While at a stoplight, a man in a truck next to us waved his arms to get our attention. I rolled down the window and he casually mentioned that we had a cupcake sitting on the back of the car. I looked over my shoulder to discover that it was not a cupcake, but a pumpkin cream cheese muffin, precariously resting on the edge of the trunk.

It must've looked appetizing, because the man continued to question me. "Is that indeed a cupcake?" I told him it was a muffin and the light changed before we had a chance to grab the escapee (okay, false. The boys refused to get it from outside because they wanted to see if it would make it all the way to the hospital!).

The muffin managed to stay on the car a few more miles and when we pulled into the hospital parking lot, Ryan promptly grabbed the muffin and ate it!

I'm very glad we didn't lose a muffin en route, because these are too good to be run over on the highway! These muffins require multiple steps and a bit of attention, but the end result is oh so worth it! My cream cheese mixture wasn't freezing very well, so I just spooned it into the muffin cups instead of slicing pieces and it still worked wonderfully. These muffins are perfectly spiced, with a streusel that puts them over the top!

Hopefully you still have some pumpkin hanging out in your cabinet because you don't want to wait until next Fall to make these!


One Year Ago: Turkey, Mushroom, and Broccoli Pie

Pumpkin Cream Cheese Muffins
from Annie's Eats
*makes 24 muffins

Ingredients:
for the filling-
-8 oz. cream cheese, softened
-1 cup confectioners' sugar

for the muffins-
-1 1/2 cups whole wheat pastry flour
-1 1/2 cups all-purpose flour (original recipe calls for 3 cups all-purpose)
-1 tsp ground cinnamon
-1 tsp ground nutmeg
-1 tsp ground cloves
-1 tbsp plus 1 tsp pumpkin pie spice
-1 tsp salt
-1 tsp baking soda
-4 large eggs
-1 1/2 cups sugar (original called for 2 cups)
-2 cups pumpkin puree
-1 1/4 cups vegetable oil

for the topping-
-1/2 cup sugar
-5 tbsp flour
-1 1/2 tsp ground cinnamon
-4 tbsp cold unsalted butter, cut into pieces

Directions:
1. Combine the cream cheese and confectioners' sugar in a mixing bowl, beating until smooth. Place the mixture into a piece of plastic wrap and shape into a log (1.5 inches in diameter). Cover the wrapped log in aluminum foil and place in the freezer for 2 hours until slightly firm.
2. To make the muffins, preheat the oven to 350F. Line 24 muffin cups with paper lines. In a medium bowl, mix the flour, all of the spices, the salt, and the baking soda. Stir to combine.
3. In a large bowl, add the sugar, eggs, pumpkin, and oil. Use an electric mixer to mix on medium-low speed just until blended. Add the dry ingredients, mixing just until combined.
4. To make the topping, mix the sugar, flour, and cinnamon in a small bowl. Cut in the butter with a pastry blender or two forks until the mixture is coarse and crumbly. Refrigerate mixture until ready to use.
5. Fill each muffin cup with 1-2 tbsp of batter, just enough to cover the bottom of the muffin cup. Slice the cream cheese log into 24 pieces. Place a slice in each muffin cup on top of the batter. Top each muffin cup with remaining batter. Sprinkle topping over each of the muffins.
6. Bake for 20-25 minutes. Transfer muffins to a wire rack and cool completely before serving.

Monday, November 28, 2011

Pumpkin Cream Oreo Tarts

Forgive me. Today you're stuck putting up with a slightly blurry, unappetizing photo. As I mentioned a few weeks ago, blog photography is much more difficult with our limited daylight and my absence from the home 6:30 am to 4:30 or 5 pm, five days a week. I've started taking as many pictures as I can on the weekends or in the few minutes before I rush out the door for work. If my neighbors didn't already think my food photography habits were strange, they definitely do now!

On the particular morning I took this picture, it was dreary and still rather dark. I did my best to capture these adorable little tarts, but you're going to have to take my word on this one: these babies are much better looking than what you see above! I later sprinkled the tops with Oreo crumbs, which proved much more fun than a single cookie piece. 

Looks aside, these pumpkin cream oreo tarts made for an impressive little dessert. It's always fun when you have your own personal-sized dessert rather than a measly piece on a plate (though I'm sure you could easily double the recipe and make this in a 9-inch tart pan!). Chocolatey crust, creamy pumpkin cheesecake filling, all topped with homemade whipped cream...YES PLEASE! I'm about a month late on this, as the coloring would have made them perfect for Halloween. Go on, save this recipe on your "Halloween" Pinterest board ;) ...though I firmly believe they're good year round!

Looking for another mini tart recipe? You must make these No Bake Orange Creamsicle Cheesecakes!


Pumpkin Cream Oreo Tarts
from Lauren's Latest

Ingredients:
for the crust-
-16 Oreo cookies
-4 tbsp butter, melted

for the filling-
-8 oz (1/3 less fat) cream cheese, softened
-3/4 cup pumpkin puree
-1/2 cup granulated sugar
-1/2 tsp vanilla extract
-1/4 tsp ground cinnamon
-1/8 tsp ground nutmeg

for the topping-
-1/2 cup heavy cream
-3 tbsp sugar
-1/4 tsp vanilla extract

Directions:
1. Blend Oreo cookies to crumbs in the bowl of a food processor. Add melted butter and pulse to mix. Spoon mixture into 4 individual tart pans and press mixture into the bottom of each pan. Set in the fridge.
2. In a mixing bowl, whip cream cheese until smooth. Add pumpkin puree, sugar, vanilla, and spices. Beat on high until smooth. Divide mixture evenly among tarts (there may be a little left over) and smooth the tops. Return tarts to the fridge while you make the whipped cream.
3. Beat cream with sugar and vanilla until stiff peaks form. Divide evenly among the four tarts and spread over the pumpkin mixture. Garnish with additional cookie crumbs, if desired. Cover and refrigerate until ready to serve.

Saturday, November 19, 2011

Pumpkin Ice Cream

Pin It
Last weekend, I set out on a run. I was excited because temperatures were warm and the sun was out--when you're usually running at 5 am, it's a real treat to run in daylight. My excitement quickly turned to frustration. The source of my frustration? The 20-30 mph winds I found myself fighting for over an hour. I struggled each step of my run, internally cursing the weather conditions. When I finally returned back to my house, I walked through the front door and yelled at the top of my lungs, "I HATE THE WIND!". Call me dramatic, call me an over-reactor (my husband did!), but it made me feel a little better to proclaim my frustration.

You know what else is frustrating? Forgetting to temper your eggs when you make ice cream. Surprisingly, I didn't scream "I HATE ICE CREAM" at the top of my lungs. That would be hypocrisy! But I did get a little sad that I had destroyed my inaugural batch of pumpkin ice cream as I picked chunks of cooked eggs out of my mixture.

Thankfully, I pressed on with making the ice cream and after straining the mixture, I ended up with perfect ice cream--it is essentially pumpkin pie filling in ice cream form. This is a new fall favorite, and I can't wait to make it a few more times this season. Next time I think I'll mix in some gingersnaps, nuts, or chocolate and try some different variations.

All in all, I suppose it's good I fought the wind and finished the run...made the calories in the ice cream that much better ;)


One Year Ago: Pumpkin Knots
Two Years Ago: Very Veggie Soup

Pumpkin Ice Cream
from David Lebovitz

Ingredients:
-1 1/2 cups whole milk (I used 2%)
-1 cup heavy cream
-1/3 cup plus 2 tbsp granulated sugar
-1 tsp ginger
-1/2 tsp ground cinnamon
-1 cinnamon stick (I subbed an additional 1/2 tsp ground cinnamon)
-1/2 tsp nutmeg
-1/4 tsp kosher salt
-5 large egg yolks
-1/4 cup packed dark brown sugar
-1/2 tsp vanilla extract
-3/4 cup canned pumpkin puree

Directions:
1. Fill a large bowl with water and ice and nest a smaller metal bowl inside of it to create an ice bath. Set a mesh strainer over the top.
2. In a medium saucepan combine the milk, cream, sugar, ginger, cinnamon, nutmeg, and salt. Warm until the mixture is hot and the edges begin to bubble.
3. In a small separate bowl, whisk the egg yolks. Once the milk mixture is hot, gradually whisk in about half of the warmed milk mixture into the eggs, stirring constantly. Pour the egg mixture back into the saucepan and cook over low heat, stirring constantly with a heatproof spatula, until the mixture starts to thicken and coat the back of the spatula (160-170F if using a thermometer).
4. Remove the mixture from heat and immediately pour it through the strainer into the bowl sitting in the ice bath. Mix in the brown sugar, stirring until cooled. Cover and chill overnight.
5. The next day, remove from the fridge and whisk in the vanilla and pumpkin until smooth. Freeze according to your ice cream maker's manufacturers instructions.

Saturday, November 12, 2011

Pumpkin Popovers

Pin It
Before you click away because you've either a. never heard of popovers or b. don't have a popover pan, hear me out! For those of you who don't know what popovers are, they're essentially an airy roll made from an eggy batter. Usually when I make these, I use a more traditional recipe that is a snap to throw together and produces the lightest little breads that are the perfect accompaniment to just about any meal. 

Like popovers but don't have a pan? No worries, you can still make these! Popover recipes also work in regular muffin tins. They may not be as "popped" as they would be in the special pan, but the muffin tin will still give you get you the taste you're going for.

With a tiny bit of pumpkin leftover in my fridge, I was on a hunt for pumpkin recipes that needed only a 1/4 cup of pumpkin. These popovers came to the rescue! The pumpkin and the inclusion of whole wheat pastry flour (I did half whole wheat pastry, half all purpose but you could easily do only all purpose) made these a little heartier and heavier than regular popovers, but they still kept that classic shape and hollow center. These are best eaten immediately from the oven, but Ryan did eat the leftovers a day later (cold) and said they were still good!
One Year Ago: Apple Walnut Salad with Cranberry Vinaigrette (one of my favorite homemade dressings)
Two Years Ago: Tuna Chickpea Salad with Pesto


Pumpkin Popovers
from Kirbie's Cravings

Ingredients:
-2 large eggs
-1 cup fat free milk
-1 tbsp butter, melted
-1 cup flour
-1/4 tsp salt
-1/4 cup pumpkin puree
-1/2 tsp pumpkin pie spice

Directions:
1. Preheat oven to 375F. Spray a popover pan (a muffin pan will also work, they just won't "pop" as much!) with cooking spray and set aside.
2. Whisk together the eggs, milk, and pumpkin puree in a large bowl. Stir in the melted butter. Add the flour, salt, and pumpkin pie spice, mixing to combine but leaving it still a little lumpy.
3. Divide the batter among the prepared pans, filling each mold 1/2 to 2/3 full.
4. Bake for 45 minutes. Do not open the oven until ready to remove.

Tuesday, November 8, 2011

Whole Wheat Pumpkin Waffles

Pin It
The waffle iron and I have had a bit of a rough history. It's nothing against waffles in particular. I actually really love waffles. Growing up, breakfast for dinner, featuring waffles, was one of my favorites. My mom would take waffle after waffle off of the iron and onto our plates, where we'd add syrup, jam, or powdered sugar...sometimes all three!

When I got my own house, and my own waffle iron, I discovered that waffles were nowhere near as easy to make as they appeared, or so it was for me. I've made a few different varieties and none could be considered a true success. The flavor was often good, but the texture lacked. Other times, they refused to set up in my waffle iron. This time, however, I nailed it! I don't know what it was, but these waffles came out perfectly--cooked all the way through with a crispy shell and tender insides. The pumpkin flavor is noticeable and makes for the perfect fall breakfast (or breakfast for dinner!). We ate these drowning in syrup, as you'll notice in the pictures, but Ryan highly recommends topping them with peanut butter, which is what he did with the leftovers!

Extras can be frozen and reheated in the toaster oven. Thanks to the Fairy Hobmother from Appliances Online, The Sweets Life has a brand new toaster oven! Her mission is to bring joy to the blog world and she happened to see a comment of mine on another blogger's post. She granted me my wish--in the form of a new toaster oven--and just might pay you a visit too. Leave a comment on this post with your kitchen appliance wish and perhaps she'll grant your wish too!
One Year Ago: Pumpkin Spice Roasted Chickpeas (it's just the time of the year for pumpkin! :))


Whole Wheat Pumpkin Waffles
as seen on Spiffy Cookie, guest post by Lauren's Latest
Ingredients:
-1 cup milk
-1 egg, separated
-1/2 cup pumpkin puree
-1/2 tsp vanilla extract
-3 tbsp canola oil
-2 tbsp brown sugar
-3/4 cup whole wheat flour
-1/2 cup all-purpose flour
-2 tsp baking powder
-1/4 tsp salt
-1/2 tsp cinnamon
-1/8 tsp nutmeg

Directions:
1. Preheat waffle iron.
2. In a large bowl, mix milk, egg yolk, pumpkin, vanilla, oil, and brown sugar. In a mixing bowl, beat egg white until stiff peaks form. Set aside.
3. Add flours, baking powder, salt, cinnamon, and nutmeg to the wet mixture, stirring just until combined (batter might still be a little lumpy). Fold in egg whites.
4. Spray waffle iron with cooking spray and pour approximately 1/2 cup batter onto the waffle iron. Cook waffles until lightly browned and crispy. Serve immediately with butter and syrup.
*extra waffles can be frozen and reheated in the toaster or toaster oven!

Sunday, November 6, 2011

Creamy Pumpkin Peanut Soup

Pin It
Last time I made a variation of pumpkin soup was in the very early days of the blog. I didn't really know what I was doing, particularly when it came to taking pictures. Of course, I still have a lot to learn when it comes to food photography, but I've learned a few basics and upgraded my camera, which is why today's pumpkin soup looks a heck of a lot more appetizing than the one I posted over two years ago (don't let the lackluster picture dissuade you--I've made that soup a few times since and it's still one of my favorites!).

One thing I've learned is how much better pictures are in natural light, without the use of a flash. One of the most basic photography rules, but one I was completely unaware of. I'm telling you, I really was clueless!

With winter around the corner (noooooooooooo!) and the amount of daylight dwindling, I've learned to get creative with my food pictures. How so? Well, I made this soup late one evening, after I'd already had dinner. I made it with the sole intention of being able to photograph it as soon as we got home from work the next day. Although this soup comes together quickly, I knew that by the time we walked in the door, I wouldn't be able to make the soup and photograph it before darkness fell. Life of a food blogger. 


In the end, this worked out well, and I recommend making it ahead of time even if you don't need to for photographic purposes, like some of us crazies. We came home starving and all I had to do was pull the tupperware out of the fridge and reheat! My only change would be to reheat it on the stove instead of in the microwave. Things typically reheat more evenly on the stovetop.
This pumpkin soup was a little spicy. I wouldn't call it kid-friendly--make this for those with adventurous tastebuds. We didn't have sour cream on hand to top the soup but it would have been a nice cooling contrast for the heat of the soup. I did really like the crunchy green onion and chopped red pepper toppers. Despite the fact that we ate this while catching up on our favorite TV show (Modern Family), Ryan interrupted the silence (well, the laughter, really) twice to tell me how much he liked this!

One Year Ago: Roasted Brussels Sprouts and Apples (think you aren't a fan of brussels sprouts? Try them roasted!)
Two Years Ago: Pizza Fail  (my sister still makes fun of Ryan and I for the fight that erupted over this meal...and I can finally find the humor in the situation :))

Creamy Pumpkin Peanut Soup
from Women's Health Magazine, October 2011

Ingredients:
-2 tsp vegetable oil
-1 small onion, chopped
-3 cloves garlic, smashed
-1/4 tsp ground turmeric (I omitted)
-1/2 tsp paprika
-1/2 tsp chili pepper flakes
-1 can pumpkin puree (15 oz)
-1 1/2 cups low-sodium chicken or vegetable broth
-1 jar (7 oz) roasted red peppers, drained (reserve 1 tbsp for garnish)
-1/3 cup smooth reduced-fat natural peanut butter
-1 tsp sugar
-1/2 tsp salt
-1/4 tsp freshly ground black pepper
-1 tbsp fresh lemon juice
-1/4 cup reduced fat sour cream
-2 tbsp chopped roasted peanuts
-2 tbsp chopped scallion greens

Directions:
1. In a 4-quart saucepan over medium-high heat, heat oil. Add onion and cook until golden, stirring occasionally, about 10 minutes. Add garlic, cooking for 2 more minutes.
2. Add turmeric, paprika, and chili flakes, and stir. Add pumpkin puree, broth, peppers, and peanut butter, whisking to mix. Bring mixture to a boil. Reduce heat and simmer for 5 minutes before stirring in sugar, salt, pepper, and lemon juice.
3. Transfer to a blender or food processor (or use a hand blender) and puree until smooth. Divide among 4 bowls and garnish with sour cream, peanuts, reserved chopped peppers, and scallion greens.

Friday, November 4, 2011

Pumpkin Oatmeal Scotchies

Pin It

In the eyes of most people, I probably look like I have it all together. Despite the many things on my plate—a full time job, this blog, online classes, regular exercise, church activities—I still somehow find a way to say ‘yes’ to more (an issue, I’m working on it!) and most of the time with a smile on my face. Truth be told, though, it’s a myth. Although I do have a lot on my plate and I do truly enjoy being busy, I don’t always have it all together and I can’t always do it on my own.

Case in point: a while back I volunteered to make cookie favors for my brother-in-law and (now) sister-in-law’s wedding. Cookie favors…no big deal, right?! Uhh…unless you’re making 300 of them! After spending several weeks rolling out batch after batch of cookie dough, I realized the task at hand was much larger than anticipated. Although I managed to bake the 300 cookies, the thought of decorating them (not my strong point in the first place!) made me want to cry. Thankfully, I have the BEST mom and grandma, who came to town with the specific purpose of helping me finish the cookies.

Last time the two came to town together, they helped us paint every room in our new house in 2 ½ days. This time, they went right to work yet again. Not only did they decorate every cookie, but they also managed to be my personal shoppers and chefs for the few days they were there. Most importantly, they helped keep me laughing, despite a few cookie woes. I owe them my sanity! (Julia, Nate, and Ryan get a special shout out in this endeavor as well!)

On our final night of cookie decorating, my attention was divided because I was also trying to make these Pumpkin Scotchies (Oatmeal Butterscotch) to bring to work for Boss’s Day. All hell almost broke loose when I added baking powder to the recipe instead of baking soda. As you can see, I was all over the place! Once again they helped me out—switching cookie trays in addition to decorating cookies AND doing some decorative painting in my family room (No doubt where I get my multi-tasking ways from, huh?).

The moral of this story? I don’t deserve my mom or my grandma, but I am sure as heck thankful for them! Cherish your family members—the ones who see you at your worst, will put aside anything and everything to help you, and love you in spite of it all! The other moral of this story? Make these cookies. I love oatmeal butterscotch cookies, but these may have them beat. The slight flavor and spice the pumpkin adds to them is unreal. Even my sabotage of them thanks to the baking powder fiasco couldn’t ruin them (I carefully removed what I could and added the correct ingredient!).

Again, I repeat: Cherish your fam. Make these cookies. Got it?

Pumpkin Oatmeal Scotchies

Ingredients:
-1 1/4 cups all-purpose flour
-1 tsp baking SODA
-1/2 tsp pumpkin pie spice
-1/2 tsp cinnamon
-1/4 tsp nutmeg
-1/4 tsp salt
-1/2 cup unsalted butter, at room temperature
-3/4 cup granulated sugar
-3/4 cup packed brown sugar
-1 large egg
-1 tsp vanilla
-1 cup pumpkin puree
-3 cups old fashioned oats
-1 1/2 cups butterscotch chips

Directions:
1. Preheat oven to 375F. Line two baking sheets with parchment paper and set aside.
2. In a small bowl, whisk together flour, baking soda, pumpkin pie spice, cinnamon, nutmeg, and salt.
3. In a mixing bowl, beat butter and both sugars until creamy. Add vanilla, egg, and pumpkin, mixing until combined.
4. Slowly add flour mixture, mixing just until combined. Stir in oats and butterscotch chips.
5. Drop tablespoons of dough onto prepared baking sheets. Bake for 10-12 minutes (cookies will be set and golden). Remove from oven and allow to cool for a few minutes before transferring to a wire rack to cool completely. 

Monday, October 24, 2011

Pumpkin Roll

Pin It
This had disaster written all over it. Though I've seen pumpkin rolls popping up all over the place every fall, the actual physics of it seemed impossible to me. Roll a cake? Without it breaking or cracking? Impossible! Still, I was intrigued, so I put it on my fall to-bake list and approached it with the attitude that if I failed, it wasn't that big of a deal. I like to think I've learned to cut myself some slack when it comes to kitchen adventures...trying not to repeat the whole white chocolate amaretto cake tantrum :)

I decided to make this for Ryan's work group food day even although his immediate group was responsible for breakfast foods. People eat pumpkin bread for breakfast. People eat cream cheese on bagels for breakfast. Therefore, I justified this pumpkin roll as a breakfast food (I don't think anyone minded!). Still convinced I would be facing a disastrous mess of a pumpkin roll, I set out to make this two days before his food day, ensuring I'd have plenty of time to make something else in the case of failure.

As it turns out, Plan B was never needed! Rolling the cake didn't turn out to be nearly as difficult as I anticipated. I made sure to grease my pan well, add lots of powdered sugar to my towel, and let the cake fully cool before unrolling it. As you can see from the pictures--100% success! Who knew something that looked so pretty wasn't all that difficult?!

Though I didn't get to sneak a piece before sending it with Ryan, he made sure to shoot me an instant message praising both the taste of the cake and the fact that it was perfectly rolled. The boy knows the way to my heart is with praise for my kitchen successes! Now that I've mastered the technique, I can't wait to try out a few other rolled cakes I've seen recipes for, such as banana with cream cheese frosting and chocolate with buttercream!

Any kitchen techniques or recipes that terrify you? Any surprising successes?


One Year Ago: Pumpkin Cheesecake Dip


Pumpkin Roll
from allrecipes.com

Ingredients:
-1/4 cup powdered sugar (to sprinkle on towel)
-3/4 cup all-purpose flour
-1/2 tsp baking powder
-1/2 tsp baking soda
-1 1/2 tsp pumpkin pie spice
-1/2 tsp ground cinnamon
-1/4 tsp salt
-3 large eggs
-1 cup granulated sugar
-2/3 cup pumpkin puree
-1 (8 oz) package cream cheese, softened (I used 1/3 less fat)
-1 cup powdered sugar
-4 tbsp butter, softened
-1 tsp vanilla extract

Directions:
1. Preheat oven to 375F. Grease a 15 x 10 inch jelly roll pan. Top greased pan with wax or parchment paper. Grease and flour paper (I used baking spray with flour in it that I got from Target...worked great!). Sprinkle a kitchen towel laid out on the counter with powdered sugar.
2. In a small bowl, combine flour, baking powder, baking soda, cinnamon, pumpkin pie spice, and salt in a small bowl. In a large mixing bowl, beat eggs and sugar until thick. Add pumpkin and beat. Stir in flour mixture. Pour mixture into prepared pan, spreading evenly with a spatula.
3. Bake for 13-15 minutes or until top of cake lightly springs back when touched. Remove cake from oven and immediately turn cake onto prepared towel (I placed the towel, powdered sugar side down, on top of the cake and then flipped). Peel off wax paper. Roll up cake and towel together, beginning with one of the narrow ends. Place rolled cake on wire rack to cool, about 45 minutes.
4. Beat cream cheese, powdered sugar, butter, and vanilla extract in a small mixing bowl until smooth. Carefully unroll cake and remove towel. Spread cream cheese frosting over cake evenly. Reroll cake (without towel). Wrap in plastic wrap and refrigerate for at least one hour. Unwrap cake and sprinkle with powdered sugar before serving, if desired.

Thursday, October 20, 2011

Pumpkin Snickerdoodles

Pin It
Ryan has a really fun group of coworkers, or so it seems from the stories he comes home with. A few months ago, I was invited to join he and his group at happy hour. I was excited for the chance to witness some of the characters I'd heard about in person...that is, until I got to work that day...and ended up having an incredibly frustrating day at work. The type of day that even a stiff drink during happy hour can't fix. The type of day that warrants a sob session once you get into your car. In most cases, I can 'make it til I make it', but this particular day that just wasn't happening. Needless to say, I don't think Ryan's coworkers were too impressed with his wife.

Since then, I've felt bad about their false impression of me. I think his group needs to have another happy hour so I can show them the real me! Until then, I've worked on winning them over with my baking.
I've made them treats several times before but it had been awhile, so I asked Ryan to take requests from a few of his coworkers who recently had birthdays. The dessert of choice? My snickerdoodles. Instead of making the same cookie again, I asked if I could change it up a bit and thankfully, they agreed!

Pumpkin snickerdoodles aren't all that different from the usual recipe. The pumpkin flavor is lightly noticeable and the texture is slightly different, but Ryan's coworkers went just as crazy for these as they did for the others! You know when people, Ryan included, are eating more than 8 cookies in a day that it's one irresistible cookie!
So, until another happy hour is scheduled, I plan to keep wooing his coworkers with sugar and butter ;)

****Today I'm guest posting over on my friend's blog: The Edible Perspective. This is one guest post you DON'T want to miss (it involves popcorn, coconut, chocolate, and caramel! Sneak peek below!)

One Year Ago: Easy Turkey Chili
Two Years Ago: Pumpkin Cake (I recently remade this and it was just as good as I remembered!)


Pumpkin Snickerdoodles
from Recipe Girl

Ingredients:
-2 sticks salted butter, at room temperature (I used unsalted)
-1 1/2 cups granulated white sugar
-3/4 cup pure unsweetened pumpkin puree
-1 large egg
-2 tsp vanilla extract
-3 3/4 cups all-purpose flour
-1 1/2 tsp baking powder
-1/2 tsp salt
-1/2 tsp ground cinnamon

for the rolling sugar-
-1/2 cup granulated white sugar
-1 tsp ground cinnamon
-1/2 tsp ground ginger
-1/2 tsp allspice

Directions:
1. In a large bowl, cream butter and sugar with an electric mixer until fluffy. Add sugar and pumpkin puree, beating well. Mix in egg and vanilla, scraping down the sides of the bowl with a spatula.
2. In a separate medium-sized bowl, whisk together flour, baking powder, salt, and ground cinnamon. Beat flour mixture into liquid mixture a little at a time, just until incorporated.
3. Cover dough with plastic wrap and chill in the refrigerator for 1 hour.
4. Remove dough from fridge and preheat oven to 350F. Line baking sheets with parchment paper or spray with nonstick spray (I did both and parchment worked better!). In a small bowl combine rolling sugar ingredients.
5. Use a medium cookie scoop (1 1/2 tbsp) or a large spoon to scoop out dough and roll into balls. Roll balls in cinnamon sugar mixture and place 2 inches apart on prepared baking sheets. Flatten cookies by dipping a flat-bottomed glass first in the sugar and then on the dough balls.
6. Bake for 8-12 minutes at 350F, until cookies are slightly firm to the touch (mine were good at about 9 minutes). Allow to cool on baking sheets for 5 minutes before moving to a wire rack to cool completely.
*Store cookies in an airtight container

Thursday, October 6, 2011

Pumpkin Cinnamon Streusel Buns

Pin It
I have this weird thing about smells. Certain food smells prompt quite a reaction out of me, almost to the point of gagging. I’m not sure where this came from or when it started; I don’t remember always being so sensitive to smell…but in the last year or so I’ve found myself miserable anytime I encounter a few certain smells.

On the list?
  • ·      Really ripe cantaloupe. It’s completely fine and unnoticeable until it suddenly hits a certain ripeness and Ryan MUST cut it immediately (because I can’t go near it) and get the rind out of our house!
  • ·      Banana peels. I love bananas and eat one daily, but once the inside is gone I can’t handle the peel anywhere near me. Sometimes I think it won’t bother me and I’ll toss a peel into the trashcan near my desk at work…only to have to remove it a few hours later because the smell is making me sick.
  • ·      Lunch meat. For a long time Ryan was on a pb&j kick and brought that to work almost daily. Recently, he’s switched to sandwiches with lunch meat and I’ve found I have to steer clear of the kitchen while he makes his lunch!

Sorry, now that I’ve grossed you all out with my weird food/smell quirks, let me tell you about a smell I do love—these pumpkin cinnamon rolls made my house smell positively dreamy while they baked. Fall baking always has the best smells, with its heavy doses of cinnamon and spice!

These cinnamon rolls tasted as good as they looked. A Cooking Light recipe, they are less sinful than the Classic Cinnamon Rolls and the Cranberry Orange Cinnamon Rolls, meaning it’s perfectly acceptable to double up on the cream cheese icing! The pumpkin flavor is rather subtle, but it gives them a nice orange color and a veggie boost. I also added pumpkin pie spice instead of nutmeg to the dough for an extra boost of flavor. Best warm from the oven, they were also good a day later reheated in the microwave!

What’s your favorite food smell? Least favorite? Tell me I’m not the only crazy one!

One Year Ago: Cookies and Cream Rice Krispie Treats


Pumpkin Cinnamon Streusel Buns
from Cooking Light October 2001

Ingredients:
-1 package dry yeast (2 1/4 tsp)
-1/4 cup warm water (100 to 110F)
-2 3/4 cups all-purpose flour, divided
-1/2 cup pumpkin puree
-1/2 cup milk
-1/4 cup butter, melted
-1 tbsp granulated sugar
-1 1/4 tsp salt
-1 tsp pumpkin pie spice (original recipe called for 1/4 tsp nutmeg)
-cooking spray
-3 tbsp granulated sugar
-3 tbsp brown sugar
-2 tbsp all-purpose flour
-1 1/2 tsp ground cinnamon
-2 tbsp chilled butter, cut into small pieces

for the frosting-
-4 oz. cream cheese (low-fat is fine), at room temperature
-1/4 cup milk (plus more, depending on consistency)
-1 cup powdered sugar (plus more, depending on taste)
-1 tsp vanilla extract

Directions:
1. To prepare buns, dissolve yeast in warm water in a large bowl and allow to stand for 5 minutes. Add 2 cups flour, pumpkin, milk, butter, 1 tbsp sugar, salt, and pumpkin pie spice to the bowl. Beat on medium speed until smooth.
2. Place dough on a floured surface and add up to an additional 3/4 cup flour, 1 tbsp at a time, to prevent dough from sticking to hands. Dough will feel tacky. (Mine took the extra 3/4 cup plus a little more).
3. Place the dough in a large bowl coated with cooking spray. Cover and let rise in a warm place for 45 minutes or until doubles in size (press 2 fingers into dough; if an indentation remains, the dough has risen enough)
4. In a small bowl, combine 3 tbsp granulated sugar, brown sugar, 2 tbsp flour, and cinnamon. Cut in butter with two knives or a pastry blender until mixture resembles coarse meal.
5. Punch dough dough. Cover and allow to rest for 5 minutes. Roll dough out on a floured surface into a 12 x 10 inch rectangle. Sprinkle with brown sugar mixture and roll the rectangle up tightly (beginning with a long edge).
6. Pinch seam and ends to seal. Cut roll into slices (original recipe called for 12 rolls, I cut mine small to get 16) and place in a baking pan coated with cooking spray (I used an 8-inch square pan and another small dish).
7. If baking immediately, cover and let rise 25 minutes before baking at 375F for 20 minutes. If freezing, wrap tightly in foil and place in freezer. When ready to bake, remove from freezer the night before you plan to bake and place in fridge. Place on counter 30 minutes before baking, then bake at 375F for 20 minutes or until golden brown. Cool buns for 15 minutes in the pan on a wire rack.
8. To make the frosting glaze, beat cream cheese until soft and creamy. Add milk, powdered sugar, and vanilla, beating until smooth. Depending on how thin you want it, add more milk if desired (I wanted to drizzle mine, so I added additional milk 1 tbsp at a time until I got the consistency I wanted). If you prefer really sweet icing, add additional powdered sugar. Drizzle frosting over pumpkin buns just before serving.

This post is linked to Eat at Home.

Friday, September 30, 2011

Zucchini Pumpkin Cranberry Bread

Pin It
You know about my summer obsession; I’ve mentioned my mourning of the end of the season a few times. Need additional proof? I spent the first few weeks of September in a panic each time I went to the grocery store or farmer’s market, fervently praying that this wouldn’t be the week that watermelon disappeared. I continued to buy one and eat it in about four days, pouting when I felt like Ryan was eating too much of it and whining that he was stealing my happiness. Dramatic much? Don’t answer that.

Thankfully, much as I love summer temperatures (and watermelon), I also really love the foods of fall. Butternut squash, hearty soups, and pumpkin are welcomed with open arms into my kitchen each September. I like to think of this bread as the perfect compromise between fall and summer. The zucchini, leftover from summer’s abundance, gives moisture to this bread that is heavy on fall flavors: pumpkin, cranberries, and cinnamon.

I took a recipe from allrecipes.com and healthified it, knowing Ryan and I were likely to finish off the two loaves in a matter of days. We aren’t exactly a picture in self control when it comes to baked goods! :) I used mostly whole wheat pastry flour, cut the sugar in half, and reduced the butter, subbing unsweetened applesauce for most of it. The result was a minimally sweet, light-tasting quickbread that, as expected, didn’t last long in our house. I suppose if summer has to go, this is a pretty good way to wish it farewell….!

Looking for other quickbread recipes? I’ve got a whole bunch of them here!

One Year Ago: Pomegranate Banana Bread
Two Years Ago: Best Ever Pumpkin Chocolate Chip Cookies

Zucchini Pumpkin Cranberry Bread
inspired by allrecipes.com
Ingredients:
-3 eggs, lightly beaten
-1 cup sugar
-1 cup canned pumpkin
-1/2 cup unsweetened applesauce
-6 tbsp butter, melted
-1 tbsp vanilla extract
-3 cups all-purpose flour
-1 tsp baking soda
-1/2 tsp baking powder
-1/2 tsp salt
-1/2 tsp ground cinnamon
-1/2 tsp ground nutmeg
-1/2 tsp ground cloves
-1 cup shredded zucchini
-1 cup coarsely chopped cranberries
-3/4 cup pepitas

Directions:
1. Preheat oven to 350F. Spray two 9 x 5 inch loaf pans with cooking spray and set aside.
2. Combine eggs and sugar in a mixing bowl. Mix in pumpkin, butter, applesauce, and vanilla.
3. In a separate bowl, stir together flour, baking soda, baking powder, salt, cinnamon, nutmeg, and cloves. Stir into wet ingredients, mixing just until combined.
4. Stir in zucchini, cranberries, and pepitas, mixing to combine. Divide batter evenly among two prepared pans, smoothing the tops with a spatula.
5. Bake for 40-45 minutes, until an inserted toothpick comes out clean. Transfer pans to a wire rack to cool. Remove bread from pans once cooled completely.