#header-inner {background-position: center !important; width: 100% !important;}
Showing posts with label brownies. Show all posts

Wednesday, September 17, 2014

Amaretto Brownies

Amaretto Brownies | The Sweets Life
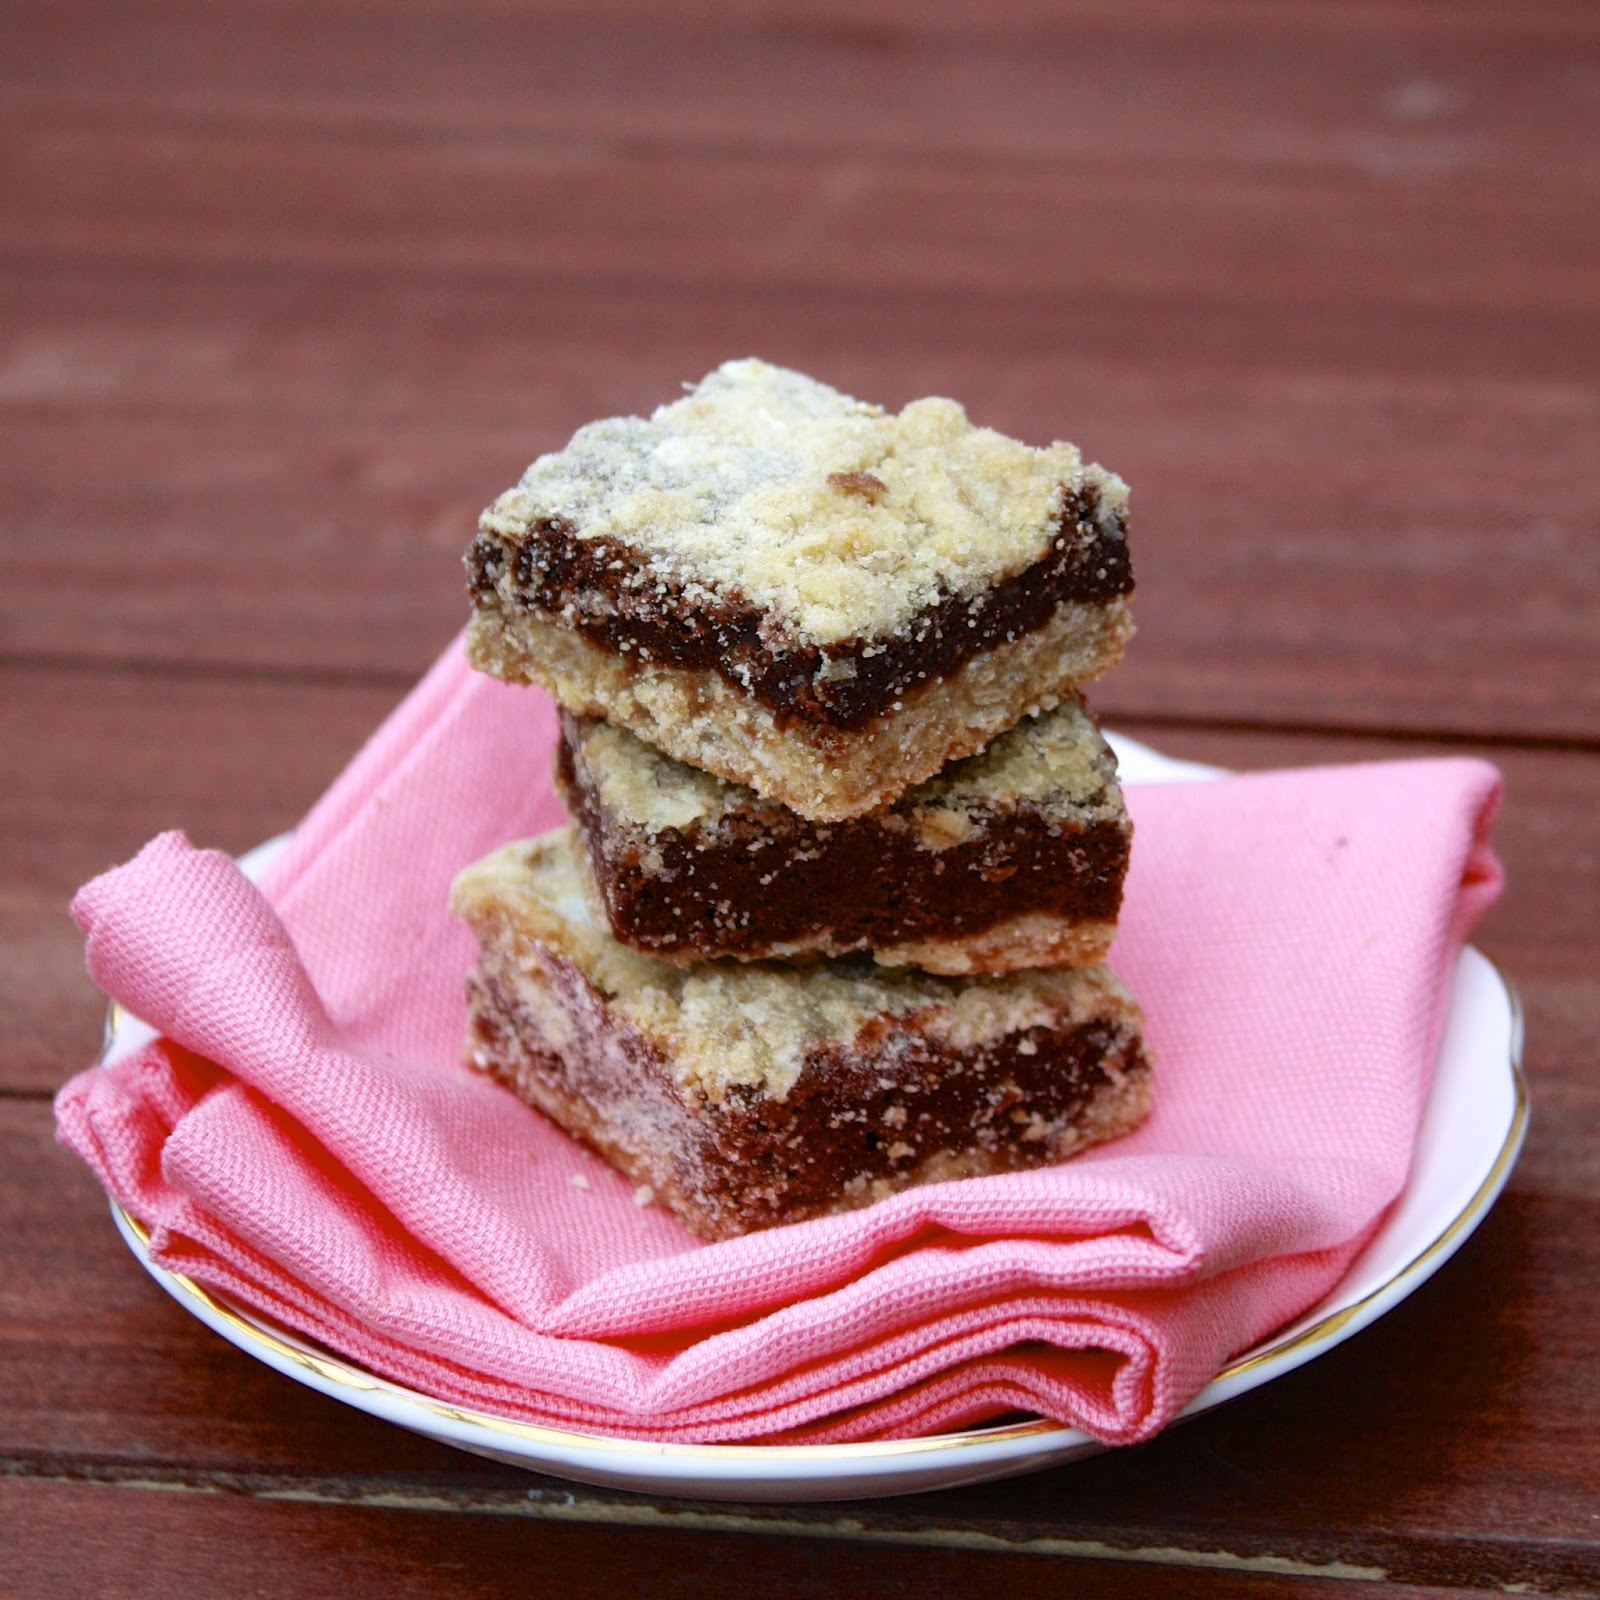
Amaretto Brownies 


I know, more brownies? I told you I’m surprising even myself with all these brownies coming out of my kitchen (first the oatmeal brownie bars, then the chilecinnamon brownies), but apparently it’s the dessert of the moment. What’s next? Time will tell, although I will say my ice cream maker has been far too neglected lately…
Pin ItAmaretto Brownies | The Sweets Life
I’m not disappointed in this brownie fixation, especially since I’m 3/3 now. These amaretto brownies are great when you’re craving a rich brownie, but want something a little different. With amaretto in both the brownie and the frosting, you definitely taste something special. Almond lovers won’t be able to resist these! For even more of an almond flavor, top them with slivered or sliced almonds. Like my other recent brownie recipes, these keep well for several days, but can also be frozen and saved for a brownie-craving day!
Five Years Ago: Homemade Kettle Corn

Friday, August 8, 2014

Cinnamon Chile Brownies

Cinnamon Chile Brownies | The Sweets Life
Cinnamon Chile Brownies


If you asked me my favorite dessert, I probably wouldn’t say brownies. (Duh. I’d say ice cream!) Even when I think about my favorite non-ice cream desserts, brownies still wouldn’t make the top of the list. That being said, I seem to be on a bit of a brownie kick lately. And by brownie kick, I mean “can’t get enough of them, have a list of at least four more brownie recipes waiting to try”. First there were the oatmeal brownie bars, which I’m still thinking about and planning to make again soon!
Pin It
Cinnamon Chile Brownies | The Sweets Life
My mom’s friend Brenda (Brenda, can I claim you as my friend too?!?) introduced us to this recipe and after we had them for my cousin’s bridal shower, I drove back to St. Louis, couldn't stop thinking about them, and made them again two days later. Although their official title is Cinnamon Chile Brownies, in our house we've dubbed them "Brenda's Brownies"...you can call them that too!

My use of the rainbow jimmies kind of reminded me of the cosmic brownies I made awhile back, but these brownies have a special ingredient…cayenne powder! Before you immediately dismiss this recipe because of that odd-sounding addition, hear me out. It works. A few years ago I made a Mexicanbrownie bottom cheesecake that had a little spiciness to it and I remember what a delightful surprise it was for taste testers. The same could be said here. You’ll bite and taste the intense chocolate on chocolate on chocolate, a triple whammy with chocolate chips studded throughout and ganache on top. Then, just as you swallow, you’ll get a hint of heat in the back of your throat. It’s just enough to notice, but not startle you, and it tastes like it belongs.
Cinnamon Chile Brownies | The Sweets Life

These are best served chilled, and also freeze well. And if you think freezing them will keep you from eating them, think again…I actually found them most addictive straight from the freezer!

One Year Ago: Linguine with Summer Vegetables and Goat Cheese and Oatmeal Chocolate Chip Cake with Cream Cheese Frosting
Two Years Ago: Fudgy Cosmic Brownies and Kentucky Style Turkey Burgers with Redeye Bourbon Onions & Cheddar (our FAVORITE!)
Three Years Ago: Chocolate / Peanut Butter Covered Pretzel Oreo Cheesecake Bites and Healthified Zucchini Bread 
Four Years Ago: Grilled Calzones and Cranberry Coleslaw

Wednesday, July 23, 2014

Oatmeal Brownie Bars

Pin ItOatmeal Brownie Bars | The Sweets Life
Oatmeal Brownie Bars 
I’m really really striving to live a bit more simply these days. We live in a world that constantly tells us we need more more more, but I’m making a sincere effort to ignore those voices and avoid a life of excess. I try to think twice before heading to the checkout with two shirts that are already similar to three I already own. I’m making a list before I go to Target and not allowing myself to stray from it (most of the time…). I’m only buying enough food to get us through the week and trying  not to let any of it go bad before we consume it.

I wish I could say I applied the same principle to these brownie oat bars. My intentions were pure. I made the pan of these and figured I’d keep a few and give the rest away. If there’s one thing I don’t need an excess of, it’s a pan full of butter and sugar! I made the recipe, cut them into small squares, and divided them into a few freezer bags, figuring I’d freeze them until it was time to give them away.

And then I tried one. And then another. And before I knew it, I had (admittedly, selfishly and excessively!) decided these weren’t leaving our house! The reason you only see one measly picture of them is because I was so smitten, I couldn’t be bothered to worry about capturing the perfect photograph. In my defense, I did share of few of them, but if I’m being honest, the majority of them were tucked away in my freezer where I enjoyed one or three as a guilty pleasure after putting Brecken to bed. I will absolutely be making these again, and I will absolutely (not?) be sharing them! They’re salty and sweet and absolutely perfect straight from the freezer!

Wednesday, March 5, 2014

Peanut Butter Cheesecake Brownie Bars


peanut butter brownies
Can we talk about baby girl clothes? Ugh, such a guilty pleasure. For so long I was completely convinced that I was having a boy and I was excited at the prospect for a lot of reasons, but a small part of me mourned the fact that I wouldn't be shopping for pink clothing and bows and butt ruffles. Color me surprised, of course, when February 2nd came along and our baby GIRL arrived. Visions of little dresses immediately danced in my head! Needless to say, I've had a lot of fun shopping for Brecken over the last few weeks and my mother-in-law commented that it's like I'm dressing a Barbie every day ;) Come to think of it, when my sister and I played Barbies, all we really ever did was change their clothes a million times!
cheesecake browniesPin It
Baby girl clothes really have nothing to do with brownies, except I'd say they're another guilty pleasure...especially when they contain a peanut butter cheesecake layer! As soon as I saw these brownies on Joanne's blog, I knew I needed to make them asap. Cut 'em small and serve them cold. If you're the type who loves a glass of milk with your chocolate dessert, these are the perfect accompaniment!
cheesecake brownies
As little Miss Brecken outgrows some of my favorite newborn outfits, you can probably find me crying in a corner stuffing my face with these brownies! Slow down baby girl!
One Year Ago: Chickpea Curry and Egg & Hash Brown Casserole with Spinach and Mushrooms
Two Years Ago: Braided Garlic Herb Bread and Peanut Butter and Chocolate Dipped Pretzels  
Three Years Ago: Apple Cranberry Baked French Toast and Chocolate Peanut Butter Chip Cookies 
Four Years Ago: Golden Grahams S'mores Bars and Baby Blue Party Punch

Wednesday, December 18, 2013

Dulce de Leche Brownies


brownies
Dulce de Leche Brownies
You've been running around like crazy for the past three weeks, things picking up just before Thanksgiving and not slowing down since. You've been the host one day and the guest the next. You've played Santa, or at least started shopping for your gifts (hopefully!). You're consisting on a diet of party foods and cookies, no matter how many times you swear you're going to eat clean for a day. On top of it, you're meeting pediatricians, attending childbirth classes, and decorating a nursery. Okay, maybe that last part is just me! Needless to say, though, you're busy...and just when you think you might be getting all the cooking and baking and cleaning and gifting all together, you remember you volunteered to bring something to that (fill-in-the-blank) party you were invited to. 
Pin Itbrownies
Have no fear, these brownies will save the day! They're easy, much easier than cookies which require you to shape each one and break out multiple pans. They're simple thanks to using store bought dulce de leche (a jar of caramel sauce would also work)...heck, you could even use brownie mix if you're so inclined! Best of all, they're popular...because who doesn't love chocolate and caramel?! Slow down, take a deep breath, and make a batch of these, then savor the last week before we celebrate Christmas!

One Year Ago: Slow Cooker Vegetable Sausage Soup
Two Years Ago: Soft Frosted Sugar Cookies 
Three Years Ago: Baked Vegetable Mac and Cheese and Green Tea Sugar Cookies
Four Years Ago: Strip Steak with Rosemary Wine Sauce and Chocolate Covered Pretzels

Wednesday, April 3, 2013

Peppermint Meringue Brownie Cake

Pin It
Did you know that when you beat egg whites to make meringue, and flavor it with peppermint extract, it tastes like toothpaste? Now that I've grossed you out, rest assured...it's not a bad thing...and I'm only talking about the pre-baked meringue! There's just something about the foaminess that's reminiscent of brushing your teeth.
This was actually my first time making meringue and I was surprised by how easy it was. It did deflate quite a bit after it came out of the oven, but it was still a beautiful topper for the brownie cake. Although it's called a brownie cake, I'd say it's more brownie than cake, especially in terms of texture. The brownie is dense with a fudgy center, my preferred type of brownie. The peppermint chocolate meringue offsets the richness of the brownie and makes for a fancy dessert (that couldn't be easier to make!).
This will feed at least 12, if not more. Thin slices are all you need to satisfy! This was best the day it was made, but it will keep at room temperature for 2-3 days. Next time you're craving a brownie, break out the egg whites and make this brownie cake. Can't get into the peppermint flavoring? Just omit from the meringue and make as otherwise directed!

One Year Ago: Mini Cheesecakes
Two Years Ago: Homemade Dog Treats
Three Years Ago: Almond M&M Bird's Nest Cookies

Friday, January 25, 2013

Peanut Butter and Fudge Brownies with Salted Peanuts

 Pin It
Over a week ago I teased my Facebook fans, mentioning these brownies. Shame on me for not getting them posted sooner, but I promise they are worth the wait. I've put peanut butter chips in brownies before and mixed peanut butter and nutella with brownie batter, but these are by far my favorite peanut butter brownie creation!
The brownies are dense, erring on the side of fudgy rather than cakey (just how I like them!). Topped with a thin layer of peanut butter frosting followed by ganache, they're sure to be a hit for any chocolate peanut butter fans out there. I cut them into pretty small squares, figuring they would be pretty rich. While they are rich, they weren't so rich to keep me going back for a second or a third! Store these in the fridge and don't worry about bringing them to room temperature to serve; they're best with a bit of chill still in them!

Want to make them extra indulgent? Double the peanut butter frosting layer!

One Year Ago: Roasted Sweet Potato Salsa
Two Years Ago: Kaleslaw with Red Pepper
Three Years Ago: Three Bean Salad

Friday, November 16, 2012

Caramel Brownies

Pin It
You can't deny the fact that cake mixes are convenient. You also can't deny the fact that people love them. I'm not one to judge. After all, I have a minor obsession with cake batter ice cream, cake batter blondies, and this pumpkin cake that uses a yellow cake mix. However, I got a little bitter recently when, for Ryan's work Halloween party, the second place winner won with a concoction using canned pie filling and cake batter. I know the dessert-affectionately called dump cake-and I love the stuff too...but prize-winning? Really? Don't even get me started on the fact that the grand prize went to STORE BOUGHT GUACAMOLE. Humph.
Anyway, these use a German Chocolate cake mix. And they're good, really good. I made them for a friend's birthday when she requested caramel and chocolate and she deemed them the best thing she'd ever eaten. I don't know that I'd go that far, but hey, cake mix wins again! When you're looking for an easy dessert that will satisfy the masses, this one can't be beat...cake mix and all!

One Year Ago: Crockpot BBQ Beer Chicken
Two Years Ago: Snickers Cups
Three Years Ago: Upside Down Apple Pie

Tuesday, August 7, 2012

Fudgy Cosmic Brownies

Pin It
When it came to Little Debbie snacks, our family was more of a Nutty Bars household than cosmic brownies. Even so, I still had my fair share of cosmic brownies while growing up...usually from strategic food trades made in the lunch room. Although it's been a long time since I've bitten into a Little Debbie cosmic brownie, I haven't forgotten how dense and sweet and fudgy they are.

Saturday, April 28, 2012

Thin Mint Brownies

Pin It
A few weeks ago, Ryan and I hosted a small group of college students from Saint Louis University at our house for dinner. Our church meets near SLU and we have a few students who attend regularly, so we thought it'd be fun to have them and a few of their friends over for a meal. Ryan and I aren't so far out of college that we've forgotten how awesome it is to get a (free!) meal that isn't from a dining hall or a fast food restaurant.

Monday, April 23, 2012

Brownie Macadamia White Chocolate Cookies

Pin It
I've been hoarding some macadamia nuts in my pantry for awhile now. Last year I made White Chocolate Macadamia Nut Cookies (to die for!) and discovered just how pricey they were. Since then, I've been veeeeery selective about how I use the nuts, wanting to save them for only the very best recipes!

Friday, March 23, 2012

Ghirardelli Brownies with Chocolate Ganache

Pin It
This is another one of those recipes from the early days of The Sweets Life that demanded to be resurrected. Honestly, these brownies probably deserve to be blogged about once a month or so until every single one of my readers had made them. Make them exactly as written--I truly believe the recipe has been perfected. The cake flour, the Ghirardelli chocolate, the ganache...all necessary!

Sunday, September 11, 2011

Chocolate Liqueur Brownies

Pin It
When it comes to brownies, I am all about the fudgy variety. Bring. On. The. Goo. I loved the sweet and salty brownies in part because of their consistency. If you didn’t know better, you’d think they were underbaked. Similarly, these chocolate liqueur brownies are dense, rich, and fudgy. Instead of a salted caramel filling, the flavor of chocolate liqueur is infused throughout!

I was a little concerned that the liqueur wouldn’t be prominent enough but it was noticeable in every bite. As if booze-filled gooey brownies weren’t decadent enough, we topped these with a scoop of vanilla ice cream and another drizzle of chocolate liqueur. Pleasures like these are why I could never, ever give up dessert!

Note--if you don't have chocolate liqueur on hand, you could easily use another liqueur (such as Kahlua) and get a similar flavor. Special thanks to Maria for hooking me up with the chocolate stuff! :)

One Year Ago: Banana Oatmeal Date Cookies


Chocolate Liqueur Brownies
adapted from here

Ingredients:
-1 1/2 cups flour
-1/2 tsp baking powder
-1/2 tsp salt
-2/3 cup butter (10 tbsp plus 2 tsp)
-3 oz. unsweetened chocolate
-3 large eggs
-2 cups sugar
-1/3 cup chocolate liqueur plus 1 tbsp, separated

Directions:
1. Preheat oven to 350F. Line a 9-inch baking pan with foil and spray with cooling spray.
2. In a saucepan, melt the chocolate and butter over low heat until smooth and melted.
3. In a separate mixing bowl, beat sugar with eggs until light in color. Stir in melted chocolate and mix. Stir in chocolate liqueur.
4. In a separate bowl, sift together flour, baking powder, and salt. Add to chocolate mixture and beat well.
5. Pour batter into the prepared pan. Bake for 30 minutes or until the top springs back when touched lightly in the center. Cool pan on a wire rack. Once completely cooled, brush with remaining tablespoon of liqueur. Allow to set before cutting into slices and serving.
*Bars will keep, wrapped well, at room temperature for a few days

Saturday, September 3, 2011

Mexican Brownie Bottom Cheesecake

Pin It
Of all the cheesecakes I made for the Cheesecake Extravaganza, I was most skeptical about this one. I wanted to make one with a brownie bottom, but I wasn’t convinced that the cinnamon/cayenne combination would be a crowd-pleaser.

I couldn’t have been more wrong. People, myself included, really loved this unique cheesecake. Upon first bite, your mouth is filled with cinnamon creamy goodness and a bit of rich brownie. It isn’t until a few chews in that you’re suddenly met with just the slightest punch of cayenne. The contrast is surprising, but something about it just works.

I made 1/3 of the recipe to yield two 4 ½-inch cheesecakes, but I’m quite certain there would have been no complaints if I’d made a full-sized cake! Now that I’ve put cayenne in my dessert, I suppose it’s time to put chocolate in something savory, huh?

...and with that I think I'm FINALLY done with cheesecake posts! I did my best to spread them out to not burn you out...but I'll be honest...I'm tempted to make another cheesecake sometime soon. Consider yourself warned ;)


One Year Ago: Chilled Mango and Cucumber Soup


Mexican Brownie Bottom Cheesecake
as seen on Buns in my Oven, originally from Perry's Plate

Ingredients:
for the crust-
-1/2 cup butter, cut into pieces
-4 oz unsweetened chocolate, cut into pieces
-1 cup sugar
-2 eggs
-1 tsp vanilla extract
-1/2 cup flour
-2 tsp cinnamon
-1/2 tsp cayenne pepper
-pinch of salt

for the filling-
-3 (8 oz) packages cream cheese, softened (can use 1/3 less fat)
-3/4 cup sugar
-1 tsp vanilla extract
-1 tbsp cinnamon
-1/2 cup sour cream (can use light)
-3 eggs

Directions:
1. Preheat oven to 350F. Spray an 8 or 9-inch springform pan with cooking spray.
2. Melt the butter over medium-low heat. Once butter is melted, reduce heat to low and stir in chocolate until melted. Remove from heat and stir in sugar. Add eggs, one at a time, beating after each addition. Add vanilla. Stir in flour, cinnamon, cayenne, and salt, stirring vigorously until batter is smooth.
3. Pour batter into prepared pan and bake for 30 minutes, until the center is barely set. Remove from oven and allow to cool.
4. Reduce oven temperature to 325F.
5. While brownie bottom is cooling, prepare filling. Mix cream cheese, sugar, cinnamon, and vanilla in a mixing bowl until well blended. Stir in sour cream. Add eggs, mixing on low speed, just until blended. Pour batter over cheesecake crust.
6. Place springform pan on a rimmed cookie sheet. Add 3/4-inch of water into the baking sheet. Bake at 325F for 1 hour and 5 minutes, or until center is just set (middle will jiggle slightly). Turn off the oven and crack the oven door. Allow to cool until it can be touched without hot pads. Remove from oven and cool on counter to room temperature.
7. Cover and refrigerate at least 4 hours, or overnight. To serve, run a knife around the rim of the pan to loosen cake before removing outer sides of pan. Slice into pieces and serve.

Monday, August 1, 2011

Sweet and Salty Brownies

Pin It


I’ve made a new friend in the kitchen. Her (his?) name is Fleur de Sel. If you aren’t familiar with Fleur de Sel, you may want to get acquainted. The bottle I picked up at the gourmet spice shop near my parent’s home was worth every penny. If you can’t find it nearby, do yourself a favor and order a bottle off of Amazon.

After toying with the salty/sweet dessert combination (like in these cookies), I finally bit the bullet and went for the ultimate combo: rich, fudgy brownies with a salted caramel filling, topped with sugar in the raw and fleur de sel. I have Brown-Eyed Baker to thank, who took the infamous Baked Explorations brownie recipe and slightly adapted it to come up with this salty variation.

These brownies were knock-your-socks-off good. While Ryan still says these brownies are his favorite (that desperately need to be remade because the pictures don't do them justice!), I have moved this brownie recipe to the very top of my list. They take salty and sweet to a new level—the marriage of the two is best experienced, my words don’t carry the same impact that one bite will. Find yourself some fleur de sel, you won’t be disappointed!

(And now that I have a jarful of the stuff, you can expect more recipes on The Sweets Life featuring it…so your purchase won’t go to waste!)


One Year Ago: Raspberry Citrus Bars

Sweet and Salty Brownies
from Brown-Eyed Baker

Ingredients:
for the salted caramel-
-1 cup granulated sugar
-2 tbsp light corn syrup
-1/2 cup heavy cream
-1 tsp fleur de sel
-1/4 cup sour cream

for the brownie batter-
-1 1/4 cups all-purpose flour
-1 tsp table salt
-2 tbsp dark unsweetened cocoa powder
-11 oz. dark chocolate, coarsely chopped
-1 cup unsalted butter, cut into 1-inch cubes
-1 1/2 cups granulated sugar
-1/2 cup light brown sugar
-5 eggs, at room temperature
-2 tsp vanilla extract

for the topping-
-1 1/2 tsp fleur de sel
-1 tsp coarse sugar

Directions:
1. To make the caramel, mix the sugar and corn syrup with 1/4 cup water in a medium saucepan. Cook over high heat until the mixture is dark amber in color (or an instant read thermometer reads 350F), 6-8 minutes (mine took longer than that!). Remove from heat, slowly add the cream (mixture will bubble), followed by the fleur de sel. Whisk in the sour cream and set aside to cool.
2. Preheat the oven to 350F. Butter the sides and bottom of a glass or light-colored metal 9x13 inch pan. Line the bottom with parchment paper and butter the parchment.
3. Whisk together the flour, salt, and cocoa powder in a medium bowl.
4. Melt chocolate and butter in a double boiler set over a pot of simmering water. Stir until the mixture is completely melted and combined. Turn off the keep, add both sugars, and whisk until combined. Remove the bowl from the pan and set aside until it cools to room temperature.
5. Add three eggs to the chocolate mixture, whisking just until combined. Add the other two eggs and whisk just until combined. (Do not overbeat or brownies will be cakey!) Stir in vanilla.
6. Sprinkle the flour mixture over the chocolate and fold the ingredients until just a trace amount of the flour mixture is visible.
7. Pour half of the brownie mixture into the pan and smooth the top with a spatula. Drizzle 3/4 cup of the caramel sauce over the brownie layer, making sure the caramel doesn't come into contact with the edges of the pan (it will burn if it does!). Spread the caramel evenly over the brownie layer and then spoon the remaining brownie batter over the caramel. Smooth the batter gently to cover the caramel layer.
8. Bake for 30 minutes, rotating the pan halfway through the baking time. Brownies are done when you insert a toothpick in the center of the pan and it comes out with a few moist crumbs.
9. Remove brownies from the oven and sprinkle with fleur de sel and coarse sugar. Cool the brownies completely before cutting and serving.

Monday, April 18, 2011

Breakfast Brownies

Brownies...for breakfast? This isn't your Monday morning "starting fresh after an unhealthy weekend" breakfast. No, this is more like your "got home at 3 am, craving some eats before I crash" breakfast. With cream cheese, peanut butter, and bacon, it has at least some elements of breakfast foods, legitimizing its name, or so I've decided.

Although I didn't serve this for breakfast, the friends I shared this decadent dessert with over the weekend had fun analyzing the components of the dish and dubbing it the breakfast brownie. These days, I'm more likely to be waking up closer to 3 am than going to bed at 3 am, but I wouldn't complain about eating this at breakfast, or anytime really!

This isn't the first time I put bacon in a baked good, but I was inspired to try it again when I receive a Foodbuzz email about a contest sponsored by Denny's. The only rule was to include bacon in a recipe but naturally, I found myself concocting dessert recipes in my head. This was the byproduct of my daydreaming: a rich brownie base topped with peanut butter cream cheese frosting, chopped peanuts, and candied bacon.

This "breakfast" dessert is not for the fainthearted...a small slice satisfies even the biggest sweet tooth (and I rarely think that). The contrasting sweet and salty elements provide the best of both worlds. I found the brownie was even better the second day!

Served with a tall glass of cold milk, this breakfast brownie is a grand slam!

One Year Ago: Crispy Tilapia Sandwiches

Breakfast Brownies
*serves 10-12


Ingredients:
for the brownie-
-6 tbsp unsalted butter
-2 cups (12 oz.) semisweet chocolate chips
-3 eggs
-1 cup granulated sugar
-1 tbsp instant coffee
-1/2 tsp vanilla extract
-1/2 cup all-purpose flour
-1/4 tsp baking powder
-1/4 tsp salt

for the frosting-
-5 oz. 1/3 less fat cream cheese, at room temperature
-4 tbsp (1/2 stick) unsalted butter, at room temperature
-2 1/2 cups powdered (confectioners') sugar
-1/3 cup creamy peanut butter

for the candied bacon-
-2 slices smoked bacon
-brown sugar & turbinado sugar (approximately 1-2 tsp of each)

for topping-
-1/4 cup dry-roasted peanuts, coarsely chopped

Directions:
1. To prepare the brownie, grease and flour a 9-inch tart or pie pan. Preheat oven to 350F. Melt the butter in a bowl over simmering water. Add chocolate chips, remove from heat, and stir until smooth and melted. Set aside to cool.
2. In the bowl of an electric mixer, beat the eggs, sugar, coffee, and vanilla until light and fluffy. Mix in cooled chocolate. Add flour, baking powder, and salt, mixing just until combined.
3. Pour batter into the pan, baking for 35-40 minutes, until the middle puffs up (the top may crack). Remove from oven and cool to room temperature.
4. While the brownie is baking, make the bacon by cooking it in a skillet over medium heat. Once bacon is lightly browned but still flexible, remove bacon from skillet and drain on paper towels. After pouring the fat off of the skillet, return bacon and sprinkle with brown and turbinado sugar. Cook bacon over low heat, turning occasionally until sugar is dissolved and looks to be caramelized on the bacon (8-10 minutes). Remove bacon from skillet and set aside.
5. To make the frosting, beat cream cheese and butter in a medium-sized bowl until light and fluffy. Add powdered sugar, 1/2 cup at a time, beating after each addition. Beat in peanut butter, scraping down the sides of the bowl, until all is combined.
6. Once brownie has cooled, spread frosting atop brownie (there will be some extra frosting). Crumble bacon and sprinkle over the frosting. Top with chopped peanuts.
7. Refrigerate until serving, removing from the fridge approximately 10 minutes before serving.

**This post is my submission to the Foodbuzz and Denny's BACONALIA challenge.
This post is linked to Eat at Home.

Sunday, March 20, 2011

Marshmallow Brownies

If I mention the word "brownies" in the house, Ryan usually makes a face. Unless I'm making the Ghirardelli brownies, he claims he doesn't really like brownies (I know, I know, who doesn't like brownies?!). As a result, there are a lot more cookies on this blog than fudgy, chocolately squares of goodness.

I try to be an equal opportunist when it comes to desserts, and it was high time I added another brownie recipe to The Sweets Life. It's a good thing I did, too, because my friend Greg declared these his "new favorite dessert" when I brought these to a church meeting. I know what he's getting at; the brownie base is moist and chewy, but these are made extra special thanks to the marshmallow layer and chocolate frosting. I caught myself eating the tops off of these, I found the frosting irresistible!

If you're looking for a jazzed up brownie, try this one. Even non-brownie lovers were caught eating these ;)


One Year Ago: Veggie Tuna Pasta Bake

Marshmallow Brownies
from First Look, Then Cook

Ingredients:
for the brownies-
-1 cup (2 sticks) unsalted butter, melted
-2 cups granulated sugar
-1/4 cup cocoa
-4 eggs
-2 tsp vanilla
-1 tsp salt
-1 1/2 cups flour
-2 1/2 cups mini marshmallows

for the frosting-
-1/4 cup butter, melted
-2 tbsp milk
-1/3 cup cocoa
-1 1/4 cups powdered sugar

Directions:
1. Preheat oven to 375F and line a 9 x 13 pan with foil that has been sprayed with cooking spray. In a large bowl, mix together melted butter, sugar, cocoa, eggs, vanilla, and salt. Stir in flour, mixing just until combined. Pour batter into prepared pan and bake for 25 minutes.
2. Remove pan from oven and top with mini marshmallows. Return to oven for 2 minutes. Remove from oven a second time and, with a knife dipped in water, spread marshmallows evenly. Cool completely.
3. Whisk frosting ingredients together until smooth and spread over marshmallow layer once cooled. Cut into squares and serve immediately or refrigerate until serving (if desired).

Sunday, December 26, 2010

Giant S'mores Cake

Pin It

Okay, I know I promised non-dessert recipes after Christmas, but this one was too good not to share! Stay tuned for tomorrow, the recipe WON'T contain sugar! This cake was made for my dear friend Maggie, whom I hosted a birthday party for a few weeks ago. The party menu consisted of a number of her favorites, including two soups that I'll be posting over the next two days. Like me, Maggie is a huge fan of dessert and I knew she's be easy to please (so long as I avoided pumpkin or anything melon-flavored!). Still, I wanted a dessert she'd both appreciate and be impressed by.

It was actually months ago that I first saw this cake online. I was in awe. A giant s'more, how awesome is that?! My initial thought was actually that it'd be perfect for Maggie's birthday, and I stored the idea away, anxiously awaiting her party in December.

Execution of this cake proved to be easier than anticipated. I was worried about assembling the layers, but with an extra set of hands (thanks Julia!), it wasn't too difficult. The graham cracker layer was my favorite, and I didn't complain about the extra scraps of those! The cake pieces were giant and the flavor really was reminiscent of a s'more...an extra indulgent s'more, perfect for a special birthday!

One Year Ago: Butternut Squash, Black Bean, & Feta Pita Sandwiches (I still remember how much we loved these...and I really need to re-make and re-photograph because the pictures don't do the recipe justice!!)

Giant S'mores Cake
from Sweet Tooth

Ingredients:
for the graham cracker layer-
-1 cup unsalted butter, softened
-1 1/2 cups granulated sugar
-1/2 cup brown sugar
-4 large eggs
-2 tsp vanilla extract
-3 cups all-purpose flour
-2 cups graham cracker crumbs
-1 tsp salt
-1/2 tsp baking soda

for the brownies-
-1 box fudge brownies

for the marshmallow-
-2 jars Marshmallow Fluff (~15 oz.)
-kitchen torch

Directions:
1. First make the graham cracker cookie bars. Preheat oven to 375F and line a 9 x 13" pan with foil, spraying with cooking spray.
2. Using an electric mixer, cream butter and sugars until light and fluffy. Add eggs, one at a time, beating well after each addition. Mix in vanilla.
3. In a separate bowl, stir together flour, graham cracker crumbs, salt, and baking soda. Stir dry ingredients into butter mixture, just until combined.
4. Pour batter into prepared pan, spreading evenly. Bake for 20-25 minutes, until an inserted toothpick comes out clean. Allow to cool completely before removing from the pan.
5. Next, prepare the brownies according to the box's instructions (use an 8x8" pan and line it with greased foil). Once brownies have been baked and cooled, remove from the pan.
6. To assemble, remove the cookie bar from the pan and lay on a cutting board. With a large serrated knife, cut off sides to form an 8x8" piece. Cut the 8x8" piece in half horizontally (the result will be 2 thin 8x8 cookies). Place one cookie piece on an 8x8" piece of cardboard. Top the cookie with the brownies.
7. Fill a piping (or ziploc) bag with marshmallow fluff and cover the brownie with a thick, even layer of the fluff. (It will be messy and ooze off the sides!)
8. Using a kitchen torch, torch the marshmallow evenly. Allow to set for a few minutes before laying the final cookie layer on top.