#header-inner {background-position: center !important; width: 100% !important;}
Showing posts with label tart. Show all posts

Monday, November 25, 2013

Chocolate Pecan Tart


pecan tart
Chocolate Pecan Tart 


When I plan my meals each week, I almost always start by flipping through my manila folders stuffed with recipes ripped from magazines. Since I’m also usually baking for one thing or another each week, this includes a look through the “desserts” folder. Almost every week I would pause at this Chocolate Pecan Tart, mouth watering at the deep chocolate color splashed on the page of Real Simple, and then opt out of making it for one reason or another.
Pin It
pecan tart
Last month I finally bit the bullet and yanked it from the folder, determined to finally give it a try. Of course, it’s always the recipes you wait the longest to try that are the ones you should’ve made immediately! This dessert got more comments and compliments when I brought it to church than anything else I can remember in the recent past. People snuck extra pieces, hounded me for the recipe, and more than anything made me realize what a terrible mistake I’d make in holding out on making it.
chocolate tart
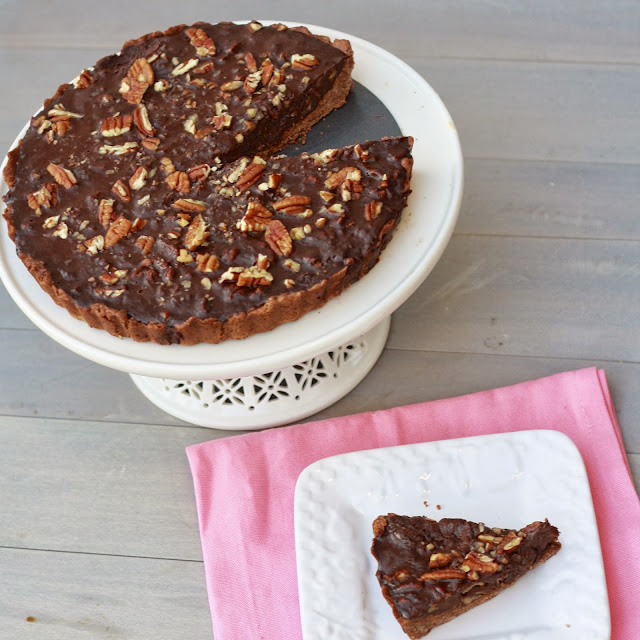
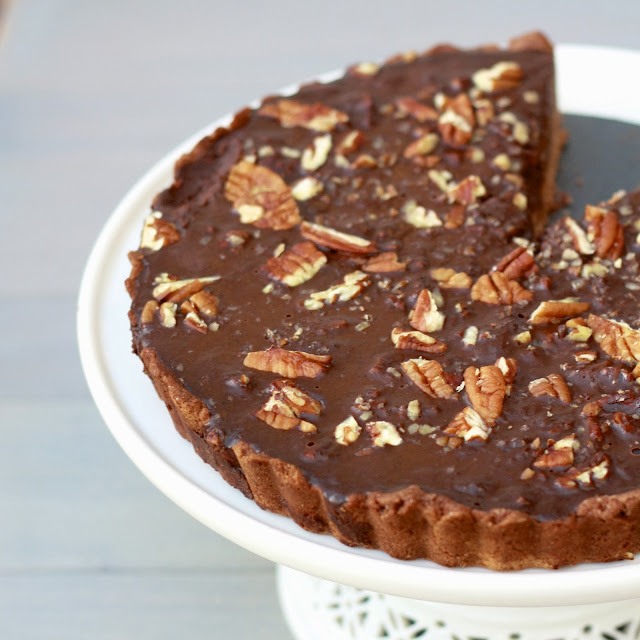
The tart isn’t anything outrageous or complicated: it’s a basic chocolate crust filled with what is essentially a chocolate ganache studded with toasted pecans. Then again, can you ever go wrong with chocolate?! Because this comes together in a snap and can be made ahead of time, it’s likely the missing dessert for your Thanksgiving spread!
chocolate tart

One Year Ago: Mozzarella, Raspberry, and Brown Sugar Panini
Two Years Ago: BBQ Collard Greens with Edamame
Three Years Ago: Leftover Turkey Sandwiches
Four Years Ago: Ryan's Thanksgiving Proposal

Tuesday, May 21, 2013

Raspberry Tart

Pin It
 According to Ryan, this dessert could win contests. Now, he’s not by any means a contest judge, but living in our house, the boy has tasted a lot of different desserts so I tend to trust his opinion! He claims it’s beautiful enough to be behind the glass case at some bakery or dessert shop. I can’t disagree—it’s definitely one of the most beautiful desserts I’ve made (although my sister-in-law Katelyn gets all raspberry arranging-credit!).
We shared this with Ryan’s family and it was met with rave reviews from everyone—not always easy to do when there are 9 of us with differing tastes and opinions on what qualifies as a fantastic dessert. The tart is only moderately sweet and the cheesecake layer is so thin it is barely noticeable, but together they form a fantastic base that allows the raspberries to shine as the star ingredient. I recommend making this several hours ahead of time to give the flavors a chance to meld; the one piece that lasted until the next day was even better! (Note—the raspberry jam does start to bleed by day 2 so just be aware if you want to make it a full day in advance)

One Year Ago: Chicken with Kale and Freekeh Lentil Pilaf

Two Years Ago: Black Beans and Coconut Lime Rice
Three Years Ago: Poppyseed Bread

Wednesday, May 1, 2013

Feta Asparagus Quiche

Pin It
My mom is kind of an entertainer extraordinaire. She's the woman who manages to beautifully decorate the (spotless) house, complete with an exquisitely designed table. It's never enough to serve you one appetizer and one dessert...she's always there with multiple options so that if you don't like chocolate there's something sweet for you to end your meal with. And to top it all off, she answers the door looking straight off the cover of a magazine. I know she's reading this and denying it, but those who know her are smiling and nodding.
Over Easter weekend, she hosted a bunch of the women in my dad's family for brunch. Since I didn't come in until the night before I wasn't able to help her prepare the four (yes, four!) different kinds of dessert. I was, however, around to help make this quiche!
This was different in that the crust was made with olive oil instead of butter and we were skeptical of the finished result. (Spoiler: the crust was just as light and flaky as it would have been with butter!) The filling is simple, asparagus and feta covered in an egg mixture. With asparagus in season, now is the time to make it!
Might I suggest you make it for your mother extraordinare this Mother's Day?! 

One Year Ago: Strawberry Cream Cheese Crumble Tart
Two Years Ago: Rainbow Chopped Salad
Three Years Ago: Basil Baked Tilapia

Wednesday, August 22, 2012

Greek Tomato Tart

Pin It
I had an extra pie crust to use up after making the tomato pie and I was tempted to make the tomato pie again, but I was out of mozzarella. We did have some feta hanging out in our fridge and I typed “pie crust, tomato, feta” into Google and it spit out this recipe from Real Simple magazine. Thanks to the thyme growing like crazy in my backyard herb garden all I needed were the olives!

Tuesday, May 1, 2012

Strawberry Cream Cheese Crumble Tart

Pin It
Strawberries are back. There are huge stacks of them at the grocery store each week, bright red berries in the prime of their ripeness. I've gotten into the habit of buying them, and will continue to do so until the (sad) day when they disappear from grocery shelves or start to look pathetic and unappetizing. Although I'm perfectly happy washing them, chopping off their tops, and eating them by the handful, I'm always looking for new ways to incorporate them into recipes.

Wednesday, February 22, 2012

Mushroom, Spinach, and Scallion Tart with Goat Cheese

Pin It
Any time I've ever read anything about phyllo dough--whether in a magazine, a cookbook, or another blog, it always mentions how difficult it is to work with. I've read about how easily it tears, how crucial it is to cover the pieces you aren't using, and how temperamental it is in general. Do you blame me for avoiding it?!
Often times when my mom pays a visit, she comes bearing food gifts, usually things like leftover quinoa that won't be good by the time she's back in town (so I use it for cookies!) or, most recently, half a package of phyllo dough. Because the thought of wasting food makes me cringe, I knew it was time to conquer phyllo.
One night after work I got to work. Not sure what to expect, I probably looked like the Tasmanian devil ripping around my kitchen...so paranoid was I that my dough would immediately dry out. As it turned out, the phyllo wasn't nearly as finicky as I'd anticipated. My first piece tore as I placed it in my baking dish, but the rest of the process went quite smoothly.
The finished product was a pleasant surprise. The flavors reminded me a bit of this egg dish. My only lesson for next time is MORE oil/butter on each layer--mine was flaky but could've been even flakier! This would be lovely as a breakfast, brunch, or lunch dish. If you're not up for working with phyllo, I think this would work just as well with a store bought pie crust pressed into a pie dish (you'd likely have enough filling for almost 2 pies!).

One Year Ago: Southern Banana Pudding (WHY haven't I made this again?!)
Two Years Ago: Pesto Roasted Vegetables

Mushroom, Spinach, and Scallion Tart with Goat Cheese

Ingredients:
-1 lb mushrooms, trimmed and sliced 1/2-inch thick (called for a mixture, I used all button)
-5 tbsp extra-virgin olive oil
-1 tsp kosher salt
-12 scallions, ends trimmed and cut into 2-inch pieces, washed & shaken dry
-3 1/2 cups (4 oz) flat leaf spinach, stemmed, washed, and shaken dry
-10 sheets phyllo dough (14 x 9 inch)
-4 oz fresh goat cheese
-3 large eggs
-1/3 cup milk (I used half and half)
-3 tbsp chopped mixed fresh herbs (I omitted, none on hand)

Directions:
1. Preheat oven to 425F. Line a baking sheet with foil. Toss mushrooms with 2 tbsp olive oil and 3/4 tsp salt. Place on lined baking sheet and roast for 10 minutes. Add scallions and roast for an additional 15 minutes. Move mushrooms and scallions to one side of pan. Add spinach to empty side and roast until wilted, about 3 minutes. Remove from oven. Let cool briefly and then squeeze spinach dry.
2. Brush an 11 x 7 inch pan (or a 10-inch round pan) lightly with some of the remaining olive oil. Working with one piece of phyllo dough at a time (keep the rest covered under a damp towel), place sheet on tart pan, leaving a 1-inch overhang. Brush lightly with olive oil. Place a second sheet of phyllo into the pan and brush with oil. Continue with remaining sheets. Fold edges at top. (I placed most sheets in one direction and a few in the opposite direction--horizontally, 2 across--in order to best cover the entire pan.)
3. Form a double layer of aluminum foil into a rectangle and place on top of phyllo. Place pan on baking sheet and baking for 7 minutes, until edges are set. Remove foil and baking an additional 3 minutes, until golden all over. Remove from oven, leaving baking sheet.
4. Reduce oven to 375F. Puree goat cheese, eggs, milk, and remaining 1/4 tsp salt in a blender until smooth. Add herbs and pulse to combine. Spread roasted vegetables over crust and pour custard over the top.
5. Place tart on baking sheet in oven and bake until custard is set, 20-23 minutes. Remove from oven and allow to cool for 10-15 minutes on a wire rack before cutting and serving.

Saturday, January 21, 2012

Chocolate Caramel Banana Hazelnut Tart

Pin It
Tell me I’m not the only one who gets satisfaction out of the words “I told you so”. Granted, these four little words have the power to jumpstart an argument or hurt feelings, so I try to use them sparingly. But seriously, doesn’t it feel so good sometimes to say “I told you so”, if only in your head?!

I made this Banana Hazelnut Caramel Tart in a chocolate crust for New Years Eve. Unfortunately, we had an overwhelming amount of food and sweets that night and I was left with the majority of a tart heading into January. Wanting it as far away from my sweet tooth as possible, I packed it up for Ryan to take to work. He tried to resist. Rolled his eyes. Mumbled something about his coworkers not wanting any and it being January—the season of resolutions and healthy eating. Not to be deterred, I grabbed the plate on the way out the door, once again reminding him to take it in to work as he dropped me off at my office building.
Shortly after lunch I received an instant message from him. I believe the exact phrase was, “People are going crazy for this tart.”

I told you so. (Couldn’t resist)

Why wouldn’t they? It’s a chocolate crust filled with a mixture of homemade caramel, Nutella, and banana then topped with ganache. A variety of intense flavors, but too good to stay away from-even in early January! I’ll admit, this dessert gave me a few problems. My caramel seized up and it wasn’t until I brought out the secret weapon (my KitchenAid mixer) and mixed on high with the Nutella and mashed bananas that I got it all into a smooth, pourable texture.
Not a fan of banana? Omit. No Nutella on hand? Swap it out for peanut butter. I left mine plain, but it’d also be pretty sprinkled with hazelnuts, as Bria did.

One Year Ago: Mini Turtle Cheesecakes
Two Years Ago: Popovers


Chocolate Caramel Banana Hazelnut Tart
from These Peas are Hollow

Ingredients:
for the crust-
-1 stick unsalted butter, softened
-1/2 cup powdered sugar
-3 egg yolks
-1/4 tsp salt
-1 1/2 cups all-purpose flour
-1/4 cup cocoa powder

for the filling-
-1/2 cup granulated sugar
-2 tbsp water
-2 tbsp heavy cream
-2 tbsp unsalted butter, softened
-1/4 cup nutella
-2 bananas, peeled and mashed

for the ganache topping-
-1 cup dark chocolate chips
-1/2 cup heavy cream

Directions:
1. To make the crust, beat the butter and sugar in the bowl of a stand mixer until combined. Add the egg yolks one at a time, beating after each addition. Add the flour and cocoa powder and mix just until combined. On a floured surface, shape the dough into a disc and wrap in plastic wrap. Refrigerate for at least one hour.
2. To bake the crust, preheat the oven to 350F. Remove the dough from the fridge and roll out on a floured surface. Carefully transfer to a tart pan (sprayed with cooking spray) and press to fit, cutting off excess if needed. Top the crust with parchment paper and fill with dried beans or pie weights. Bake for 15-20 minutes. Remove from oven, remove the parchment and weights, and allow to cool completely.
3. To make the filling, bring the sugar and water to a boil in a medium-sized saucepan over high heat. Once it turns a deep caramel color (it may first just be piles of dried sugar that will then start to melt and change color), remove from the heat. Add the butter and cream and stir to combine (it will bubble). Return to the stovetop and stir over low heat until smooth. Allow to cool slightly before stirring in the nutella and bananas. Pour into the cooled crust. Cover and chill for at least 2 hours.
4. To make the ganache, place chocolate in a glass bowl. In a small saucepan, bring the cream to a simmer. Pour the cream over the chocolate and allow to sit for 30 seconds. Stir with a wooden spatula until smooth. Allow to cool for a few minutes before pour and spreading over the chilled tart. Sprinkle with chopped hazelnuts. Refrigerate until firm.

Monday, November 28, 2011

Pumpkin Cream Oreo Tarts

Forgive me. Today you're stuck putting up with a slightly blurry, unappetizing photo. As I mentioned a few weeks ago, blog photography is much more difficult with our limited daylight and my absence from the home 6:30 am to 4:30 or 5 pm, five days a week. I've started taking as many pictures as I can on the weekends or in the few minutes before I rush out the door for work. If my neighbors didn't already think my food photography habits were strange, they definitely do now!

On the particular morning I took this picture, it was dreary and still rather dark. I did my best to capture these adorable little tarts, but you're going to have to take my word on this one: these babies are much better looking than what you see above! I later sprinkled the tops with Oreo crumbs, which proved much more fun than a single cookie piece. 

Looks aside, these pumpkin cream oreo tarts made for an impressive little dessert. It's always fun when you have your own personal-sized dessert rather than a measly piece on a plate (though I'm sure you could easily double the recipe and make this in a 9-inch tart pan!). Chocolatey crust, creamy pumpkin cheesecake filling, all topped with homemade whipped cream...YES PLEASE! I'm about a month late on this, as the coloring would have made them perfect for Halloween. Go on, save this recipe on your "Halloween" Pinterest board ;) ...though I firmly believe they're good year round!

Looking for another mini tart recipe? You must make these No Bake Orange Creamsicle Cheesecakes!


Pumpkin Cream Oreo Tarts
from Lauren's Latest

Ingredients:
for the crust-
-16 Oreo cookies
-4 tbsp butter, melted

for the filling-
-8 oz (1/3 less fat) cream cheese, softened
-3/4 cup pumpkin puree
-1/2 cup granulated sugar
-1/2 tsp vanilla extract
-1/4 tsp ground cinnamon
-1/8 tsp ground nutmeg

for the topping-
-1/2 cup heavy cream
-3 tbsp sugar
-1/4 tsp vanilla extract

Directions:
1. Blend Oreo cookies to crumbs in the bowl of a food processor. Add melted butter and pulse to mix. Spoon mixture into 4 individual tart pans and press mixture into the bottom of each pan. Set in the fridge.
2. In a mixing bowl, whip cream cheese until smooth. Add pumpkin puree, sugar, vanilla, and spices. Beat on high until smooth. Divide mixture evenly among tarts (there may be a little left over) and smooth the tops. Return tarts to the fridge while you make the whipped cream.
3. Beat cream with sugar and vanilla until stiff peaks form. Divide evenly among the four tarts and spread over the pumpkin mixture. Garnish with additional cookie crumbs, if desired. Cover and refrigerate until ready to serve.

Sunday, November 20, 2011

Butternut Squash and Kale Torte

Pin It
It's as if the recipe creators at Women's Day magazine decide to create this recipe exclusively for The Sweets Life, knowing it would entice me by including several of my favorite ingredients in one dish. In truth, it missed a few of my favorites, but I made a few simple changes that made it a near perfect recipe in my book!

For one, I swapped out the yukon gold potato for a sweet potato. If you've read this blog for any length of time you know I have quite an obsession with the orange starch! Additionally, I used goat cheese instead of provolone...because goat cheese makes everything better.
Thanks to Ile de France cheese, I had a log of goat cheese in my refrigerator begging to be used in a new recipe. Including it in this torte turned out to be a wonderful solution for some of the cheese--I loved how the creamy cheese paired with the bite of the kale and the chew of the squash and potatoes. I made this torte when Ryan was away on business and secretly enjoyed the fact that I didn't have to share it with anyone...you know a meal is good when you wake up looking forward to your leftovers for dinner!

Guess what? Ile de France wants to offer five of you the chance to win your own cheese prize pack, as pictured below. I was most impressed with their goat cheese--which is included in the prize pack along with a few other cheeses, like their brie (which I've also heard good things about!). I'm not going to lie--I'm pretty jealous of the five of you that'll win!

For a chance to win, you can do one (or both) of the following:
1. Leave a comment on this post telling me which type of Ile de France cheese you'd most like to sample.
2. Head on over to my Facebook page and leave a comment on my wall with your favorite way to eat/use goat cheese!


Got that? Each person has the option of entering two times. The giveaway is open until Tuesday, November 22nd at 8 pm central. I'll select 2 winners from the comments on this post and 3 winners from my Facebook page, to be announced in the post on the 23rd! Thanks Ile de France for spreading the cheese love! GIVEAWAY CLOSED! 

Whether or not you win, I suggest you give this recipe a try! The original also called for a tomato in the layers which I bought but didn't use because my pan got too full! The layers sunk a bit when baking so I probably could have added it but it was delicious as is. Serve with crusty bread, as Women's Day recommended, for a main meal or as a vegetable side dish with a protein like some roasted chicken.

One Year Ago: Shredded Brussels Sprouts with Bacon and Walnuts
Two Years Ago: Rosemary Bread


Butternut Squash and Kale Torte
adapted from Women's Day November 2011


Ingredients:
-1 tbsp olive oil, plus more for the pan
-1/2 small butternut squash (about 1 lb), thinly siced
-1 medium red onion, thinly sliced
-1 small bunch of kale, thick stems discarded and leaves cut into 1-inch pieces
-kosher salt and pepper
-1 medium sweet potato, thinly sliced
-2-4 oz. goat cheese
-1/4 cup grated Parmesan

Directions:
1. Heat oven to 425F. Grease a 9-inch springform pan. Arrange half of the butternut squash in the bottom of the pan, covering as completely as possible.
2. Top with half of the onion, separating the rings. Add half of the kale, drizzling with 1/2 tbsp olive oil and season with 1/4 tsp salt. Top with the sweet potato slices and the goat cheese.
3. Top cheese with remaining kale and drizzle with 1/2 tbsp olive oil plus 1/4 tsp each salt and pepper. Top with remaining onion followed by the squash. Sprinkle with the Parmesan.
4. Cover with foil, place on a baking sheet, and bake covered for 20 minutes. Remove foil and bake for an additional 8-10 minutes, until vegetables are tender and the top begins to brown.

Tuesday, September 20, 2011

Cream Cheese Fruit Tarts

Pin It
Ryan’s a fruit dessert lover through and through. Some of his favorite desserts to date are my grandma’s apple pie and last year’s birthday dessert: the lemon tart. I didn’t know if I could beat the lemon tart, it’s the kind of dessert that stands in a class of its own. Instead, I asked him if I could make a fruit tart for his birthday. I was confident he’d like it and it wasn’t so difficult that I’d spent our fun weekend in Chicago stressing over it.

The dessert ended up being easier than I imagined and everyone, Ryan included, seemed to like it more than I had anticipated…I’d call that a win win! Southern Living’s original recipe made 6 four-inch tarts, but I doubled the recipe (and made a little extra filling) to make 12 tarts since Ryan forewarned me he was going to want at least three for himself!

Any fruit would be good on these—berries, bananas, pineapple, whatever floats your boat! My friend Maggie and I used kiwi, raspberries, blueberries, and peaches, which ended up being aesthetically pleasing and gave us the chance to enjoy summer produce while we still could!

The original recipe also called for a shortbread cookie crust but after tasting how good the crust on the No Bake Orange Creamsicle Cheesecake was, I opted for a vanilla sandwich cookie crust, a decision I don’t regret!

Make these when you need an easy dessert that looks impressive, or if you too have a fruit dessert-loving spouse/friend/neighbor that needs a birthday treat!

One Year Ago: Tilapia with Black Bean Salsa (and a rather interesting salsa ingredient!)
Two Years Ago: Mediterranean Skillet

Cream Cheese Fruit Tarts
adapted from Southern Living, June 2010
Ingredients:
-20 oz. vanilla sandwich cookies (you'll want about 4 cups of crumbs)
-12 tbsp unsalted butter, melted
-16 oz. cream cheese, softened (I used low fat)
-1/2 cup sugar
-1 tsp vanilla extract
-assorted fresh fruit

Directions:
1. To prepare the crust, preheat the oven to 325F. Pulse cookies in a food processor to get crumbs. Stir together crumbs and melted butter. Press crumb mixture into the bottom and up the sides of 12 (4-inch) tart pans with removable bottoms. Place on 2 baking sheets.
2. Bake crusts for 9 minutes, until lightly browned. Transfer tart pans to a wire rack and allow to cool completely (about 30 minutes).
3. To prepare the filling, beat cream cheese, sugar, and vanilla at medium speed with an electric mixer until smooth. Spoon mixture into crusts, using a knife to smooth evenly. Cover and chill for 1-24 hours.
4. Just before serving (or 1-2 hours before), remove tarts from pans and top with assorted fresh fruit.
*Note: tarts are best eaten the day they're topped with the fruit!

Saturday, April 23, 2011

Mini Truffle Tarts

I still have a hard time thinking of myself as a true "cook" or "baker"....maybe it's because I still misread recipes, still have to ask Ryan if the chicken looks done, and still can't figure out how to pronounce brioche. Amazingly, other people have decided I'm at least somewhat capable in the kitchen. I was both humbled, surprised, and delighted when my friend Ashley asked me to make some desserts for a bridal shower that she was hosting. It's one thing to make treats for a shower you're attending where you know everyone...quite another (and much more nerve-wracking, might I add!) to make them for a party that you WON'T be present at. I may or may not have spent the afternoon of the shower crossing my fingers and praying everyone liked them!

After a little brainstorming with Ash, I decided to make a variation of my Raspberry Truffle Tarts. This time, however, I made two different miniature versions: dark chocolate with an Oreo crust and topped with a raspberry and then white chocolate with a graham cracker crust and topped with a blueberry.

They ended up looking pretty darn adorable, and I received nothing but positive feedback...so I can't help but think that maybe in spite of my many shortfalls in the kitchen, I've still made MAJOR strides from the days of boxed cake mix and grilled cheese! :) Thanks Ash & friends for trusting me to provide your treats! Thanks Maggie for assisting me in the kitchen and reassuring me during freakouts! Thanks Paige for your brilliant carrying case idea (egg cartons)!


One Year Ago: Twelve in Ten Challenge-Ranoush


Mini Raspberry Dark Chocolate Truffle Tarts
*makes 24 mini tarts


Ingredients:
-1 cup Oreo crumbs
-4 tbsp (1/2 stick) butter, melted
-1 cup heavy whipping cream, divided
-6 oz. high quality dark chocolate, chopped into small pieces
-3/4 tsp vanilla extract
-1 tbsp sugar

Directions:
1. Line 24 mini muffin cups with paper liners and set aside. Preheat oven to 375F. In a small bowl, mix Oreo crumbs with melted butter. Using a spoon, distribute crumb mixture evenly between the 24 cups, pressing down with fingers.
2. Bake crusts for 3 minutes. Remove from oven and set aside to cool.
3. In a small saucepan over LOW heat, bring 1/2 cup of heavy cream just to a simmer. In a separate bowl, place chopped chocolate. Once cream starts to simmer, remove from heat and pour over chocolate. Allow to sit for 10 minutes before stirring with a spoon until chocolate is smooth and melted. Stir in vanilla extract.
4. Using a spoon, place a little bit of melted chocolate into each of the muffin cups, on top of the crust (mixture should be enough for 24 exactly). Place muffin tin in fridge until chocolate hardens (at least two hours) Note--these steps can be done up to 2 days ahead of time. Be sure to cover when storing in refrigerator.
5. Within 6 hours of serving, prepare whipped cream. Using a stand mixer with the whisk attachment, whip 1/2 cup heavy cream with 1 tbsp sugar on high speed until whipped cream forms. Spread or pipe whipped cream onto each of the tarts and place 1 raspberry atop each. Return to fridge if not serving immediately. Allow tarts to stand at room temperature at least 15 minutes before serving.


Mini Blueberry White Chocolate Truffle Tarts
*makes 24 mini tarts

Ingredients:
-1 cup graham cracker crumbs
-4 tbsp (1/2 stick) butter, melted
-1 cup heavy whipping cream, divided
-6 oz. high quality white chocolate, chopped into small pieces
-3/4 tsp almond extract
-1 tbsp sugar

Directions:
1. Line 24 mini muffin cups with paper liners and set aside. Preheat oven to 375F. In a small bowl, mix graham cracker crumbs with melted butter. Using a spoon, distribute crumb mixture evenly between the 24 cups, pressing down with fingers. 
2. Bake crusts for 3 minutes. Remove from oven and set aside to cool.
3. In a small saucepan over LOW heat, bring 1/2 cup of heavy cream just to a simmer. In a separate bowl, place chopped chocolate. Once cream starts to simmer, remove from heat and pour over chocolate. Allow to sit for 10 minutes before stirring with a spoon until chocolate is smooth and melted. Stir in almond extract.
4. Using a spoon, place a little bit of melted chocolate into each of the muffin cups, on top of the crust (mixture should be enough for 24 exactly). Place muffin tin in fridge until chocolate hardens (at least two hours) Note--these steps can be done up to 2 days ahead of time. Be sure to cover when storing in refrigerator.
5. Within 6 hours of serving, prepare whipped cream. Using a stand mixer with the whisk attachment, whip 1/2 cup heavy cream with 1 tbsp sugar on high speed until whipped cream forms. Spread or pipe whipped cream onto each of the tarts and place 1 blueberry atop each. Return to fridge if not serving immediately. Allow tarts to stand at room temperature at least 15 minutes before serving.

Wednesday, February 16, 2011

Leek and Mushroom Tart

Paige, Ashley, and I have been getting together on a monthly basis for over a year now. We all look forward to our girl's dinners because they give us the chance to try new recipes, drink wine on a "school night", and catch up on stories that are best told in person rather than work email. Another perk? Making foods our significant others wouldn't like! Both Paige and Ashley have guys who hate mushrooms, so we try to incorporate them into the menu as often as possible.

This leek and mushroom tart that Paige made was a major win for all of us. I liked it so much I insisted on making it a few nights later when our friends Mike and Maggie came for dinner. They, too, loved it and the 4 of us had no problem polishing the whole thing off. Served alongside a salad (spinach, oranges, walnuts, feta, and the dressing from this salad!), it was a lovely Sunday night dinner and one I will definitely be repeating!


Leek and Mushroom Tart
adapted from Sunset, October 2006


Ingredients:
for the crust-
-1 cup flour
-1/2 tsp salt
-1/2 tsp pepper
-7 tbsp butter, chilled and cut into small pieces
-3 tbsp ice water

for the filling-
-3 tbsp butter
-3 leeks, white and very light green parts halved, cleaned, and thinly sliced
-1/2 tsp salt
-1 lb baby bella mushrooms
-2 tsp fresh thyme leaves
-3 tbsp heavy whipping cream
-1/4 tsp freshly ground pepper
-1 cup grated gruyere cheese

Directions:
1. To make the crust, put flour, salt, pepper, and butter in the bowl of a food processor and pulse until a coarse, cornmeal-textured mixture forms. Add 3 tbsp ice cold water and pulse until the dough comes together (you may need to add a little bit more water, but do it sparingly or your dough will become too wet!). **Alternately, you can make this crust by hand by rubbing butter into flour mixture and adding water while stirring with a fork (I haven't tried this method and can't offer any suggestions!)
2. Wrap dough in plastic wrap and refrigerate for at least 30 minutes or up to 2 days.
3. Preheat oven to 375F. On a lightly floured surface, roll out dough with a rolling pin into a 12-inch circle. Place dough in a 9-inch tart pan and trim the edges that are overhanging. Cover dough with foil and weigh down with pie weights, dried beans, or uncooked rice. (I skipped the weights and my crust puffed up quite a bit. I was able to push it down when I filled the tart but you not want to follow my lead!)
4. Bake crust for 20 minutes. Remove foil and weights and bake for an additional 10 minutes. Remove from oven and bring to room temperature.
5. While crust is baking, melt butter in a pan over medium-high heat. Add leaks and salt, cooking until leeks are soft (3 minutes). Add mushrooms, turning heat to high. Cook, stirring constantly, for 5-10 minutes. Stir in thyme, cream, and pepper. Remove from heat and bring to room temperature.
6. Spread 1/2 cup of grated cheese over the tart crust. Top with the mushroom-leek mixture and sprinkle with additional cheese. Bake for 25 minutes, until cheese is melted and golden. Remove from oven and let sit for 10 minutes. Cut into slices and serve warm or at room temperature.

Thursday, February 3, 2011

Raspberry Truffle Tarts

Pin It

When I say rich, what comes to mind? Donald Trump? Alfredo sauce? A full-bodied wine? A Rolex? Richie Rich? (that one was Ryan's!)

Put all other definitions aside. These raspberry truffle tarts give rich a whole new meaning, with an Oreo cookie crust, a dark chocolate truffle filling, homemade whipped cream, and a few plump raspberries for good measure. 

There are few things better than enjoying good food with friends, which is what we did with these. An adorable toddler in my arms (not mine!), surrounded by wonderful people and fun conversation, all while taking bites of a rich raspberry truffle tart made for a purely blissful evening. 

Perfect for making and sharing with someone special, add these to your list of "special occasion" desserts! Rich desserts make for a rich life!

Looking for other rich, "special occasion" desserts? How about a Raspberry Amaretto Trifle, Chocolate Peanut Butter Torte, Lemon Tart, or POM Cheesecake Bars?


Raspberry Truffle Tarts
inspired by FoodNetwork.com
*makes 9 mini tarts

Ingredients:
-2 cups Oreo crumbs
-8 tbsp (1 stick) melted butter
-1 small package fresh raspberries
-1 1/4 cup heavy cream, divided
-12 oz. high-quality dark chocolate, chopped into small pieces
-1 1/2 tsp vanilla extract
-1 tbsp sugar

Directions:
1. Line 9 cups in a muffin tin with paper liners. In a small bowl, mix Oreo crumbs with melted butter. Divide crumb mixture evenly between the 9 tins. Using your fingers, press crust into the bottom and up the sides of each muffin tin. Place muffin tin in the fridge.
2. In a small saucepan over LOW heat, bring 3/4 cup of heavy cream just to a simmer. In a separate bowl, place chopped chocolate. Once cream has begun to simmer, remove from heat and pour over chocolate. Allow to sit for 10 minutes, melting the chocolate. Use a spoon and stir to combine completely. Stir in vanilla extract. Set aside at room temperature for 1 hour.
3. Remove muffin tin from the fridge. Place 1 raspberry in the bottom of each Oreo crust. Using a spatula, transfer chocolate mixture into a piping bag (or a ziploc bag with a corner cut off). Pipe chocolate into each of the Oreo crusts, using a knife or spatula to spread evenly. 
4. Return muffin tin to fridge while preparing whipped cream. Using a stand mixer with the whisk attachment, whip 1/2 cup heavy cream with 1 tbsp sugar on high speed until it makes whipped cream. Spread whipped cream on top of each tart, topping with a few fresh raspberries. Remove tarts from liners before serving. 
**Store in the fridge (up to two days) before serving. You may want to allow them to warm up a little before serving--the truffle filling gets very hard!

Tuesday, November 2, 2010

Roasted Eggplant and Peppers Tart with Chickpea Crust

Pin It

This was an awesome discovery of a recipe! I actually read Kersten's blog regularly (it's where I got the recipe for these oreo peanut butter cookie dough truffles), but I had never before seen her vegetable tart with a chickpea crust. I found it when I was doing a Google search, trying to come up with dinner out of the random ingredients I had in my fridge and cupboards.

I loved the way this turned out. It makes a great light dinner or lunch, served alongside a salad. You could also serve this as an appetizer at a party. The chickpea crust is more crumbly than your standard pastry crust, so my slices weren't neatly cut. Don't get me wrong, I certainly didn't mind! This is best served the day you make it, although I also thought it was good reheated for lunch the next day.

After success with this recipe, the caprese tart, and the lemon tart (which I just made again as a surprise for Ryan on our anniversary!), I'm convinced that anything made in a tart pan is extra good! I can't wait to try some other tarts. Leave a comment with your favorite tart or mini-tart recipe (Ryan just bought me mini-tart pans, yay!).

Pssst...have you entered my giveaway? Today's the last day for a chance to win a $45 gift certificate!

One Year Ago: Chocolate Chip Coconut Pumpkin Bars


Roasted Eggplant and Peppers Tart with Chickpea Crust
adapted from Cake, Batter, and Bowl

Ingredients:
-1/2 medium sized eggplant, cut into small cubes
-2 peppers, cut into chunks
-3 cups fresh spinach
-2 1/2 tbsp olive oil
-1/2 tsp salt
-1 can chickpeas, drained
-1/2 cup whole wheat flour
-1 tsp dried oregano
-1/2 tsp dried thyme
-1 red onion, chopped
-2 cloves garlic, minced
-1/2 cup crumbled feta cheese
-1/2 cup shredded Italian cheese

Directions:
1. Preheat oven to 400F. Place eggplant and peppers on a greased cookie sheet. Spray with cooking spray and season with salt, pepper, or your favorite spices (I used a Green Tea Peppercorn blend that I love!). Roast for 20-25 minutes, until vegetables are tender. Remove from oven and reduce heat to 350F.
2. Add chickpeas, flour, oregano, thyme, salt, and 2 tbsp olive oil to the bowl of a food processor. Pulse until a soft dough forms. Press dough into a greased tart pan. Bake at 350F for 20-25 minutes, until golden brown.
3. While crust is baking, heat 1/2 tbsp olive oil over medium high in a medium-sized skillet. Add red onions and cook until tender (approximately 5 minutes). Add garlic and spinach, saute until spinach wilts, and remove pan from heat. Lay spinach and onion mixture over the crust, spreading evenly. Top with roasted vegetables. Sprinkle the two cheeses over the vegetables.
4. Bake tart at 350F for 20-25 minutes, until crust is set and cheeses are melted. Cool for 10 minutes before slicing into pieces.