#header-inner {background-position: center !important; width: 100% !important;}

Wednesday, March 31, 2010

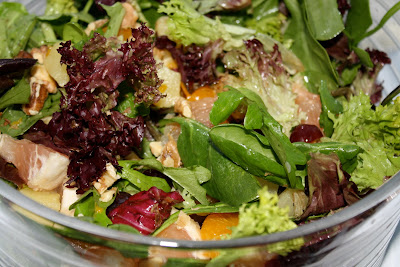
Mixed Citrus Green Salad

I'm going to keep the description here short and sweet...this salad is so fitting for spring. In fact, you might want to add it to your Easter meal this weekend. The honey citrus dressing was so refreshing and paired nicely with the variety of fruits in this salad. If you really hate grapefruit, you can leave it out, but I thought the tart fruit was a nice contrast to the other flavors of this salad. This will be added to our regular salad rotation!

Mixed Citrus Green Salad
from Cooking Light March 2010

Ingredients:
-1 cup red seedless grapes, halved
-2 (5 oz) bags mixed salad greens
-1 (11 oz) can mandarin oranges, drained
-1 (8 oz) container pineapple chunks, drained (I used a 15 oz can)
-1 (8 oz) container red grapefruit, drained (I used one fresh, peeled & chopped grapefruit)
-7 tbsp orange-poppy seed dressing
-21 walnut halves, toasted (I just added a handful)

Orange-Poppy Seed Dressing (makes 1 cup plus 2 tbsp):
-1/2 cup fresh orange juice
-1/4 cup honey
-1/4 cup canola oil
-2 tbsp champagne vinegar (I substituted white wine vinegar)
-1/8 tsp salt
-1 tsp poppy seeds

Directions:
1. To make the dressing, combine the first 5 ingredients in a blender and process until blended. Add poppy seeds & pulse once. Cover & refrigerate.
2. To make the salad, combine the first 5 salad ingredients in a large bowl. Arrange 2 cups salad on each plate. Drizzle with 1 tbsp orange-poppy seed dressing. Top with 3 walnut halves.
173 calories per salad serving plus 17 calories per dressing serving

Tuesday, March 30, 2010

Black Bean Burgers with Mango Salsa

A long time ago I posted another recipe for black bean burgers. However, when I saw this recipe in my Cooking Light magazine, I decided to try it because the salsa sounded so good. While I liked these burgers a lot, I do have a few complaints about them, primarily regarding the fact that they didn't hold together very well and weren't cooking completely in the oven. I ended up cooking them on a skillet, the way I normally do, after their 20 minutes in the oven. While they still tasted good, they were difficult to flip and didn't stay together well on the bun. My sister gave up completely, ditched the bun, and ate hers with a fork :)

The salsa, on the other hand, was a delight. My mango wasn't as ripe as I would've liked, but the avocado/mango combination was as good as it sounds. The salsa would be great atop fish or chicken, or even just served with chips. While I think I'll stick to my previous black bean burger recipe, or at least methods, this salsa will be showing up again!

Thanks, Ryan, for all your help with this meal (he did the majority of the work!)

Black Bean Burgers with Mango Salsa
from Cooking Light April 2010

Ingredients:
-2 (15 oz) cans black beans, rinsed and drained
-3/4 cup finely chopped fresh cilantro, divided
-3/4 cup shredded Monterey Jack cheese
-1/4 cup panko (I substituted oats)
-2 tsp ground cumin
-1 tsp dried oregano
-1/2 tsp sea salt
-1/2 medium jalapeno pepper, finely chopped
-2 large egg whites
-cooking spray
-1 1/4 cups chopped peeled mango (about 1 medium)
-3 tbsp chopped shallots (I substituted sweet onion)
-1 1/2 tbsp fresh lime juice
-1 avocado, peeled and chopped
-1 garlic clove, minced
-6 buns, light toasted (I used sandwich thins)
-6 green lettuce leaves (I used spinach)

Directions:
1. Preheat oven to 350F.
2. Place black beans in a medium bowl; mash with a fork. Stir in 1/2 cup finely chopped cilantro and the next 7 ingredients (through egg whites).
3. Shape bean mixture into 6 patties. Arrange on a baking sheet coated with cooking spray and bake at 350F for 20 minutes, turning once.
4. Combine remaining 1/4 cup cilantro, mango, and the next 4 ingredients (through minced garlic) in a medium bowl.
5. Place a patty on bottom half of each hamburger bun; top each with lettuce, 1/3 cup salsa, and other half of bun.

Monday, March 29, 2010

Cajun Tilapia with Polenta and Peppers

Pin It
As I continue to work through our stash of tilapia in the freezer, I have been trying to try lots of new seafood recipes. I really enjoyed this meal--the fish had quite a kick but it paired nicely with the vegetables and polenta. This was my first go at polenta and I was pleasantly surprised. It reminded me of cream of wheat, one of my childhood favorites. (Ha, I even ate the leftovers for breakfast the next morning with sauteed spinach, mushrooms, and tomatoes-also delish!) I liked that the polenta was relatively neutral in flavor, as it helped to tone down the heat from the cajun spice on the tilapia. This only took about 30 or 40 minutes to make start to finish, and most of that was letting the polenta cook. Great weeknight recipe!

Cajun Tilapia with Polenta and Peppers

Ingredients:
For the cajun spice mix-
-3 tbsp paprika
-2 tbsp red pepper
-2 tbsp thyme
-2 tbsp oregano
-2 tbsp onion powder
-2 tbsp garlic powder
-1 tbsp salt
-1 tbsp black pepper
-1 tbsp sugar
*mix everything together and store in an airtight container

For the fish-
-1 lb tilapia fillets
-4 tbsp Cajun seasoning mix
-2 tbsp olive oil, plus extra to coat fish
-sliced lemons

For the polenta-
-3 tbsp butter
-1/2 cup onions, finely diced
-2 1/2 cups water, divided
-1 1/2 cups chicken broth
-1 cup yellow cornmeal
-salt, to taste

For the peppers-
-1 red bell pepper, cut into strips
-1 green bell pepper, cut into strips
-1/2 cup mushrooms, sliced
-1 tbsp olive oil
-salt and pepper, to taste

Directions:
For the fish-
1. Coat each fish fillet in olive oil. Coat with cajun seasoning.
2. Heat a large non-stick skillet over medium-high heat. Add oil and heat until shimmering. Add fish fillets and cook for 3-4 minutes a side until opaque and flaky (internal temperature: 145F).

For the polenta-
1. Melt butter in a large saucepan over medium heat. Add onions and cook until translucent, about 5 minutes.
2. Stir in 1 1/2 cups water and 1 1/2 cups chicken broth and bring mixture to a boil.
3. When the mixture is coming to a boil, mix together 1 cup water and 1 cup cornmeal. Gradually stir into the boiling water and reduce heat to low. Cook, stirring constantly with a wooden spoon, until the cornmeal is thick and leaves the side of the pan when stirred (about 25 minutes). Add extra water or chicken broth if needed. Season with salt to taste.

For the peppers-
1. Heat a medium skillet over medium high heat. Add oil and heat until it shimmers. Add sliced peppers and mushrooms and cook 8-10 minutes, until vegetables have softened a bit. Season with salt and pepper to taste.

This post is linked to Eat at Home.

Sunday, March 28, 2010

Chewy Oatmeal Raisin Cookies

It's been way too long since I posted a dessert recipe...were you getting worried? I have plenty of sweet recipes coming your way and even more ideas stored up in my head waiting to be made! I recently switched jobs (a GREAT thing...in my dream job at the company now!) but was visiting my old group one day and wanted to bring them something since they were such a great group to work with. I remembered one lady saying oatmeal raisin cookies were her favorite so I decided to make those. Ironically enough, I began searching for recipes and saw that Maria had recently posted an oatmeal cookie recipe. She's always posting tons of yummy looking cookies, so I had no doubt these would be delicious! I liked this recipe because it made a small batch (I got 26 cookies), which was the perfect amount to bring to work with a few leftover for us (usually we end up with way too many baked goods sitting around this house!).

These are true to their name--very chewy! I think normally I prefer a thicker cookie, but I liked the buttery texture of these and they still held together nicely thanks to the oats and raisins. The dough was pretty wet and I was worried the cookies would stick to my cookie sheets, but they came right off. My coworkers loved them and we had no problem finishing the rest!

Chewy Oatmeal Raisin Cookies

Ingredients:
-1/2 cup butter, softened
-2/3 cup light brown sugar
-1 egg
-1 tsp. vanilla extract
-3/4 cup all-purpose flour
-1/2 tsp baking soda
-3/4 tsp cinnamon
-dash of nutmeg
-1/4 tsp salt
-1 1/2 cups old fashioned oats
-3/4 cup raisins

Directions:
1. Preheat oven to 350F.
2. Cover raisins with water in a small bowl and allow to sit for 5 minutes.
3. In a mixing bowl, cream butter, brown sugar, egg, and vanilla until smooth and creamy.
4. In a separate bowl, whisk together flour, baking soda, cinnamon, nutmeg, and salt. Add the dry ingredients to the mixing bowl and blend until combined.
5. Stir in the oats and raisins.
6. Spoon tablespoons of dough into round balls and place on cookie sheets. Bake for 10-12 minutes (they should be brown on the edges but underbaked in the center) and allow to sit for 5 minutes before transferring to a cooling rack.

Saturday, March 27, 2010

Chinese Chicken Salad


What an interesting spin on chicken salad! I've had many variations--typically with grapes and pecans or celery and mayo...always mayo. This recipe has been saved in my google reader for a long time, and since I was on the hunt for easy meals last week (hence all the sandwich posts), I finally picked up the ingredients to make this.

Julia, Ryan, and I all loved this, and enjoyed eating the leftovers the next few days too. This was so simple to prepare; I made and shredded the chicken one day, then mixed together the dressing and chopped everything else the following day. After an hour of chilling in the fridge, this was ready for eating! It could probably be eaten immediately too, I just wanted to give the flavors some time to meld.

The peppers and celery add a nice crunch, and I loved that the base of this was Greek yogurt instead of mayo. The asian dressing was light and flavorful, perfect if you hate those soggy chicken salad sandwiches! I'm enjoying the transition from heavier meals and warm soups to more summer and springtime dishes...this will definitely be a repeat!

Chinese Chicken Salad

as seen on Apple a Day, originally from Barefoot Contessa: Back to Basics

Ingredients:
-2 boneless, skinless chicken breasts (original called for 4)
-3 stalks celery, cut into 1/2 in. thick pieces
-1 yellow bell pepper, cut into short strips (original called for red)
-3 scallions (white and green parts), sliced diagonally

For the dressing:
-1/2 cup non-fat Greek yogurt
-1/4 cup apple cider vinegar
-3 tbsp light soy sauce
-1 1/2 tbsp dark sesame oil
-1/2 tbsp honey
-1 clove garlic, minced
-1 tsp peeled, grated fresh ginger
-1 tbsp sesame seeds, toasted
-1/4 cup smooth peanut butter
-1 tsp salt
-1 tsp black pepper

Directions:
1. Shred cooked chicken breasts (I cooked by baking frozen at 375F for 50 minutes)
2. Whisk dressing ingredients together in a large bowl.
3. Add chicken, celery, pepper, and scallions to dressing. Stir to combine. Serve in wraps or on sandwiches at room temperature or cold.

Friday, March 26, 2010

Moroccan Carrot Sandwiches


I was so intrigued by this recipe and after Julia raved about it on her blog, I knew I had to try it. Like her, I nixed the olive tapenade from the original recipe and instead went with her version, which included avocado. But then, rather than slicing an avocado, I just used some store-bought guacamole that we had sitting in our fridge. I know this combination of ingredients sounds weird; Ryan was definitely skeptical when I told him what was for dinner. However, the various flavors work SO well together. In every bite I could taste the guac, goat cheese, and spiced carrots and I couldn't get enough of it!

These were super fast and easy to throw together and I can't wait to have them again! Great, GREAT recipe!

Moroccan Carrot Sandwiches
adapted from the recipe here
**to make 4 sandwiches

Ingredients:
-1 tbsp sugar
-1 tbsp fresh lemon juice
-1 tsp paprika
-1/2 tsp ground cumin
-1/4 tsp cinnamon
-pinch cayenne
-1/2 tsp salt
-1 tbsp olive oil
-1 pound medium carrots
-8 slices bread (I had mine on a sandwich round, Ryan had his on wheat bread)
-2 oz. soft mild goat cheese at room temperature
-4 tbsp guacamole dip (or 1 avocado)

Directions:
1. Thinly slice the carrots (used my food processor for this!). In a separate bowl, whisk together sugar, lemon juice, spices, salt, and olive oil. Allow sugar to dissolve.
2. Toss carrots with dressing, cover, and refrigerate. Chill for at least 4 hours, or overnight.
3. When ready to assemble sandwiches, spread a layer of goat cheese and guacamole on one half of the bread. Top with carrots and the other half of the bread.

This post is linked to Eat at Home.

Thursday, March 25, 2010

Portabello Pita Pizzas


One night in Scottsdale, we hit up Cafe Carumba a second time for their margarita special and decide to order a few appetizers to accompany the drinks :) One of the dishes we ordered was their veggie pizza. I don't know if it was our intense hunger from hiking that day or that the pizza was that good, but we all fell in love! While eating, we discussed recreating it at home some time...but found ourselves craving it the next day and decided to give it a go.

(The original dish)

The menu description of the veggie pizza is as follows: roasted garlic, poblano peppers, mushrooms, spinach, parmesan, and goat cheese. We were convinced they forgot the poblano peppers, so we omitted them in our version as well. Our recreation was nearly as good as the original, considering we were working with minimal ingredients. Should I make it again (and I will!), I'll make more of an attempt to recreate their garlicky parmesan sauce that coated the pizzas. We didn't have parmesan and the condo lacked olive oil, but our version (which is what I'm posting below) was still a hit!

(Our version)

**These would be perfect paired with a salad for dinner, or cut into small wedges and served as part of an appetizer spread!

Portobello Pita Pizzas
inspired by Cafe Carumba's veggie pizza

Ingredients:
-5-6 whole wheat pita breads
-1 head garlic, roasted
-1 package sliced portobello mushrooms
-4-6 oz. spreadable goat cheese
-1/2 large red onion, chopped
-red wine (for caramelizing the onions)
-1 bag baby spinach
-butter

Directions:
1. Chop red onion and cook over stovetop in butter until sautéed. Add a little bit of red wine and allow onions and wine to cook until caramelized (30-40 minutes).
2. Brush pita breads with melted butter, rub roasted garlic over one side, and broil in the oven for 2-3 minutes, until lightly browned.
3. Saute spinach in a little butter over stovetop until wilted.
4. Saute portobello mushrooms in a separate skillet until warmed through.
5. Spread goat cheese onto pita breads. Top with mushrooms, caramelized red onions, and spinach. Bake at 350F for 5-10 minutes.
6. Slice and dig in!


Wednesday, March 24, 2010

Bulgur Salad with Citrus, Toasted Almonds, Feta, and Spinach


One of the great things about having a food blog is that people keep their eyes open for recipes I might enjoy and send them my way. This particular recipe, though modified, comes from an article my wonderful grandma sent me that included several whole grains recipes. I intend to try them all at some point, but I was particularly intrigued by the wheat berry salad with citrus, toasted pine nuts, feta, and spinach. You may notice that this title doesn't match the title of my post; I ended up making a few changes to the recipe based on what I had on hand. Even so, this recipe was fantastic! I LOVED the citrus dressing (and even halved the amount of olive oil with no consequence) and the variety of tastes and textures within the salad. In fact, I liked this bulgur salad better than tabbouleh (which concerns Ryan, who really wants tabbouleh at the dinner table again soon!). I'm curious to try the original recipe sometime, especially because I've never had wheat berries, but I imagine the flavor is very similar.

This would be a fabulous summer salad, and you could even add chicken to make it a complete meal. We ate this with some interesting sandwiches that'll be posted soon!

Thanks Grandma for sending this my way :)

Bulgur Salad with Citrus, Toasted Almonds, Feta, & Spinach
inspired by the Wheat Berry salad recipe from the Milwaukee Journal Sentinal

Ingredients:
-1 cup bulgur
-2 cups water
-2 tsp fine-grain sea salt
-grated zest & juice of 1 orange
-1 tbsp freshly-squeezed lemon juice
-1/4 cup extra-virgin olive oil
-black pepper (freshly ground, if available)
-3 large handfuls spinach leaves, stemmed and cut into smaller pieces
-1/2 cup toasted slivered almonds (could be increased to 1 cup; I only had 1/2 cup on hand)
-1/2 cup crumbled feta cheese (or just sprinkle on top of each serving, as I did)

Directions:
1. In a large saucepan, combine 1 cup of bulgur with 2 cups of water. Heat to boiling then cover and simmer for 12-15 minutes, until all liquid has evaporated.
2. To make the dressing, combine the olive oil, orange juice and zest, and lemon juice. Season with salt and pepper.
3. Toss hot bulgur with chopped spinach, toasted slivered almonds, and dressing. Top with feta cheese. (I ate it both warm and then cold, the next day. Both were equally good!)

Tuesday, March 23, 2010

Quickie Arizona Recap

As many of you know, Ryan and I spent last week in Arizona with some of our good friends, Mike and Maggie. It was a fabulous trip; we could not have asked for better weather (high 70s, low 80s all week), better hikes (3 in total-the Grand Canyon, Secret Canyon in Sedona, and Sabino Canyon in Tucson), or better friends to share it with! It was hard coming home after such a perfect week, but I was eager to get back into the kitchen. We ate a few of our meals at the condo--most breakfasts and a few dinners consisting of an appetizer spread--but we also ventured out and explored many great places in Arizona.

A special thanks to Kelsey, Jenn, and Sara, for graciously giving us many food and activity suggestions. Aside from hiking, we also managed to check out Fashion Square Mall, the Desert Botanical Gardens, a Spring Training Baseball game, and many other fun things. Check out the pictures below for the highlights :)

Brewers vs. Giants in Scottsdale

The 4 of us at the Grand Canyon (a little chillier here!)

One of our MANY water crossings during our Sedona hike

Cooking in the Condo

Pretty flowers at the Botanical Gardens

Maggie and I at Seven Falls (Sabino Canyon)
Additionally, we had some wonderful meals and lots of delish margaritas. Again, highlights below...

Lots of margaritas enjoyed at Cafe Carumba (on multiple occasions!)...the fresh watermelon margarita was my favorite!

We ate a lot of Mexican Food...including these yummy eats (& margaritas) at Loco Patron for Happy Hour

Awesome breakfast at an eclectic cafe in Flagstaff (Macy's), between our Grand Canyon & Sedona hikes

Our favorite meal of the trip, from Joe's Farm Grill (A MUST-VISIT if you're anywhere near it in Arizona)...best burger of my life!

Thai salad with tuna, also from Joe's Farm Grill (we saw this place featured on Diners, Drive-Ins, and Dives on the Food Network one night and decided it was worth a stop. Boy we were right!)

The SUGAR BOWL...banana splits for lunch in the cutest little ice cream parlor!

Grimaldi's pizza for our last night in Scottsdale. We devoured this bad boy!

As you can see, a fabulous trip! Later this week I'll post a recipe we re-created from a dish we had one night at Cafe Carumba!

Monday, March 22, 2010

Sweet Potato Bread

Back to the real world. Arizona was AMAZING and we had such a wonderful time.
I'll show a few pictures and highlight a few favorite eats tomorrow, and then later this
week I'll post a new recipe from the trip. Yup, we couldn't help but contribute to
The Sweets Life, even on vacation ;)
I made this bread one Sunday afternoon after I realized we'd had one lone sweet potato sitting on our countertop for nearly two weeks. I knew I wouldn't use it in any of our meals that week, so I decided to get creative and make a new quick bread. I had heard of sweet potato muffins and figured there were plenty of recipes out there for sweet potato breads as well. Sure enough, I found several! I settled on one recipe but ended up straying from it significantly, in my attempt to healthify the bread. Despite my changes (and accidental omissions, such as the cinnamon and nutmeg, oops!), this bread experiment turned out wonderfully. Not only did it look pretty, with its perfect round top and light orange color, but it turned out tasting much more decadent than I expected, given all of the changes I made. Next time I'll surely add the spices, but even without them, this bread was yummy...lightly sweet and extremely moist! We enjoyed it both warm out of the oven, and cold from the fridge for the next several days. If you have sweet potatoes wasting space on your countertop, or if you have leftover mashed or roasted sweet potatoes,give this bread a shot!

Sweet Potato Bread
recipe adapted from here

Ingredients:
-3/4 cup whole-wheat flour
-3/4 cup all-purpose flour
-1 tablespoon wheat germ
-1 tsp salt
-1/2 tsp baking powder
-1 tsp baking soda
-cooked flesh from 1 sweet potato (I peeled and microwaved)
-1/4 cup granulated sugar
-1/4 cup brown sugar
-4 tablespoons butter, melted
-1/2 cup applesauce
-2 large eggs
-1 tsp vanilla extract
-1/2 cup skim milk

Directions:
1. Preheat oven to 350F. Grease a loaf pan.
2. In a small bowl, combine flours, wheat germ, salt, baking soda, and baking powder. Set aside.
3. In the bowl of a stand mixer fitted with a paddle attachment, mix sweet potato flesh, granulated sugar, and brown sugar on medium speed until well combined (about 1 minute).
4. Add butter and applesauce and mix on low speed until smooth.
5. Add eggs one at a time, mixing until fully incorporated, then mix in vanilla.
6. On low speed, add 1/2 the flour mixture followed by 1/4 cup of milk. Repeat with the remaining flour mixture and milk, mixing until just combined.
7. Pour batter into loaf pan and bake for 55-60 minutes (mine was perfect at 55 minutes).

Sunday, March 21, 2010

Carrot Soup


I mentioned that Julia made dinner a few weeks ago, when she debuted the irish soda bread. Its partner in crime that evening was this very orange carrot soup! We actually ate this on a fairly warm evening and I would imagine it was our last soup supper until next winter (which we are not even allowing to enter our thoughts right now!!!). Still, it was a great way to end soup season ;) If carrots are one of your favorite vegetables, then this is the soup for you! The carrot flavor is primary, but it pairs nicely with the dill (fresh dill would've been even better). Rather than use the potatoes the original recipe called for, I suggested Julia add a can of black eyed peas. I think this was a perfect substitute--kept Julia far away from potatoes, as she prefers, and gave us all a little boost of iron and protein.

Thanks Julia for making din!!

Carrot Soup
adapted from Suite Apple Pie

Ingredients:
-1 big yellow onion, chopped
-1 tbsp butter
-1 tbsp olive oil
-2 pounds medium carrots, peeled and chopped
-1 can black eyes peas, drained and rinsed
-4 cups chicken broth
-1 tsp salt
-1/4 tsp pepper
-1/2 tsp dried dill
-1/2 cup skim milk

Directions:
1. Heat a large soup pot on the stove over medium high heat. Add the butter, oil, and onion, and saute. Cook until onion is tender and translucent.
2. Add the carrots and black eyed peas and cook for 20 minutes.
3. Add the chicken broth and bring to a boil. Lower the heat and simmer for 30-40 minutes, until the carrots are soft.
4. Remove from heat and puree with an immersion blender to desired thickness.
5. Stir in the dill, salt & pepper, and milk. Warm over medium heat before serving.

Saturday, March 20, 2010

Veggie Tuna Pasta Bake

Home sweet home....today we're headed back to St. Louis from Arizona (hopefully to Spring-like weather). Vacation recap to come!

If we're being plain and simple, this is tuna casserole. But it's different than most tuna casseroles I've ever seen or had, so I decided to give it a little bit more of a sophisticated name! I used a recipe found on a blog as inspiration, but ended up straying from it based on what I had in my fridge. The result was a wonderfully creamy yet fairly healthy dish. All of green vegetables gave the meal a pop of color and some nutrients to boot! I loved the crunch of the breadcrumbs that I sprinkled on the top at the last minute and will amp it up even more next time with a bit of wheat germ (good idea Ryan!). Try this sometime, it's a less indulgent meal that still feels like comfort food...perfect for this transition from Winter to Spring!

Veggie Tuna Pasta Bake
inspiration found here

Ingredients:
-12 oz. whole wheat penne
-2 cloves garlic, minced
-3 stalks celery, chopped
-1/2 cup all-purpose flour
-2 cups skim milk
-1 cup light sour cream
-1/2 jar artichoke hearts, chopped
-4 green onions, chopped
-3/4 can black olives, chopped
-4-5 cups fresh spinach
-handful of fresh parsley, chopped
-2 cans tuna, packed in water
-1/4 cup breadcrumps

Directions:
1. Preheat oven to 400F. Cook pasta for 8-10 minutes. Drain and set aside.
2. In a large soup pot, heat garlic and celery in a little bit of cooking spray or olive oil, 5-6 minutes.
3. Pour in flour and stir for about 30 seconds.
4. Add milk and stir continuously until mixture thickens and there are no lumps (about 5 minutes)
5. Stir in sour cream. When mixture begins to bubble, lower heat slightly.
6. Add artichokes, green onions, olives, tuna, and parsley. Mix to combine. Add spinach and stir until it begins to wilt. Stir in pasta and mix to combine.
7. Pour pasta mixture into a baking dish (mine fit in a 9 x 9) and sprinkle with breadcrumbs. Bake for 20 minutes.

Friday, March 19, 2010

Butterhorns


This recipe is another family favorite, originally given from my Grandma (dad's side) to my mom, and one that I've eaten many times, but never made myself or even had a clue of how to make. One day my sister Julia and I started talking about these and she suggested that I make them. My mom emailed me the recipe (thanks mom!) and after reading through it a few times, I nervously went for it.

My mom was right; this recipe isn't hard per se, but it is rather putsy. The dough is a little hard to work with and it's easy to get frustrated when trying to roll each piece into a large circle. However, I'm glad I tackled this recipe and even more glad I can now make these whenever I want :) These turned out smaller than I remembered, but maybe that's just my kid-memory picturing them as huge! While the size surprised me, the taste was all too familiar and one bite brought me back to childhood. It's always so fun to eat something you haven't had in years!

Butterhorns
*makes 32

Ingredients:
-1 package dry yeast
-1 tsp sugar + 1 1/4 cup sugar, separated
-1/4 cup warm water
-2 eggs, separated
-1/2 tsp cinnamon
-1/2 cup chopped walnuts
-2 cups flour
-1 tsp salt
-1/2 cup shortening
-1/2 cup butter
-Optional: powdered sugar & milk, for glaze

Directions:
1. In a small bowl, mix yeast, 1 tsp of sugar, and 1/4 cup warm water. Set aside and allow yeast to dissolve.
2. Beat two egg whites until stiff. Beat in 1/2 cup of sugar. Set aside.
3. In another small bowl, mix 3/4 cup sugar, cinnamon, and walnuts. Set aside.
4. In a large bowl, add the flour and salt. Cut in shortening and butter and blend with a pastry cutter until mixture is crumbly. Pour in the two beaten egg yolks and mix. Add yeast mixture to the flour mixture and mix until a dough forms (works best to use your hands).
5. Form dough into a circle. Cut into 4 equal pieces. Roll each piece into a circle (it is impossible to roll into a perfect circle, but just shape the best you can).
6. Brush egg whites onto circle, then sprinkle with cinnamon sugar mixture. Using a knife, cut the circle into 8 equal pieces.
7. Roll each individual piece toward the middle, beginning with the wide end and moving toward the narrow end.
8. Place on a greased baking sheet.
9. Repeat with 3 remaining pieces of dough.
10. Bake pans at 375F for 10-13 minutes, until butterhorns are cooked through and lightly browned.
11. All to cool and, if desired, drizzle with a powdered sugar/milk glaze (just mix small amounts of milk and powdered sugar until desired consistency is reached).
*note--there will be lots of egg whites left over!

Thursday, March 18, 2010

Zucchini Artichoke Spinach Quiche with Bulgur Crust


Whew, that's a title and a half! To be really accurate, I should add "and feta cheese", but I didn't want to lose anyone in the title :) This is a unique recipe, unique in that I came up with this completely on my own. As I become more comfortable in the kitchen, I'm beginning to experiment more and more. Sometimes this backfires...thankfully not in this case!

I have a ton of bulgur leftover from the tabbouleh, so I'll probably be trying to incorporate it into different recipes. In this case, I decided to try and use it as a crust for quiche. I was a little afraid that it wouldn't stick together like a crust (I didn't use anything to bind it) and even more worried it wouldn't hold up as a crust when I sliced the quiche, but neither disaster occurred!

Next time, I might add a few more eggs to bulk it up a little bit and may play around with some spices. One thing's for certain, I will be making many variations of this quiche with bulgur crust. It's an easy meal that's perfect for a light dinner (we enjoyed with large hunks of sweet potato bread) or a brunch menu!

Zucchini Artichoke Spinach Quiche with Bulgur Crust

Ingredients:
-1 cup water
-1/2 cup bulgur
-4 eggs, beaten
-1/3 cup milk
-1/4 cup chopped artichoke hearts
-2 cups spinach, wilted (I did this in the microwave)
-1/4 cup chopped zucchini
-feta cheese, as much as desired

Directions:
1. Preheat oven to 350F. Add 1/2 cup bulgur to 1 cup boiling water. Cover and allow to simmer for 15 minutes, until no water is remaining.
2. Press bulgur into a greased pie plate. Bake for 15 minutes, until bulgur feels hard to the touch (note: it will not feel super firm, but should have less moisture than it began with)

3. Remove crust from oven. Top with artichoke hearts, spinach, and zucchini. Sprinkle with feta cheese.

4. In a separate bowl, beat eggs and add milk. Pour egg mixture over the vegetables.

5. Increase oven temperature to 375F. Bake for 20-25 minutes, until egg is set and cooked through.

6. Slice and serve!

Wednesday, March 17, 2010

Irish Soda Bread

Happy St. Patty's Day! I'm not sure how we're celebrating, but I'm sure we're doing SOMETHING fun in Scottsdale today :) We'll be back in a few days...in the meantime, enjoy this recipe for irish soda bread!

Julia offered to be on dinner duty one night last week when she was off work and I happily took her up on the offer. As is our system, I supplied the recipes and she prepared them...quite perfectly I must say! This irish soda bread was the perfect addition to our soup which will be posted later this week.

I'd never had irish soda bread before but put it on our weekly menu because 1. We had leftover buttermilk sitting in the fridge, 2. I love homemade bread...and yeastless bread is even better (easier!), and 3. I felt it was necessary given the upcoming holiday (that happens to be today!).

We all LOVED this bread. It was thick and doughy and reminiscent of pancakes, due to the buttermilk. Seriously as it was baking, I commented that our house smelled like pancakes! The three of us nearly finished the loaf in one sitting and all decided it would be awesome at breakfast with some butter and jelly. I can't wait to make it again; thanks Julia for this yummy introduction!

Irish Soda Bread

Ingredients:
-2 1/2 cups flour
-1 tsp salt
-1 1/8 tsp baking soda
-1 1/4 cups buttermilk

Directions:
1. Preheat oven to 350F and grease a baking sheet.
2. Combine the flour, salt, and baking soda in a medium bowl and whisk together with a fork.
3. Stir in half the buttermilk, then add the remaining buttermilk 2 tbsp at a time. (The dough should be a little bit moist and hold together, but not be sticky. If you add too much milk, knead in some flour until the dough is no longer sticky)
4. Shape dough into a ball and cut an X into the top.
5. Bake for approximately 45 minutes, until golden brown (if you tap the bottom of the loaf with your knuckles, it should sound hollow).
6. Let cool, but eat within 3 hrs of baking!

Tuesday, March 16, 2010

Twelve in Ten Challenge: Making a Lamb Dish


Ryan and I added "making a lamb dish" to our Twelve in Ten Challenge list because we share a fondness for all things lamb but have never made it at home. We love to frequent the neighborhood gyro house and we never go to P.F. Changs without ordering the wok-seared lamb, but we hadn't ever really considered making it ourselves until we came up with this challenge. This month, we decided, was the month to tackle the lamb.

I have to say, this was more Ryan's feat than mine. I took care of the side dishes, but Ryan found the lamb recipe and did all of the cooking required. We enjoyed the lamb, pita bread, and tabbouleh along with a bottle of wine leftover from our wedding. Our good friends joined us for the meal while we wrapped up vacation plans for the trip we are currently on!

The verdict? This lamb was good! Ryan had to cut the lamb into smaller "grillable" pieces and the inevitable unevenness of some of them allowed for a few of the pieces to be slightly undercooked, but hey--it was his first try! The pieces that DID cook completely (the majority of them, I promise!) were great, wonderfully seasoned and a fabulous change from your standard steak or pork.

The mint yogurt sauce made for a great marinade, but we all agreed that the sauce was a little overpowering when added to the lamb. I would have preferred that the yogurt sauce have less spice and more of a lime flavor, so next time maybe we'll make a separate marinade and dipping sauce.

All in all, it was fun to try a new meal and check another thing off of our Challenge! Can't wait to see what's in store for April...

Lamb with Mint Yogurt Dipping Sauce
recipe from the Food Network

Ingredients:
-1 rack of boneless lamb legs
-1 cup plain yogurt (we used Greek yogurt)
-1 lime, juiced
-3 cloves garlic
-1 cup fresh mint leaves
-salt
-1/4 tsp cayenne pepper
-1 tsp cumin
-1 tsp paprika

Directions:

The Day Before-

1. Cut the lamb into equal sized pieces.

2. Prepare yogurt sauce by mixing the above ingredients (yogurt through paprika).

3. Place lamb "steaks" into a large bowl. Pour 1/2 of the prepared sauce over the lamb, making sure each piece is completely covered.

4. Cover and refrigerate overnight.

The Day Of-
1. Remove lamb from the refrigerator and prepare grill.
2. Grill lamb and cook to desired doneness.
3. Serve lamb with remainder of yogurt dipping sauce on the side (forgot to get a picture of the sauce with the lamb!)


Monday, March 15, 2010

Whole Wheat Pita Bread

Two days into our vacation...today we're headed to the Grand Canyon! I've been twice before, but I'm excited to share it with Ryan, Mike, and Maggie, all of whom have never been. I'll be sure to return with pictures; in the meantime, enjoy this great pita bread recipe!


I decided that pita bread would be another delicious accompaniment to our lamb dinner, along with the tabbouleh I posted yesterday. While store-bought pita bread might have been quicker, I have been determined to make homemade pita bread and after reading through the directions, decided I'd have time after work and before dinner to attempt it. My thoughts? Homemade pita bread is easy!!, certainly the easiest yeast bread I've ever worked with. It has such a fast rise time and the dough was no trouble to work with. This bread had a very hearty flavor, given the large amount of whole wheat flour, but overall it was still a very light bread. I loved watching these puff up in the oven and wrapped in a kitchen towel, they stayed warm for nearly an hour before we finally ate them. While I can't promise that I will always make pita bread from scratch, I'm thrilled to know it's such a simple option!

Whole Wheat Pita Bread
as seen on Apple a Day

Ingredients:
-2 cups whole-wheat flour
-1 package instant yeast
-1/2 tsp salt
-1 1/4- 1 1/2 cups hot (not boiling) water
-1-1 1/2 cups all-purpose flour

Directions:
1. Combine the first four ingredients in a large bowl. Beat well for 1 minute.
2. Mix in the remaining flour, using just enough to make a soft, sticky dough.

3. Turn out on a floured board and continue to knead for 5 minutes.
4. Divide the dough into eight balls.

5. Roll each dough ball to about 1/4 inch thick and 6 inches in diameter. Place on a lightly greased cookie sheet sprinkled with cornmeal. Let rise in a warm place for 25-35 minutes.

6. Bake at 450F for 4-5 min per side, or until lightly browned.

7. Wrap immediately in a dishtowel for 3-4 min.

**looking for something to stuff in that pita bread? Try this or this or this!